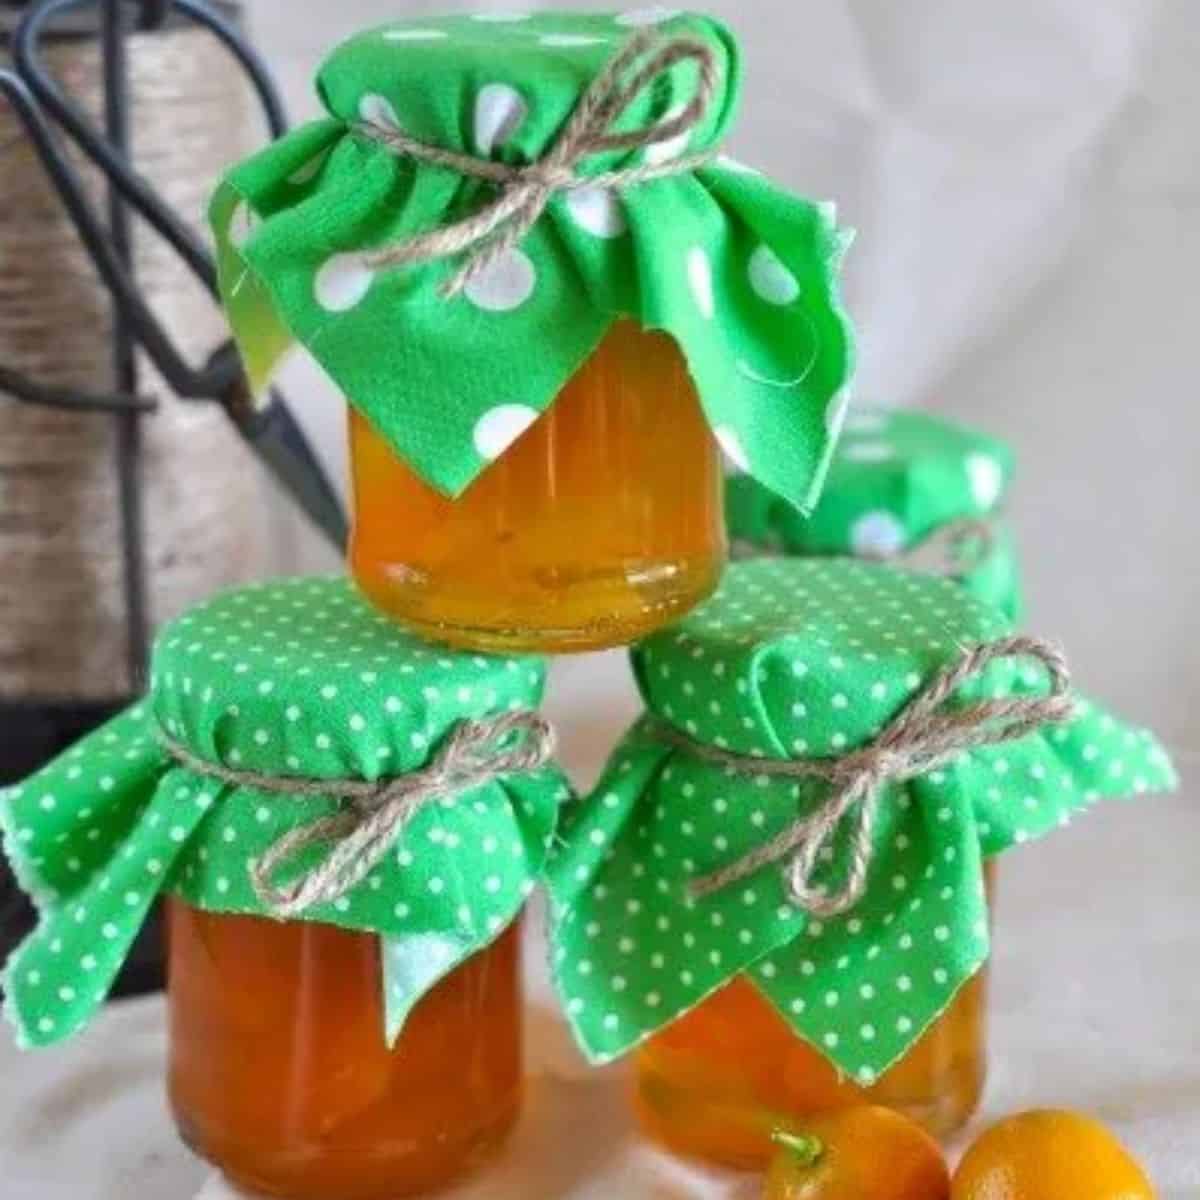
This easy & delicious cumquat jam recipe is really quick to make unlike some that can be tricky, fiddly and take a lot of time.
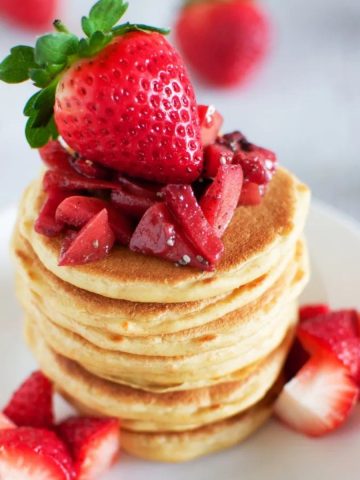
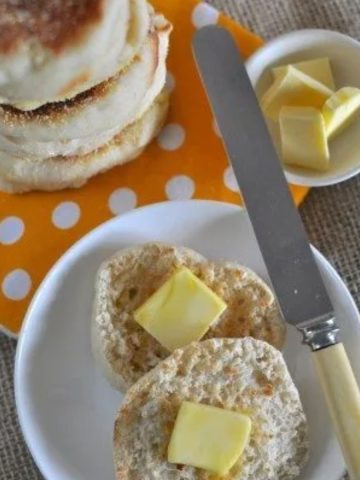
In this recipe there is no de-seeding cumquats involved (& no pectin)! Enjoy it spread on homemade toast bread, 3 ingredient scones or simple sourdough discard pancakes or use it for a twist on Thumbprint Cookies.
Love this recipe, thank you Claire! It worked a treat when I made it last year for the first time and by now it is a firm staple of my kitchen repertoire :). Now I just have to get myself a cumquat tree for the garden, that would be dreamy. Homemade jam is just the best, isn't it. Especially on homemade bread!
Katrine
Quick look at Cumquat Jam
- ⏲️ Ready in 50 minutes.
- 🛒 Ingredients: Just 4 (including water)!
- 🍽️ Makes: Adjustable depending how many cumquats you have.
- 🧑🍳 Difficulty: Easy.
- 🗃️ Make ahead: Keeps for up to 2 years.
The first time I made this, my grandmother rang me after sampling her jar to tell me it was the best cumquat jam she’d ever had (& she was a tough judge - it was her very favourite jam after rosella).
Why This Cumquat Jam Recipe
- No de-pipping! I reject any recipe that involves taking the pips out of the tiny little fruit. It's way too fiddly!
- It's quick - The most work is preparing the fruit and even then, you just have to quarter them. Ready in under an hour.
- It's delicious - As judged by my Grandma the most critical food tester there ever was.
- It's beautiful - This jam is a beautiful vibrant orange unlike some recipes that turn a bit more of a burnt orange colour. According to my Grandma it's the prettiest she's seen.
Jump to:
Ingredients in Cumquat Jam
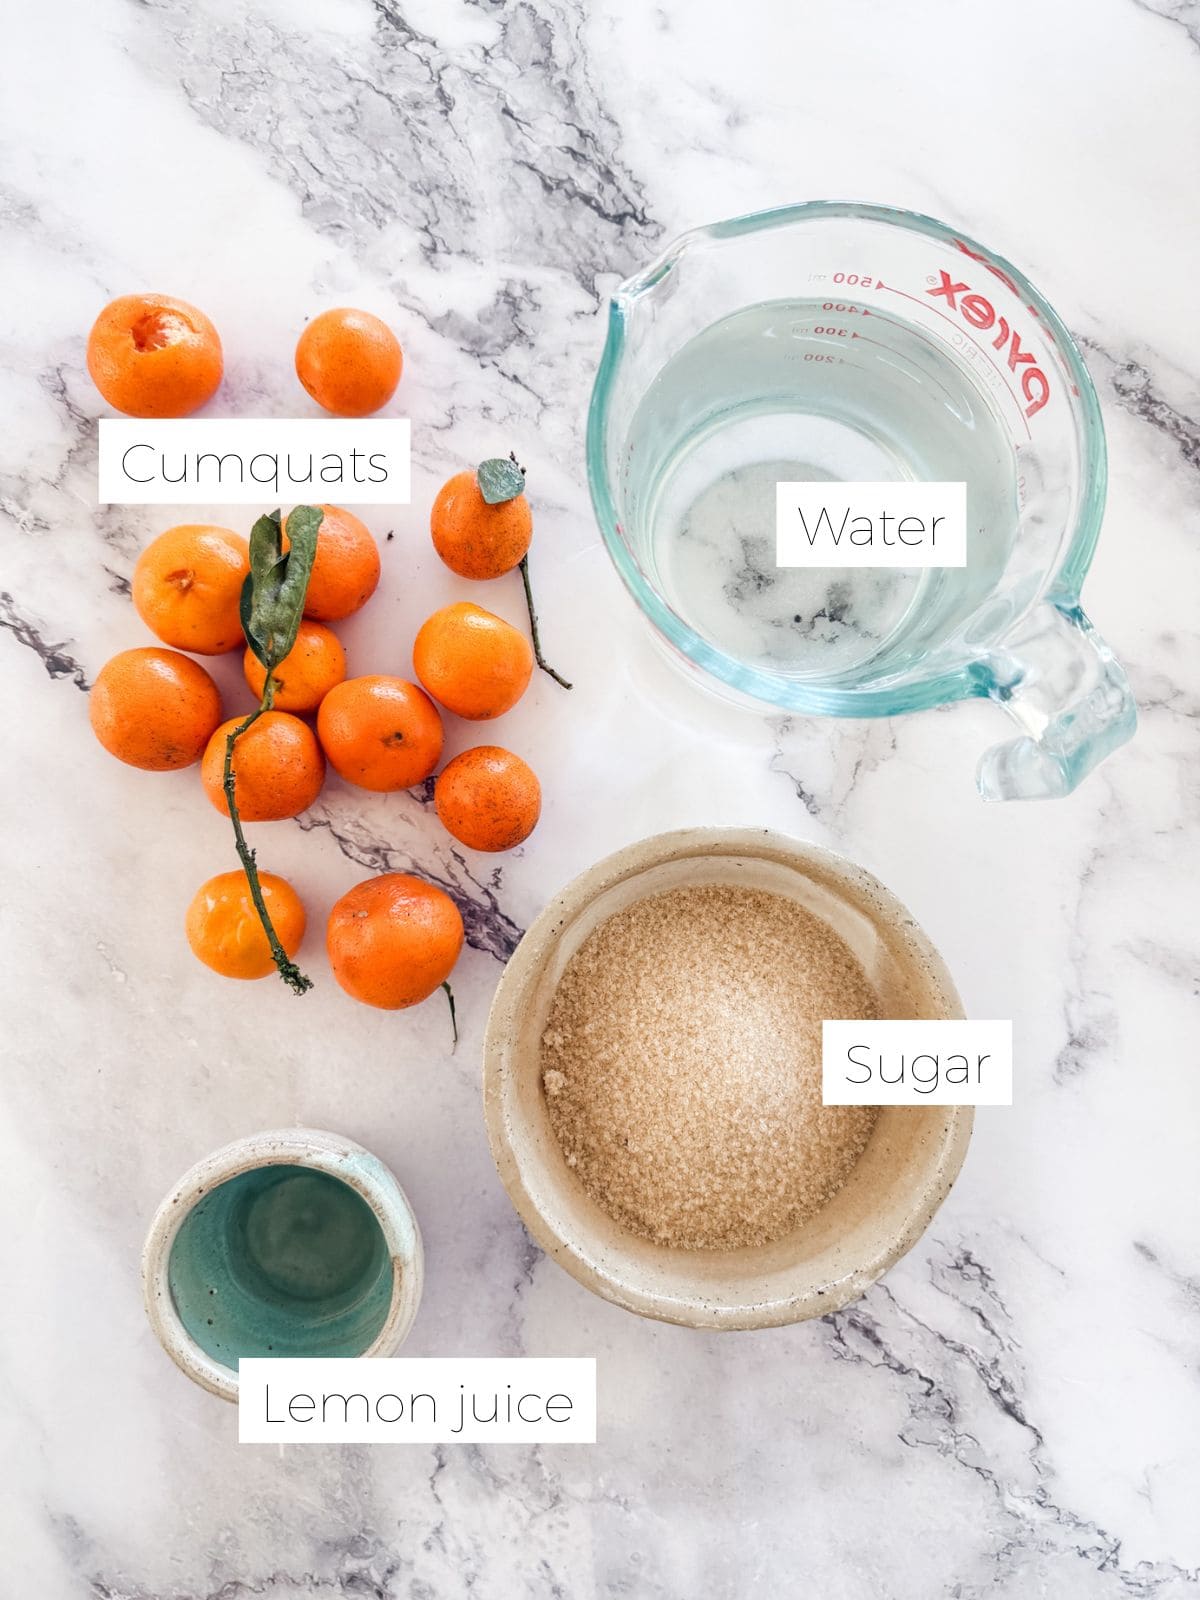
To make cumquat jam, you will need:
- Cumquats – They’re super easy to grow and do well in pots. Cumquats are ripe & ready to pick when they turn bright orange (they start out green). Pick a few extra to make melting moments sandwiched with cumquat icing.
- Lemon juice – Fresh is best but out of a bottle will work just as well as you've got the cumquat pips.
- Sugar – We use raw sugar. Caster sugar or just regular white sugar will work. You can very the amount of sugar depending on how sweet you like your jam.
Pro Tip
You can always add more sugar, but you can’t take it out — taste your jam first, then add a little at a time if needed.
How To Make Cumquat Jam
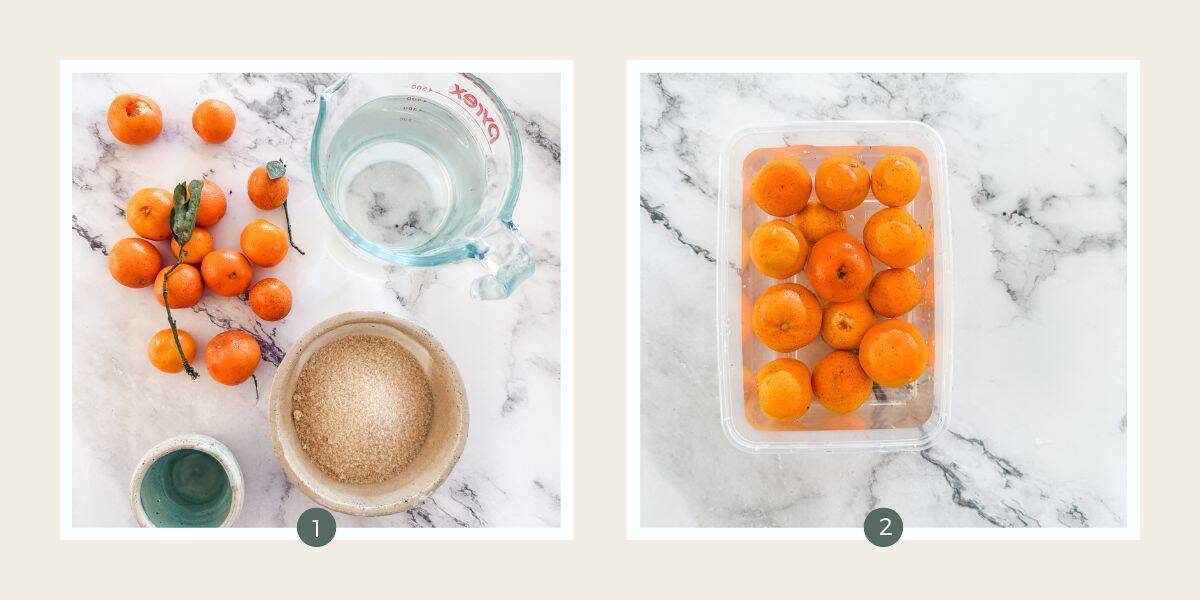
Step 1: Measure out all the ingredients. Step 2: Wash the cumquats well in a tub of water then drain.
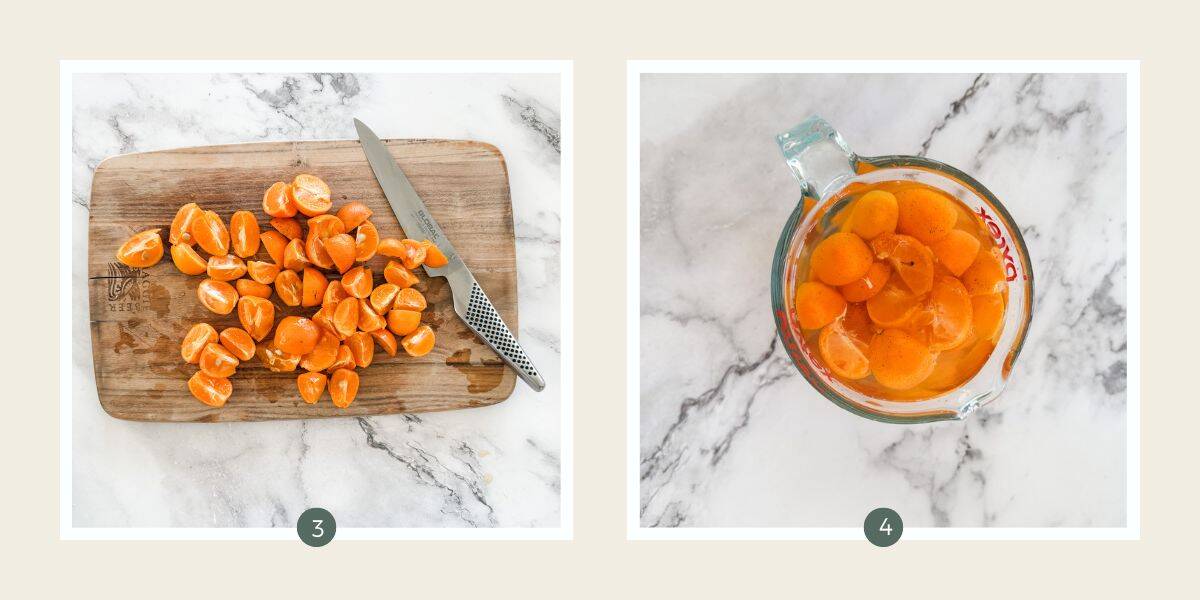
Step 3: Cut them into quarters with a sharp knife. Step 4: Place the cumquats in something big enough to hold them & the water. Add the water, cover & soak overnight.
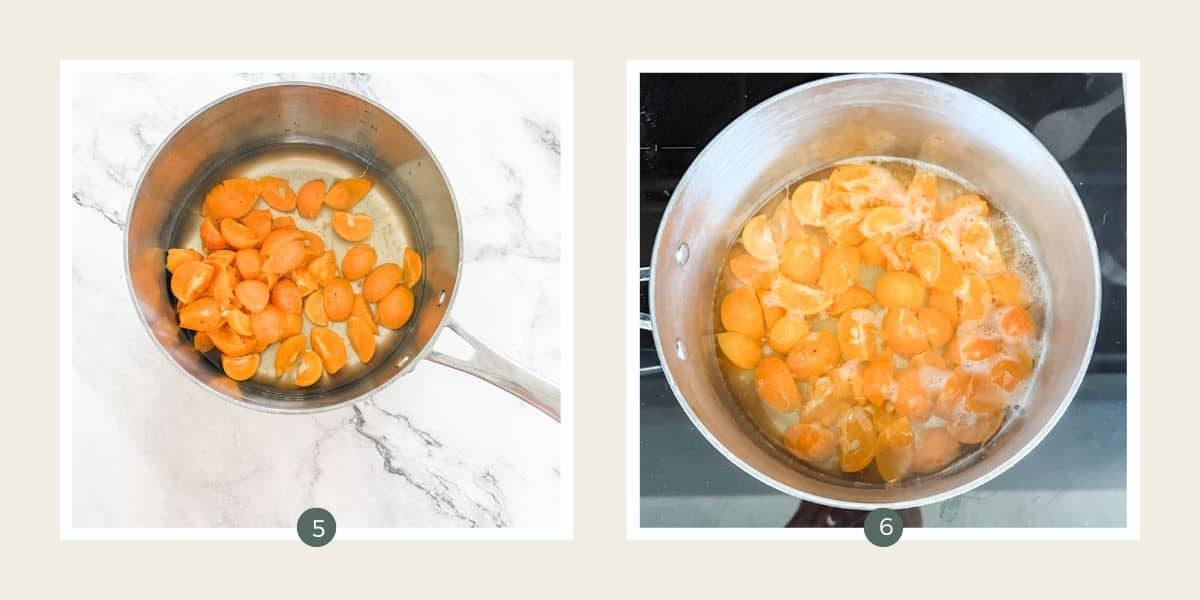
Step 5: Pour the water and cumquats along with the lemon juice into a saucepan. Step 6: Bring to a boil then reduce to a simmer for 20-30 minutes or until the cumquat skins are soft.

Step 7: Add the sugar to the saucepan. Step 8: Stir through the sugar over medium heat until it has dissolved.
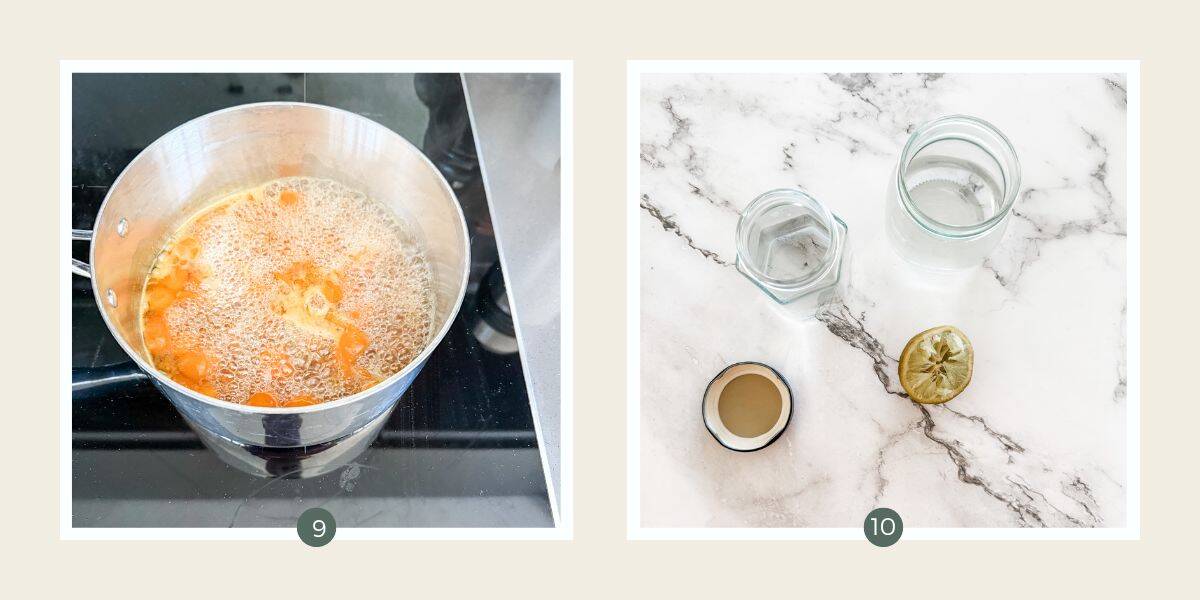
Step 9: Bring to a gentle boil and let it roll for 20 minutes watching carefully to make sure it doesn't boil over. Step 10: Sterilise the jars for the jam.
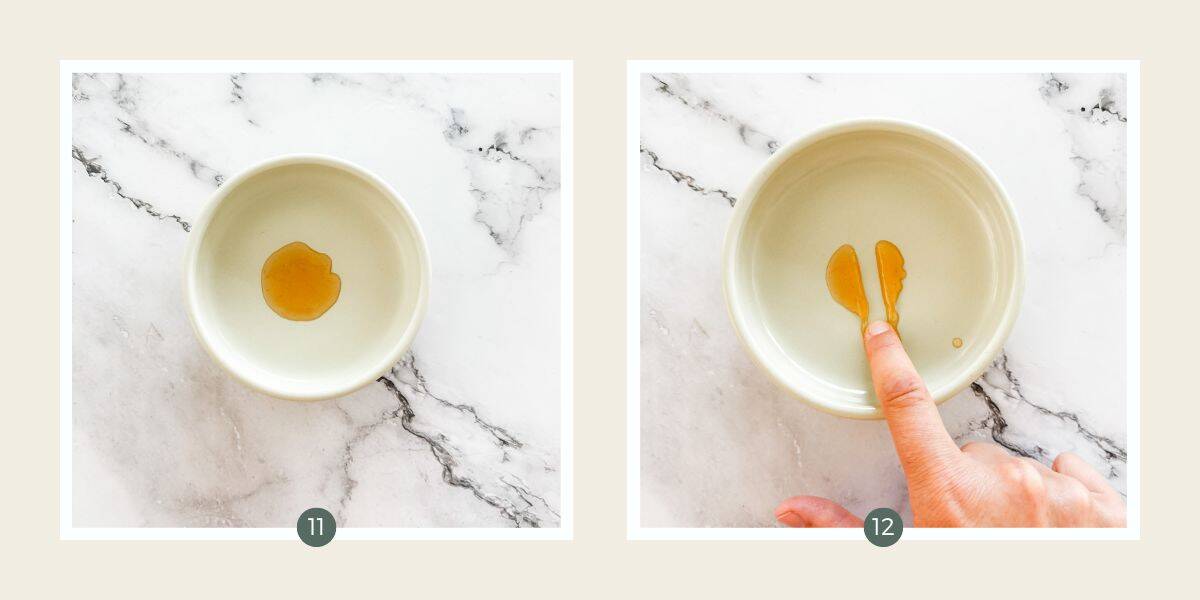
Step 11: Check if the jam has reached setting point by spooning a small blob onto a small chilled plate. Step 12: If it's ready, it will stay separated when you run your finger through it.
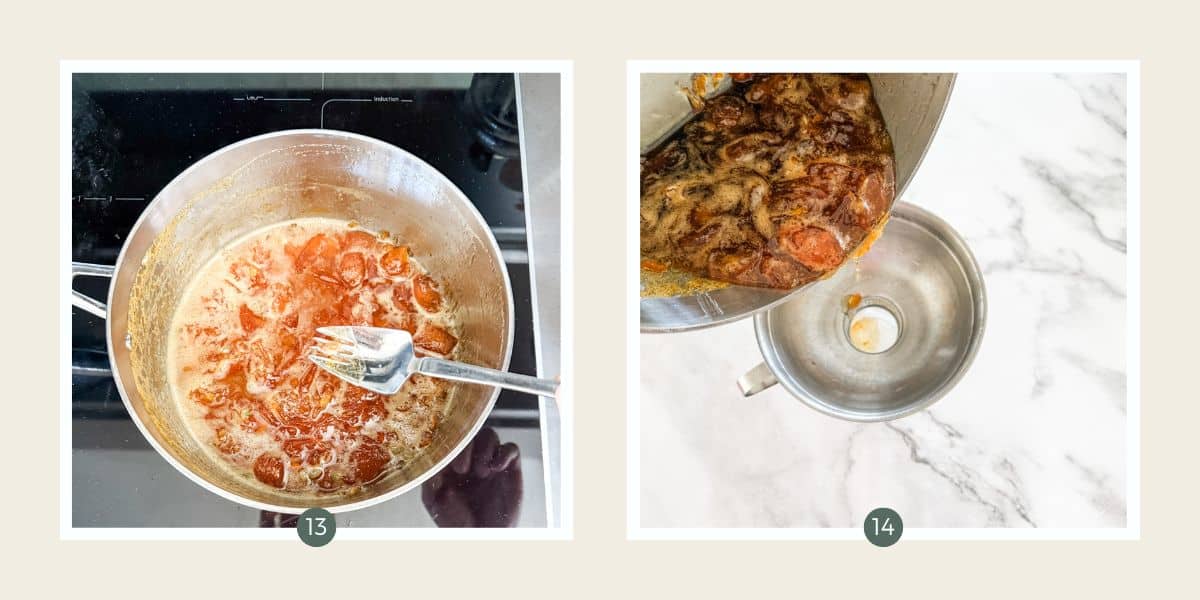
Step 13: Turn the heat off and remove the pips if desired. Step 14: Using a funnel, pour the hot cumquat jam into the sterilised jars.
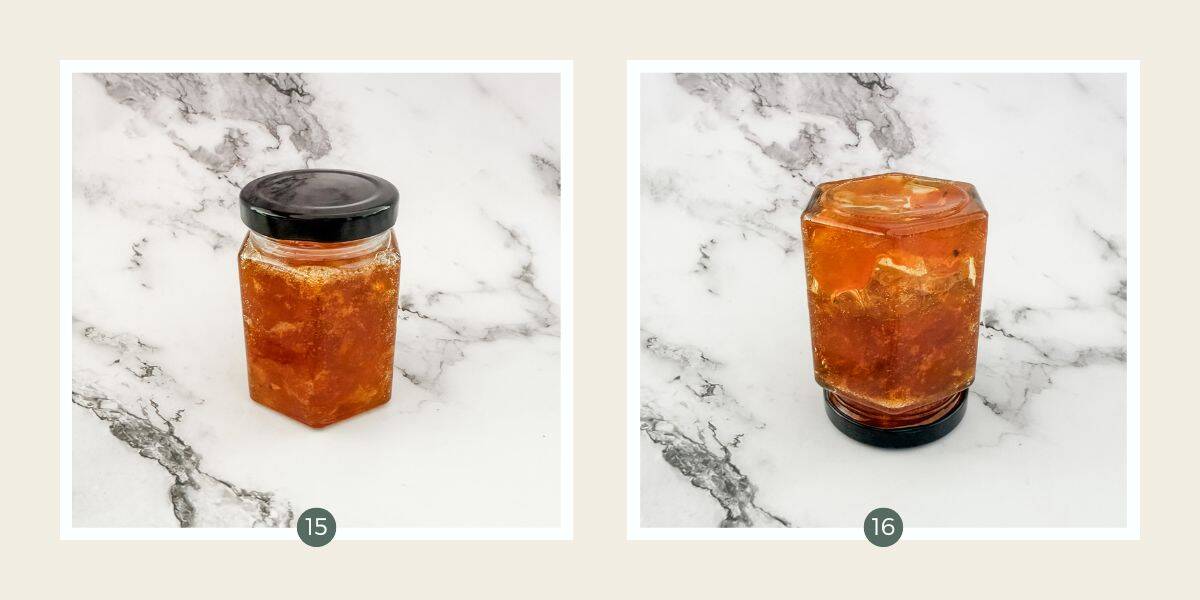
Step 15: Carefully put the lids on the jars and tighten them. Step 16: Turn the jars upside down to cool. This helps create a good seal on the jars (the lid will 'pop' in).
Serving Suggestions
Honestly we could probably eat this with a spoon but if you want to be a bit more civilised you could:
- Spread it on a warm slice of Coconut Loaf Cake or Honey & Sea Salt Challah Loaf.
- Use it to sandwich Maple Butter Shortbread Biscuits together to make a shortbread sandwich.
- Whip it through Easy Buttercream Frosting and spread it on Easy Delicious Vanilla Cupcakes.
Recipe FAQs
If you’re planning on keeping your cumquat jam at room temperature for a period of time or really even if you want to keep it in the fridge it’s recommended you sterilise your jars to kill any bacteria that might be lurking.
There are a few methods out there but here's how to easily sterilise glass jars without using an oven.
No, jam needs to be jarred when it is hot hot hot and have the lid put on right away. The heat stops any bacteria from getting in and creates a seal in the jar.
If you’re going to be making jam more than a couple of times, I recommend getting some jam-making tools.
I have a little stainless steel funnel, a jar-holder (they’re like camp tongs with a rubber end on them) and another similar thing that holds the jar while you screw the lid on so you don’t burn your fingers.
For best results, flip the jam jars onto their lids while they cool which helps create a seal.
I like this jam because I don’t have to remove the seeds but if you do want to, make sure you keep them, wrap them up in a little bit of muslin cloth and then put them in the pot with the fruit while it cooks.
The seeds contain pectin and that is what helps the jam to set.
I personally have only used the one type of sugar for this recipe but others have successfully made it using other sugars.
Keep in mind different types of sugar have been processed differently so may take longer to cook or may brown more quickly.
Even if you use white sugar, it will brown when it gets to a certain temperature.
Different sugars also vary in sweetness.
Using an unrefined sugar like rapadura will result in a slightly more tart jam.
I've never seen cumquats in grocery stores (or supermarkets) here in Queensland, Australia but don't write off the recipe just because of that.
They're actually really easy to grow.
Even in a small space, you can grow cumquats in a little pot. A small tree will produce enough fruit to make a decent batch of cumquat jam every year.
You don't need a lot of cumquats to make jam - the recipe can be scaled down if you don't have enough.
Enjoy!
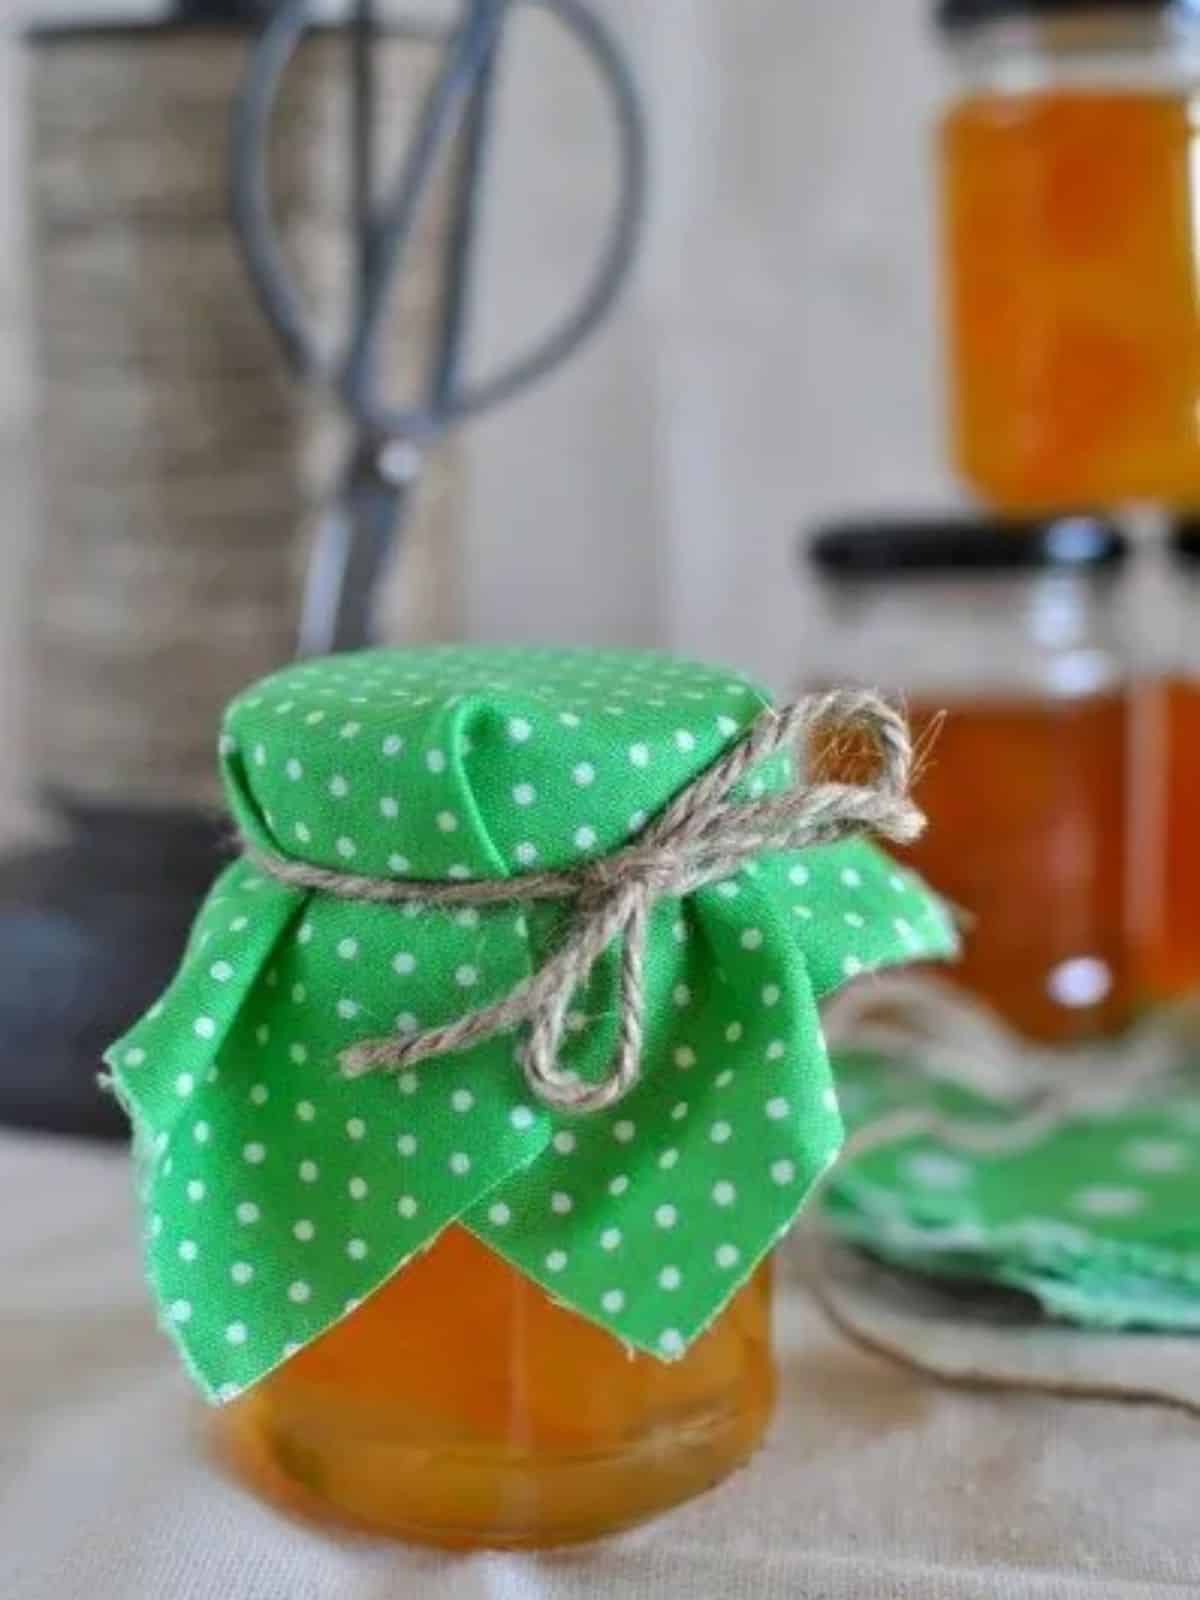
p.s. If you’re using old jars, I have a little tutorial for how to remove the labels without ruining your fingernails (you’ll also get a bonus tutorial for making pretty labels in less than 5 minutes without having to buy anything).


Recipe
Cumquat jam
Ingredients
- 1 kg cumquats
- 5 cups water
- 2 tablespoon lemon juice
- 5 cups raw sugar
Instructions
- Wash the cumquats and cut them into quarters.
- Place in a bowl, add the water and cover the bowl then set aside over night.
- Pour the water and cumquats into a large saucepan, stir in the lemon juice and bring it to a boil.
- Reduce the heat to a simmer for 30 minutes or until the cumquats are soft.
- Add the sugar and stir until the sugar dissolves then bring to a boil and continue to cook on high, uncovered and without stirring for 20 minutes or until the jam has reached setting point.
- To test if it's ready, place a small plate in the fridge. Spoon a little jam onto the plate and put it back in the fridge for a few minutes.
- Run your finger through the middle and if the jam stays separated then it is set.
- When the jam is ready take it off the heat for 5 minutes and carefully scoop out any pips you can see.
- Divide between sterilised jars and seal them up.
Claire Cameron says
My grandma's second favourite jam (after rosella).
Michael says
Hi Claire is the 5 cups of water in addition to the water used to soak overnight?
Claire Cameron says
Hi Michael. Soak the cumquats in the 5 cups and then use that water in the jam. Hope that helps!
Wendy says
Just made this jam. Thank you for the recipe. Biggest issues were the pips (didn't know there were so many to remove :-D) and the length of time it took for the jam to look anywhere near set. I took the advice from a previous comment, and reduced the water to 4 cups per kilo. However, it was still bubbling away after 60 minutes and quite runny. The jam is a beautiful amber hue, but I didn't want to cook it longer - just in case it burnt. Will wait and see now if it will be used as a jam, or dessert topping.
Claire Cameron says
Hi Wendy. Did you leave the pips in while the jam cooked? If you took them out prior then the jam won't set. It needs the pips for the natural pectin but they can be removed at the end.
Danielle says
Hi - quick question, how much water should I add to the Cumquats while soaking overnight? Is it just enough to cover them?
Claire says
Hi Danielle. Yes enough to cover them by about 2cm.
Patsy says
I want to try your recipe but wonder about bringing the cumquats, presoaked and cooked, to a 20 minute rolling boil after you add the sugar. Shouldn’t you stir occasionally-every 5 minutes to keep it from scorching? Instructions said no stirring?
Claire says
I didn't Patsy and it still turned out but stirring certainly wouldn't hurt
Mike says
I have now used your recipe 4 times. It does make great jam but what I find each time is that the amount of water you suggest is always too much. I need to boil for at least 40 minutes to get the right thickness unless I put in only 4 cups per kg. The worst thing about having to boil so long is that the mixture looses all the golden colour and will always end up brown.
Claire says
Oh dear I can imagine that might look a little off-putting. I guess it does also depend on how juicy your fruit is too. There's no problem with adding less water if you feel it needs less. Good luck with the next batch!
Tony says
Thank you for such a great recipe which worked seamlessly. I macerated the fruit and water after the initial 30 minute boiling in a food processor.
Claire says
You're welcome Tony!
Melinda says
Hi my apologies if you have already been asked this, can I use caster sugar instead of brown?
Claire says
I think that would be ok Melinda it just wouldn't be as rich. You could add a little golden syrup or rapadura or coconut sugar as well.
Kavita Kumari says
Hi Claire ,
I am so tempted to make this jam! Have lots if cumquats in my garden . What I would like to know is....... If we cover the jar while the jam is hot will moisture not for on the lids ? Will it be good for preserving the jam ? Will I need to refrigerate it ?
Thank you
Kavita
From Jaipur, Rajasthan INDIA
Rita Dunphy says
Hi I love chia seeds do you think they could be added to this recipe please?
Claire says
Definitely!
Kay says
Thanks Claire. Easy and delicious! Thanks goodness I have a friend with a Cumquat tree! In fact I'm going to pick some more tomorrow and make some Cumquat Brandy. It needs to age for at least 6 months so you have to be strong!
A fantastic season this year on the east coast of Australia.
In response to your query re marmalade or jam... I've always known it to be called marmalade. However, after a quick search I've found the following info "Cumquats were once classified as Citrus but they now are accepted as belonging to their own genus Fortunella."
So I am assuming you are quite correct in calling it jam.
Whichever it is, it's truly a delicious jamalade or marmajam ;)
Claire says
How interesting Kay! Good luck with the brandy that will make a rather delicious treat when it's ready.
Katrine Schleiger says
Love this recipe, thank you Claire! It worked a treat when I made it last year for the first time and by now it is a firm staple of my kitchen repertoire :). Now I just have to get myself a cumquat tree for the garden, that would be dreamy. Homemade jam is just the best, isn't it. Especially on homemade bread!!
Claire says
It sure is Katrine! Yes definitely get a cumquat tree they're fantastic. So much fruit for not too much effort.
Michael Sweeney-Knapp says
Hi Claire. I'm about to try the recipe (first timer) just wondering if white sugar would help it to not turn brown ?
Claire says
Hi Michael. You could give it a go?
Lisa says
I've used this recipe a few times now and each time it comes out very dark brown, even though I am using white sugar, the taste is okay but the colour is a bit off putting. I don't understand how you get such a golden result. Any ideas?
Claire says
Hi Lisa. I think it would just depend on the fruit and how long you cook it. The longer you cook it the darker it will go.