Looking for a fun idea for your Christmas gift tags this year that the kids can get in on?
Have a go at making your own salt dough gift tags and ornaments.

Jump to:
I know Christmas is still more than 2 months away.
But now is the time to get organised to avoid all that last minute craziness!
This month, we're getting all the planning done and as much of the actual Christmas work as possible.
I love a good arts and crafts day.
I love getting into glue and glitter.
Coloured papers and paints make me happy.
I hand-make Birthday cards, gift tags and even Christmas crackers some years (it's still on my to do list this year).
One year I made reinbird gift tags which were quite a Pinterest hit.
They're super cute and easy to make if you can't find any pretty gift tags because you've left it a little late.

I love these salt dough gift tags because they cross my two great loves.
It's baking meets crafting - salt dough gift tags/ornaments plus they're a fun one for the boys to get involved in making too.

I think the 3-5 hour baking time put me off a little the first time I made them but I persevered.
3-5 hours is a long time to have the oven on.
It also requires me to be organised enough to plan other cooking/baking around them.
Apart from the oven time, they're so easy there's no reason not to try them.
If you haven't heard of salt dough (I'm sure you have), I'd describe it as baked playdough.
Basically it's just flour and salt mixed together into a dough and then rolled out, cut up and baked.

It holds its shape really well in the oven.
You can cut out delicate shapes and even stamp them with whatever you like.
I stamped some with initials one year and they were our place settings for Christmas dinner.
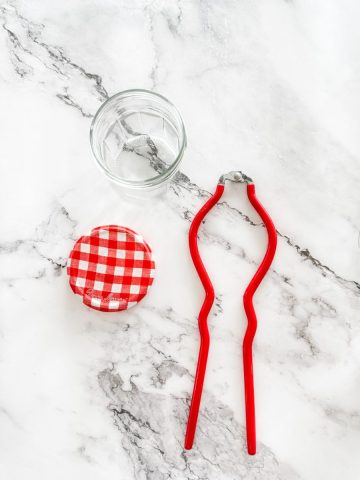
If you want to hang them or tie them to something then you'll need to poke a hole in the tops before baking.
I used a straw which gave a good-sized hole.

After they're completely cool you can get to work on decorating.
Of course the first thing that came to my mind was glitter.
Decorating
To add glitter, draw whatever you want onto the ornament with glue and then sprinkle it with glitter and shake off the excess.
Even if you're shaking the excess into a container it's best to lay something like a bit sheet of paper on your work surface.
Don't do what I did and lay them on the table or you will end up with glitter ev-er-y-where.
For the non-word ones I got a little bit crafty and added spots and stripes. It's a little bit like decorating cookies really.
More ideas
- mix glitter into the dough
- paint with regular acrylic paint
- glue on jewels or sequins
- draw on with permanent marker
- dip in pain
- add leaves and foliage for a natural look
- add essential oils to the dough before baking to give them the scent of Christmas
Tie your gift tags onto the presents and write on the back of them in permanent marker then hand your gift over to the lucky recipient!
What about you?
Are you crafty?
Do you make your own Christmas decorations?

Salt dough ornaments and gift tags
Materials
- 2 cups flour
- 1 cup salt
- 1 cup water
Instructions
- Preheat the oven to 100C fan-forced and line two baking sheets with baking paper.
- Combined the sugar and flour in the bowl of an electric mixer and then with the motor running, slowly add the water until the dough comes together.
- Turn it out onto a floured surface and roll it out until it is about 2cm thick.
- Cut out shapes using cookie cutters and place them on the baking trays (they won't really expand so you can put them pretty close together).
- Stamp them using a rubber stamp if you want a design or word imprinted.
- Use a straw to make holes in the tops so you can hang them.
- Bake for 3-5 hours or until they are completely dried out.
- Leave to cool.
- To decorate with glitter, first draw your pattern in glue and then coat in glitter and shake off the excess.
- Leave to dry before adding any other colours or decorations.


Barbara Bamber | justasmidgen says
Didn't these turn out so adorable? You're quite the crafty girl! I'm off to see your reindeer!!
Claire says
Thanks Barbara. I thought they looked rather cute!
Nancy/SpicieFoodie says
Aw these are so cute. I too love arts and crafts and making cookie ornaments. I have to try this recipe. Thanks for sharing:)
Claire says
You're very welcome Nancy.
Lorraine @ Not Quite Nigella says
I'm strictly a low level crafter :P Although I'm getting into it a bit this year! :D These are great-are they humidity resistant? Gingerbread ornaments tend to fall off in the humidity :(
Claire says
Yes I'd say they'd survive ok as long as you make sure they are totally dried out.
Christine @ Cooking Crusade says
These are so pretty! Another great way to use cookie cutters, and I imagine this would be so fun with kids!
Claire says
It would be great fun with kids! They could go crazy decorating them with paint and glitter too.
The Café Sucré Farine says
So pretty Claire! You're so clever!
Claire says
Thanks Chris!