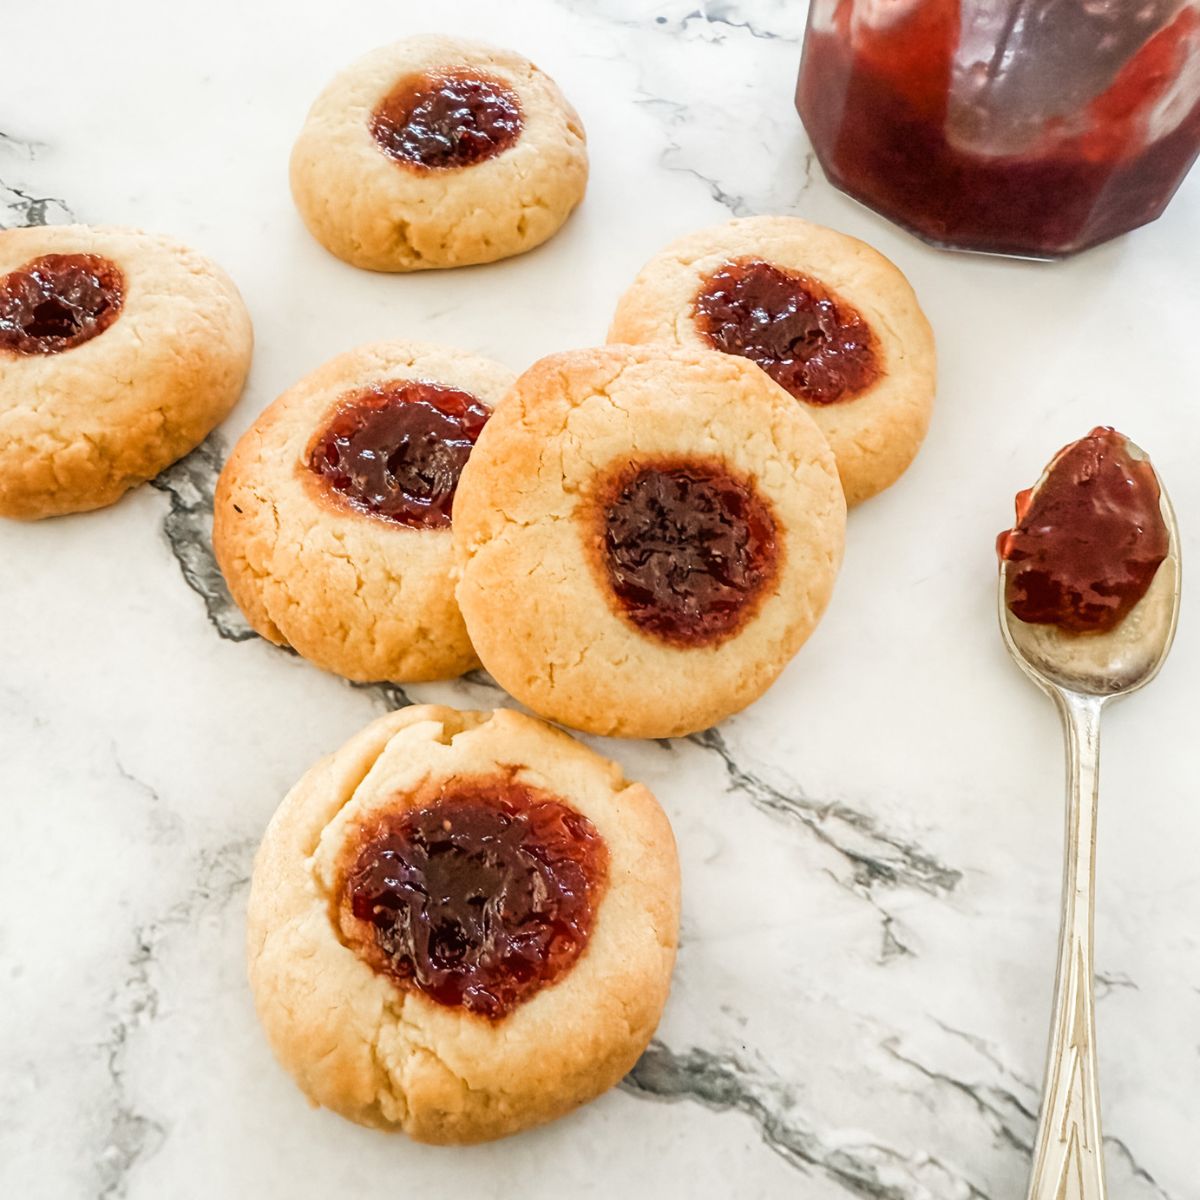
These buttery Strawberry Jam Drop Cookies are the perfect way to enjoy fresh, homemade baking without the fuss. With just a few simple ingredients and minimal prep, they’re quick to make — and little hands will love helping press the jam into the centres. A sweet treat for lunchboxes or a cosy afternoon bake together.
Want to take it up a notch? Here's How To Make Your Own Strawberry Jam.
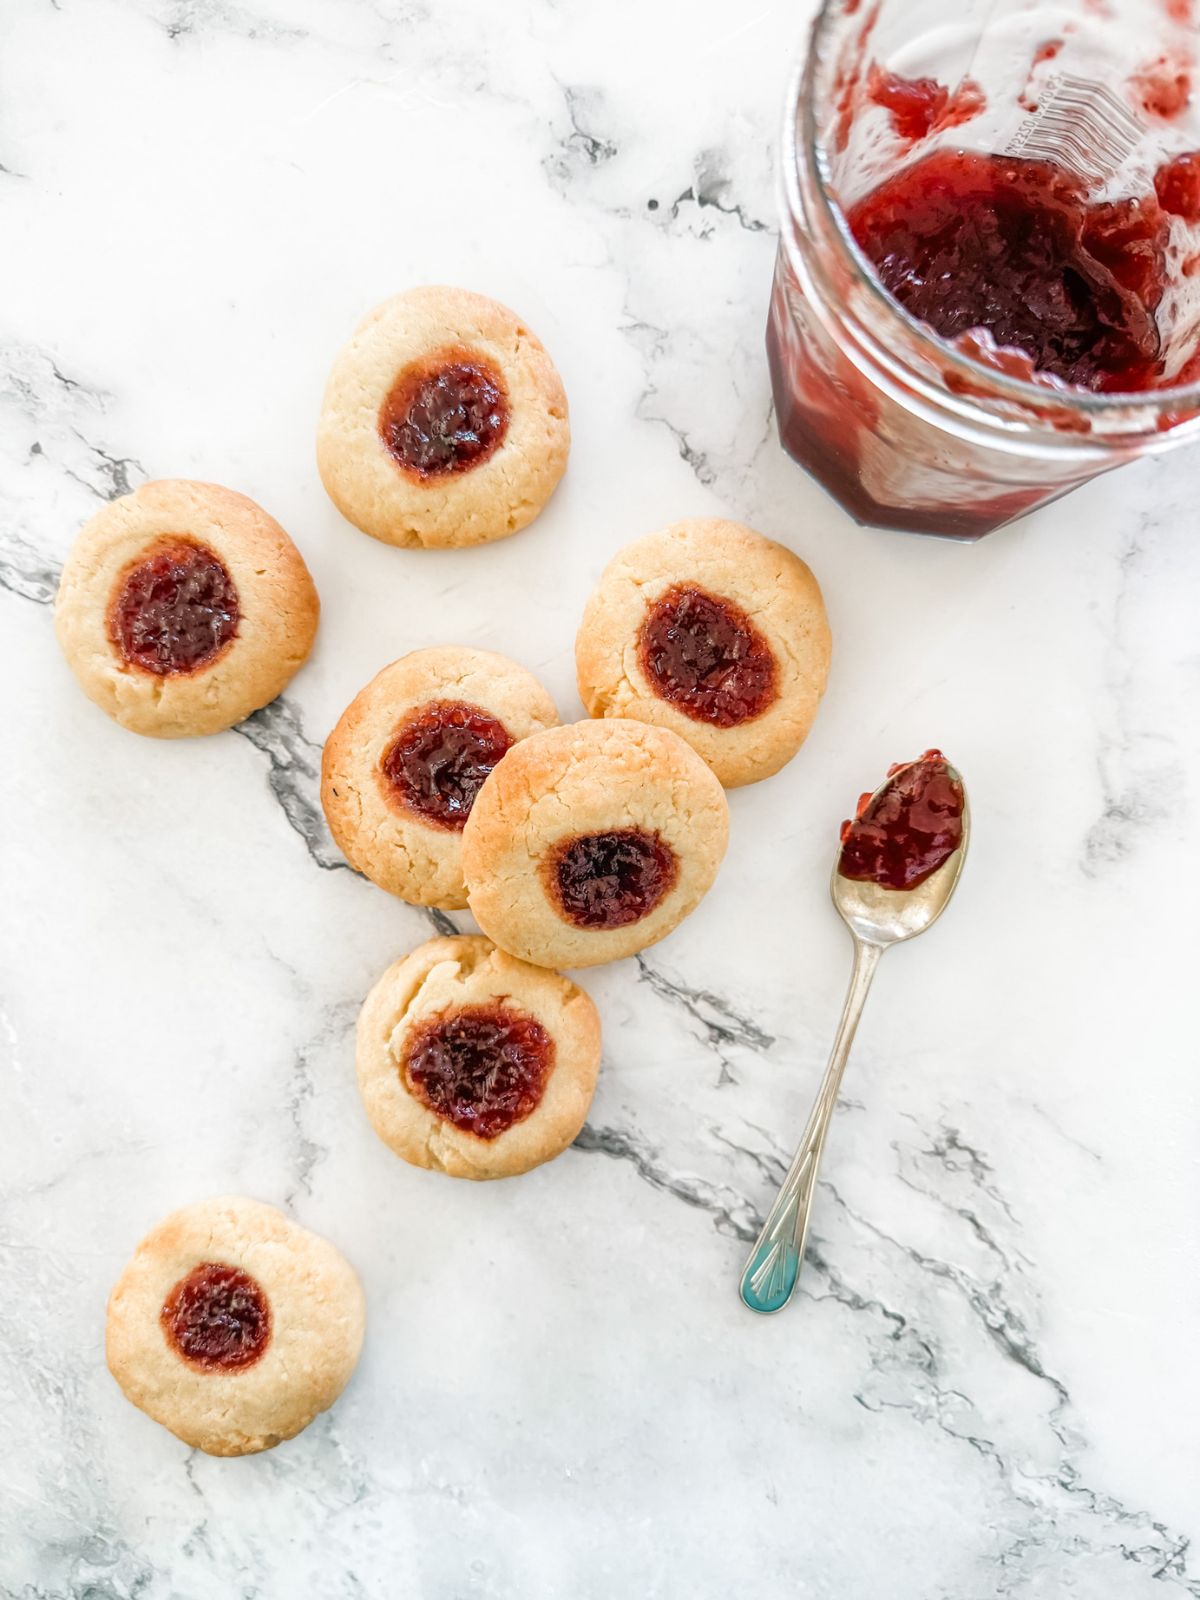
Quick look at Strawberry Jam Drop Cookies
- ⏲️ 15 mins hands-on time.
- 🛒 Ingredients: 10 (including salt & baking powder)
- 🍽️ Makes: 40 cookies.
- 🧑🍳 Difficulty: Easy - kid-friendly recipe.
- 🗃️ Make ahead: Keep for up to 2 days or freeze for months.
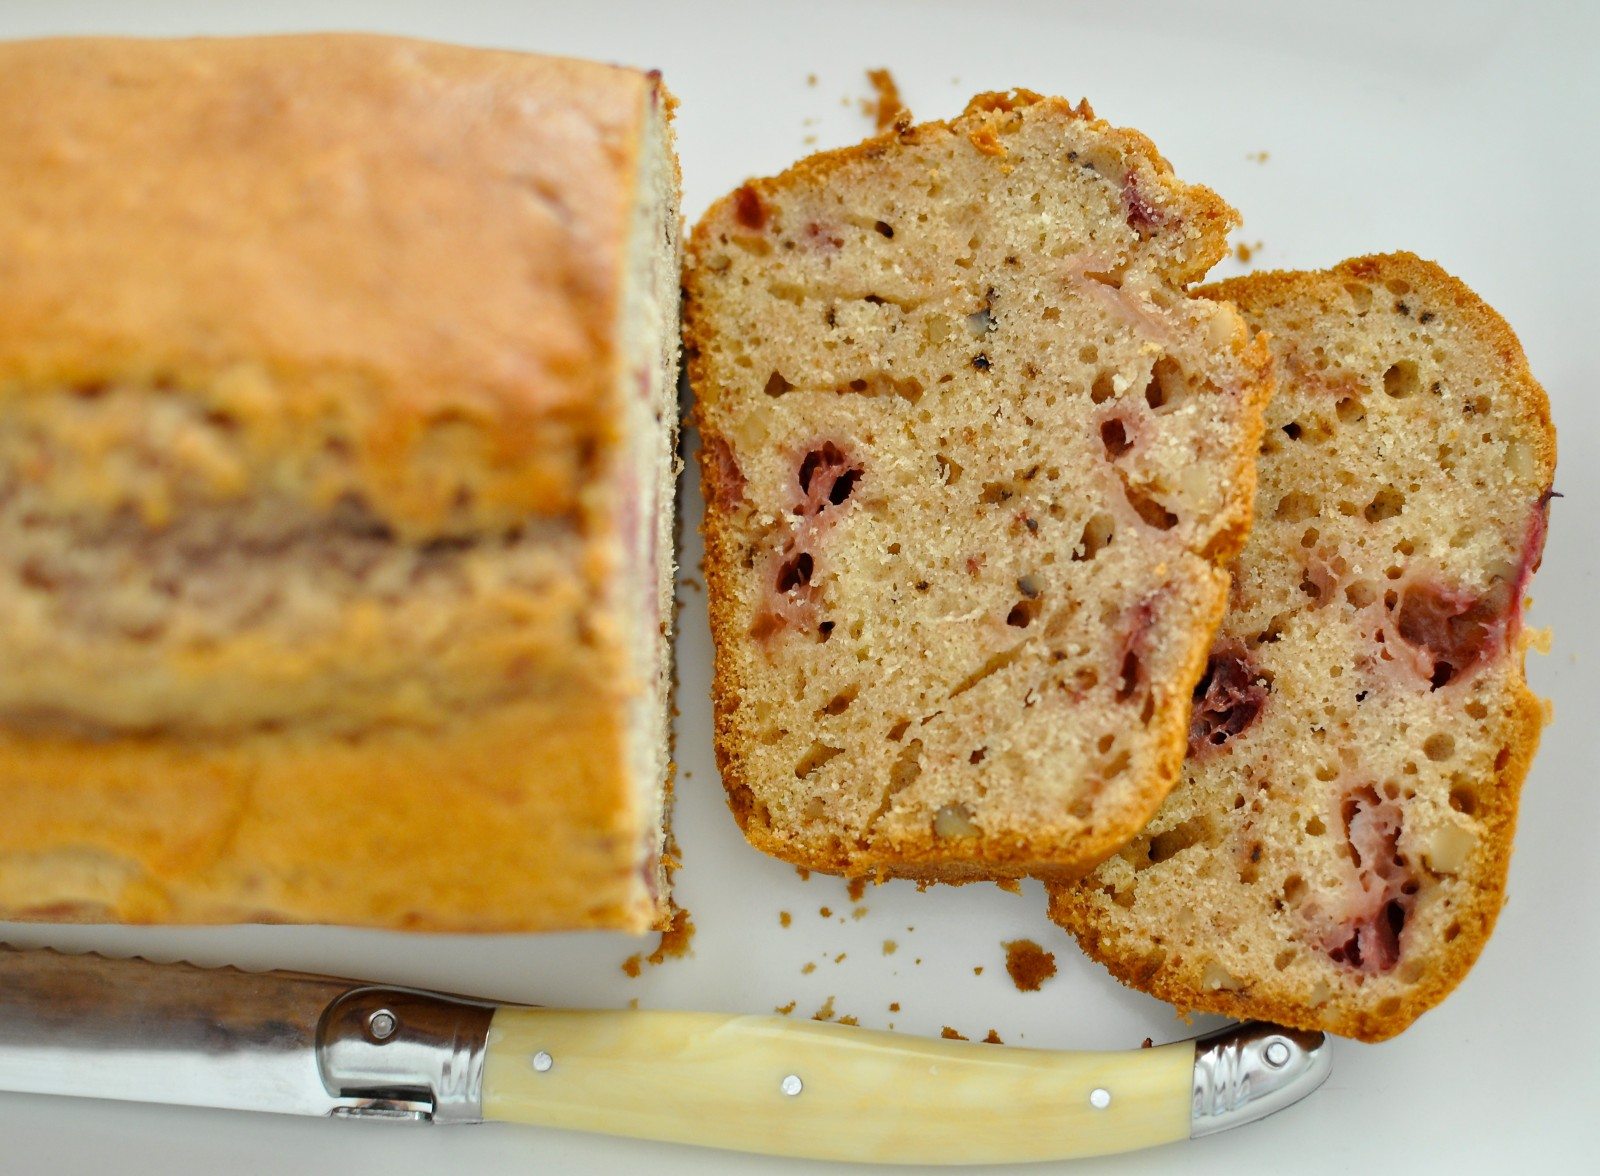
My latest creation, actually our latest creation (I had a little help from my husband-to-be) was sweet, delicious jam drops. Can you believe that at the age of 27, I had never tried a jam drop?
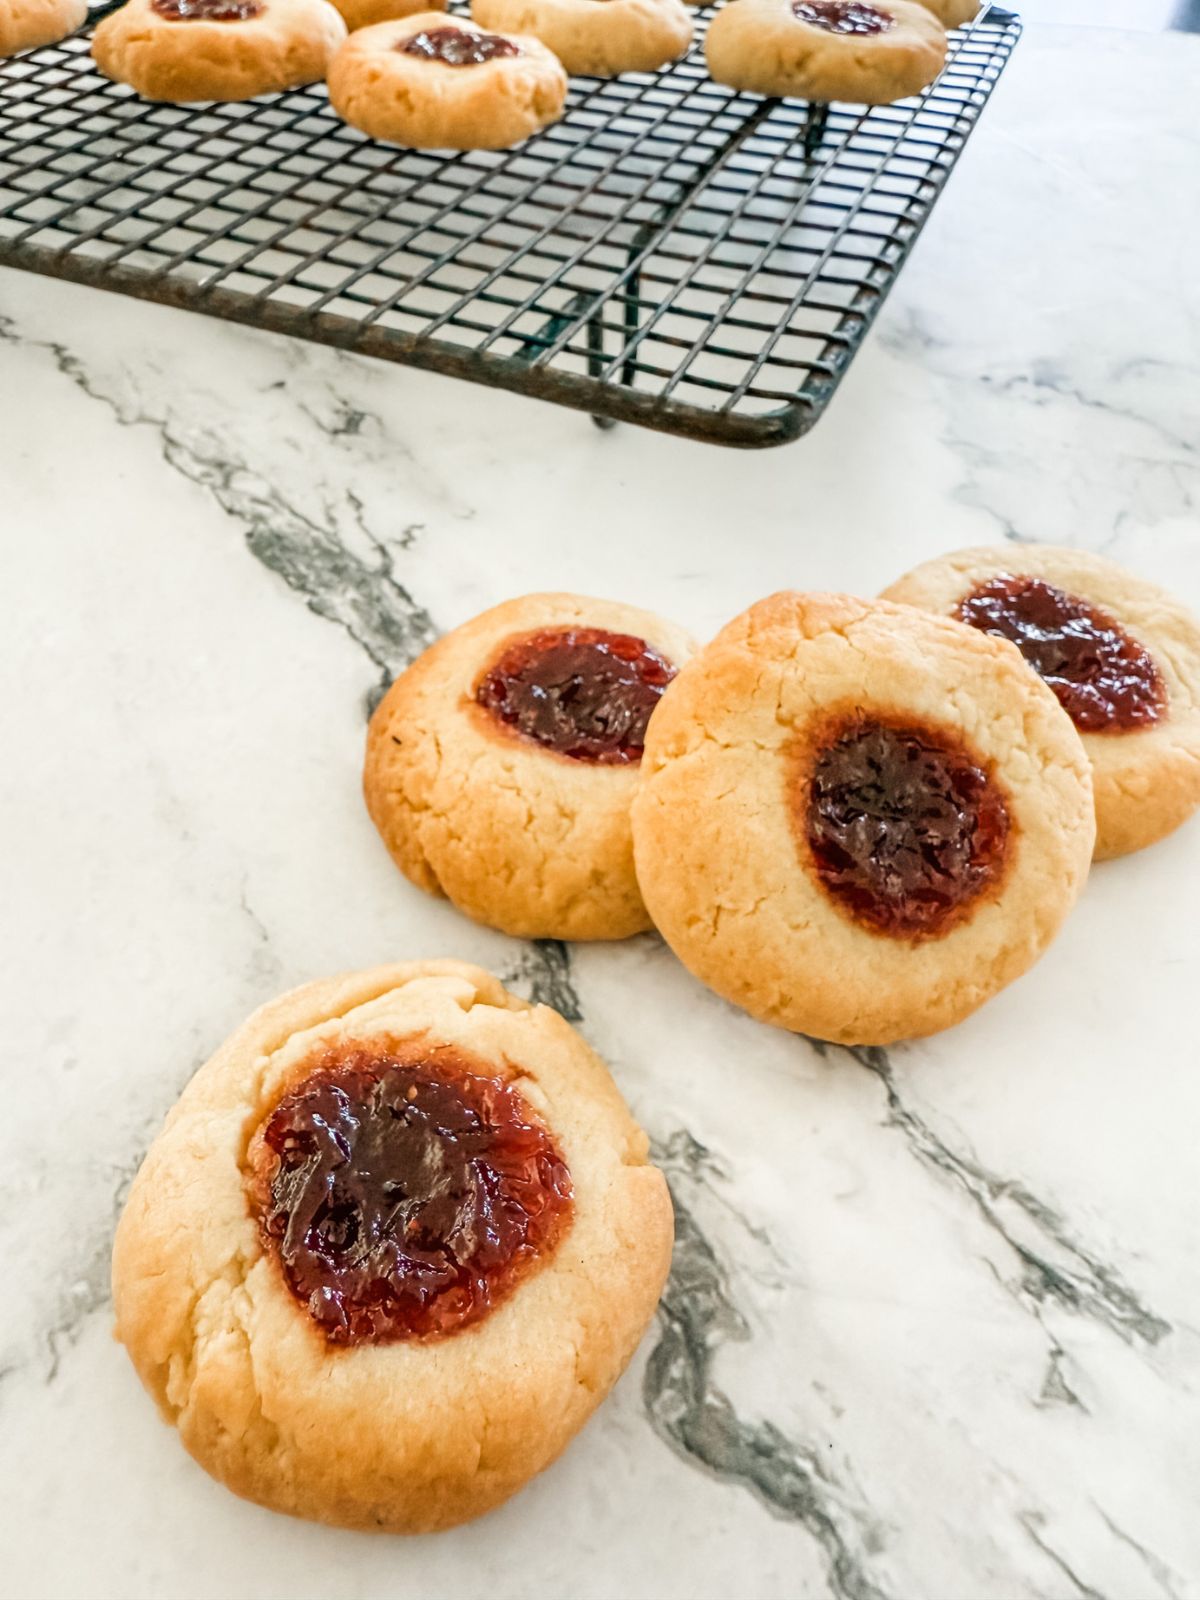
Crumbly, buttery, sweet and melt-in-your mouth are the words that spring to mind. They really are every bit as good as they look and then some.
They're also a cinch to make. The only downside is that they don't keep very well but that won't matter because you won't be able to resist eating them.
Who Choose This Strawberry Jam Drop Cookies Recipe
- Quick & fuss-free – Only a few simple ingredients and not much prep.
- Kid-friendly baking – Children love helping roll the dough and press the hole for the jam (& filling it), making it a fun family activity.
- Great for lunchboxes & snacks – Bite-sized and mess-free, they’re ideal for school or after-school treats (they freeze really well!).
- Classic, crowd-pleaser – Buttery, melt-in-your-mouth biscuits with sweet jam that everyone loves AND they look really pretty.

How To Make Strawberry Jam Drop Cookies
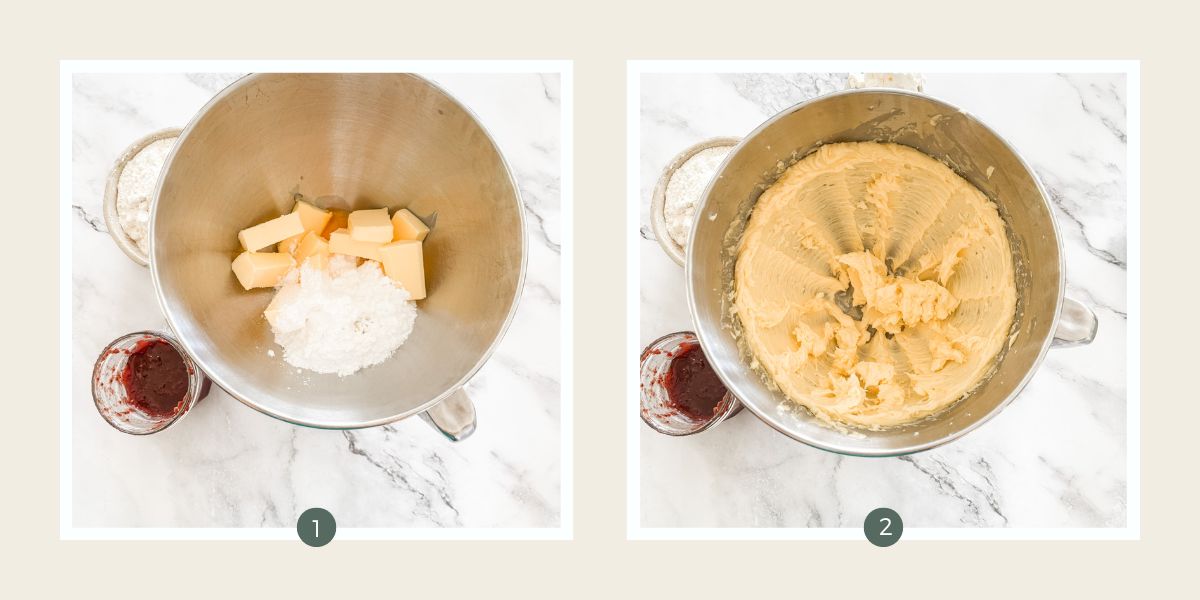
Step 1 - Put the butter, icing sugar, egg yolk and vanilla in the bowl of an electric mixer.
Step 2 - Beat it up until it's nice and smooth.

Step 3 - Now add the cream cheese to the bowl and mix it in until it's combined. Make sure that it's well-mixed before you take the bowl off the stand.
Step 4 - You don't want little chunks of cream cheese in your biscuits, or maybe you do, but it will affect the texture of them so best to mix it all in.
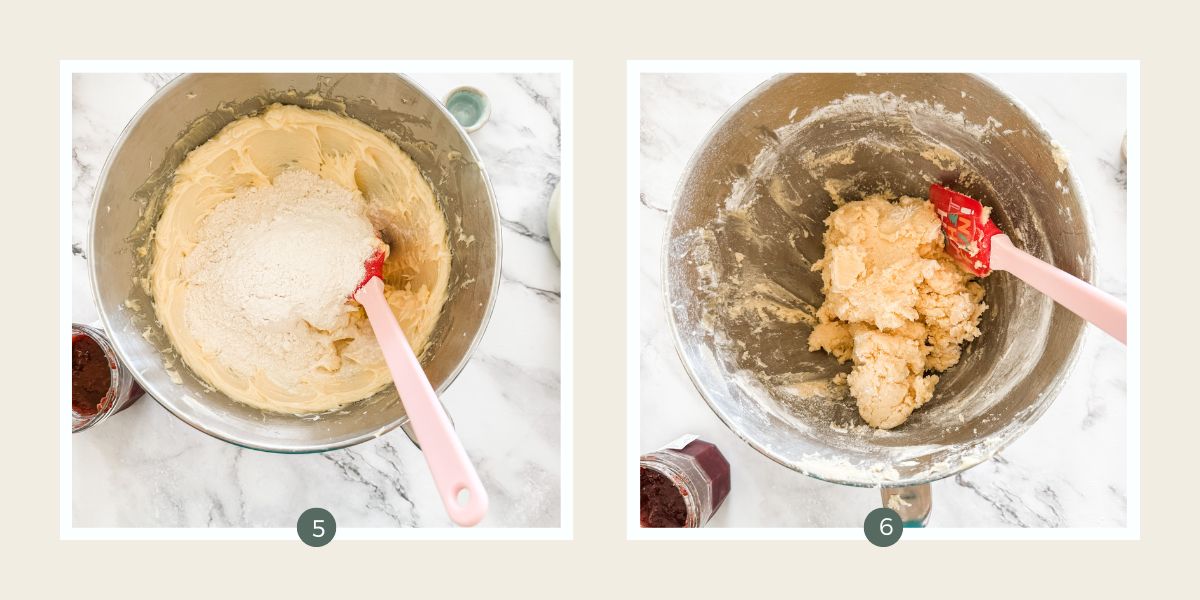
Step 5 - Take the bowl off the stand and sift in the flour, baking soda, baking powder and salt and gently stir them in with a wooden spoon.
Step 6 - It doesn't seem like it will all come together but keep at it and it will form a nice smooth dough.
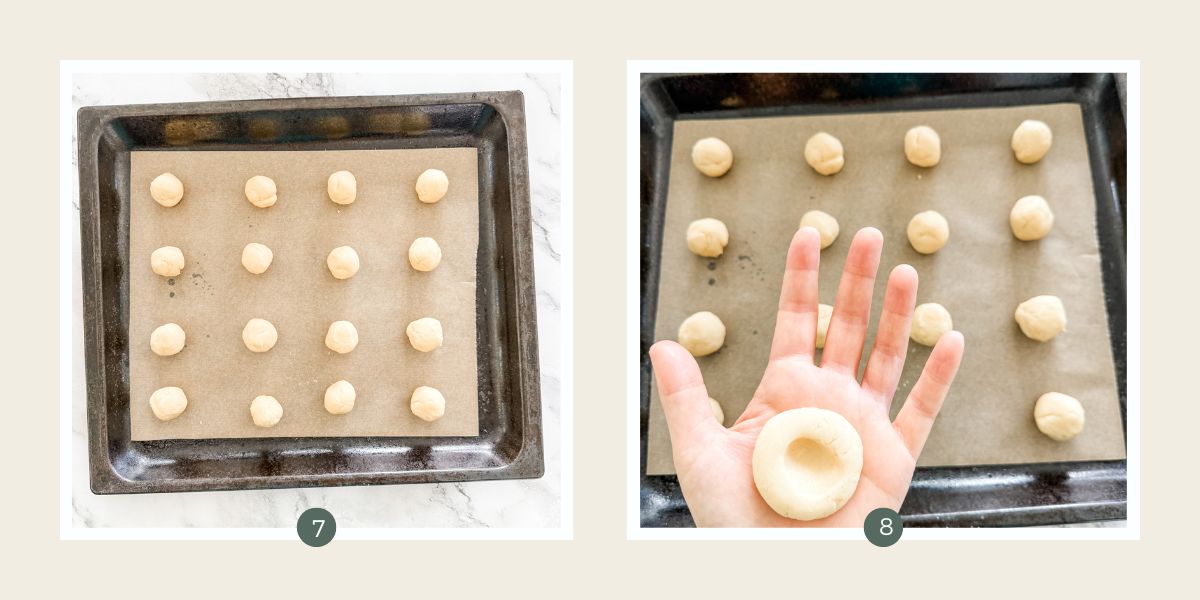
Step 7 - Working with a tablespoon of dough at a time, roll them into balls and place them on a lined baking tray.
Step 8 - Use your thumb to gently make an indent in the middle of each ball of dough. The biscuits don't spread out much when they bake so make sure you press them down quite a bit.
Shaping Tip
To stop the cookies cracking, gently press them into a disc before pressing your thumb in.
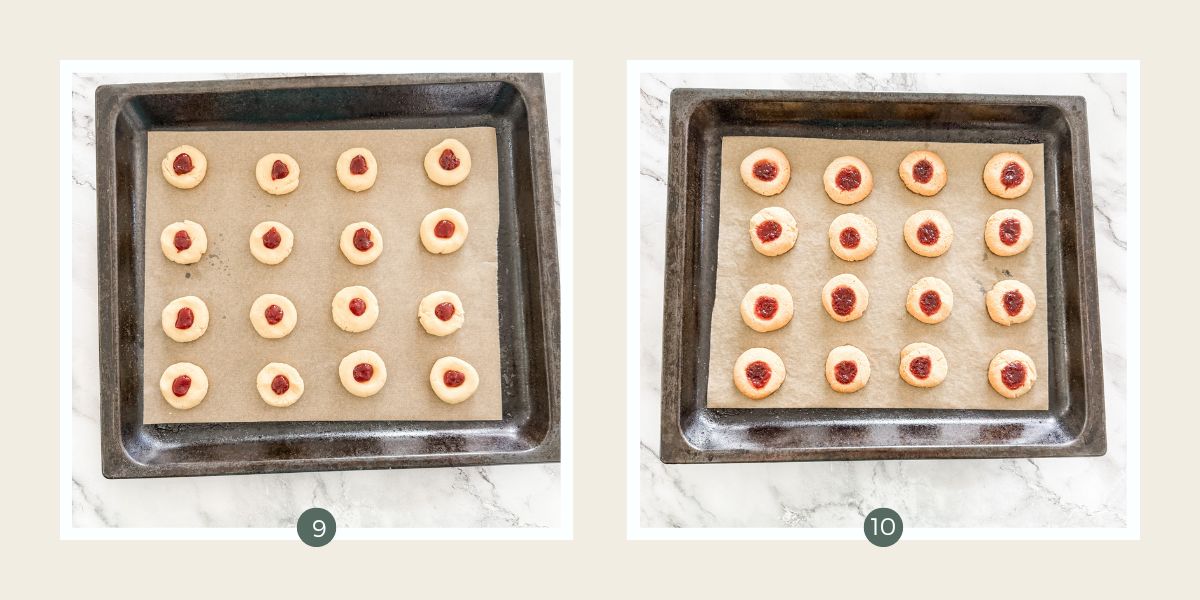
Step 9 - Spoon about half a teaspoon of jam on top of each dough ball. You can use whatever sort of jam you like but I love Homemade Strawberry Jam or Fresh Mulberry Jam. Bake the biscuits for 10 to 12 minutes or until they start to turn golden around the edges.
Step 10 - Leave the baked biscuits to rest on the baking tray for five minutes.
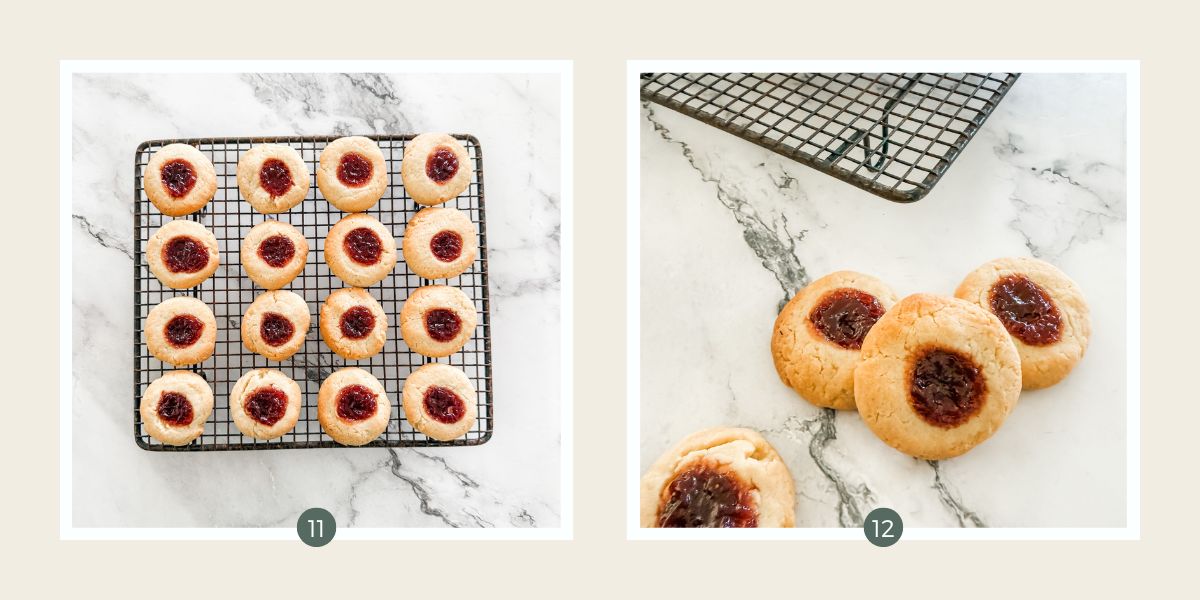
Step 11 - Move them onto a wire rack to cool completely. The jam will set a bit when they cool but it will still be a little bit sticky to touch.
Step 12 - Serve them up straight away or keep them in an airtight container for up to two days. I doubt they'll last that long though. We managed to put a rather large dent in our batch that afternoon.
Recipe FAQs
An electric mixer makes it much easier but it's not essential. You could do it all by hand just follow the steps and use a wooden spoon instead of a mixer.
Absolutely. To freeze the dough, make it up to either the balls or the pressed out stage. Freeze in a single layer until firm and then you can pop them in a ziplock bag. Leave to thaw on the lined tray then add the jam.
To freeze the finished Jam Drops (also called Thumbprint cookies), lay them in a single layer and freeze until firm, then pop in a container or bag. Alternatively freeze in a container with freezer go-between between layers to prevent them sticking.
Enjoy!
What about you? Have you been in the wars lately or is it just me?
For a little something different, you could use kumquat jam in place of strawberry or raspberry jam.

Recipe
Ingredients
- 250 g 8.8ozbutter, softened
- 140 g 5oz icing sugar
- 1 egg yolk slightly beaten
- 90 g 3oz cream cheese, softened
- 1 ½ teaspoon vanilla extract
- 340 g 5oz plain AP flour
- ¼ teaspoon baking powder
- ½ teaspoon bicarbonate of soda
- a pinch of salt
- 6 tablespoon Strawberry jam
Instructions
- Pre-heat the oven to 160C (320F) fan-forced and line two baking trays with baking paper.
- Place the butter, sugar, egg yolk and vanilla in the bowl of an electric mixer and beat it all together until it is light and creamy.
- Add the cream cheese and beat it through until the mixture is smooth.
- Take the bowl off the stand and sift in the flour, baking powder and bicarbonate of soda.
- Gently stir the mixture until the dough comes together.
- Using a tablespoon of dough at a time, roll the dough into balls and place it on the baking trays leaving 3cm between each one.
- Very gently press the top of each ball down to make an indent ready for filling.
- Spoon ¼ of a teaspoon of jam on top of each ball of dough.
- Bake the biscuits for 10-12 minutes or until they begin to turn golden.
- Leave the biscuits on the trays to rest for 5 minutes and then transfer them to a wire rack to cool completely.

Claire Cameron says
Super soft, melt-in your mouth & delicious. They look pretty too!
Lynette Alphonso says
Hi... these look super! How many biscuits did this dough yield?
The Hungry Navigatrix says
These look fantastic. Will definitely be giving them a try very soon.
Look after yourself!
Claire says
They are pretty fantastic! So crumbly it's a little too easy to gobble up more than one.
Hotly Spiced says
I love your raspberry drops. I used to make something similar years ago but haven't made them in such a long time. They look so inviting I'm sure you couldn't stop at just one. And I'm sorry to hear you're in the wars. Just before my wedding I decided to go and have four wisdom teeth out. I became very ill after the surgery, lost 5kgs, became dehydrated, had to have my wedding dress totally re-made because it no longer fitted etc, etc. It seems to be a common problem and it all adds to the drama of the occasion. These are great stories for you to look back on and cherish - but please, enough is enough! Look after yourself from her on in! xx
Claire says
Oh no Charlie that's no good. I had my wisdom teeth out a few years ago and lost a lot of weight too. Yes that's true enough is enough. I tripped on a door mat today and nearly went a over t but managed to right myself. Must start being careful!!