This is my go-to recipe for olive bread! It always turns out perfectly and the whole family loves it. My 2 year old would eat the whole loaf on her own if we let her! Thanks for posting the recipe!
:D Deb
I have baked a lot of bread over the years. Most of them have turned out delicious but not quite as good as the really good bakery bread. That is until I discovered Olive bread.
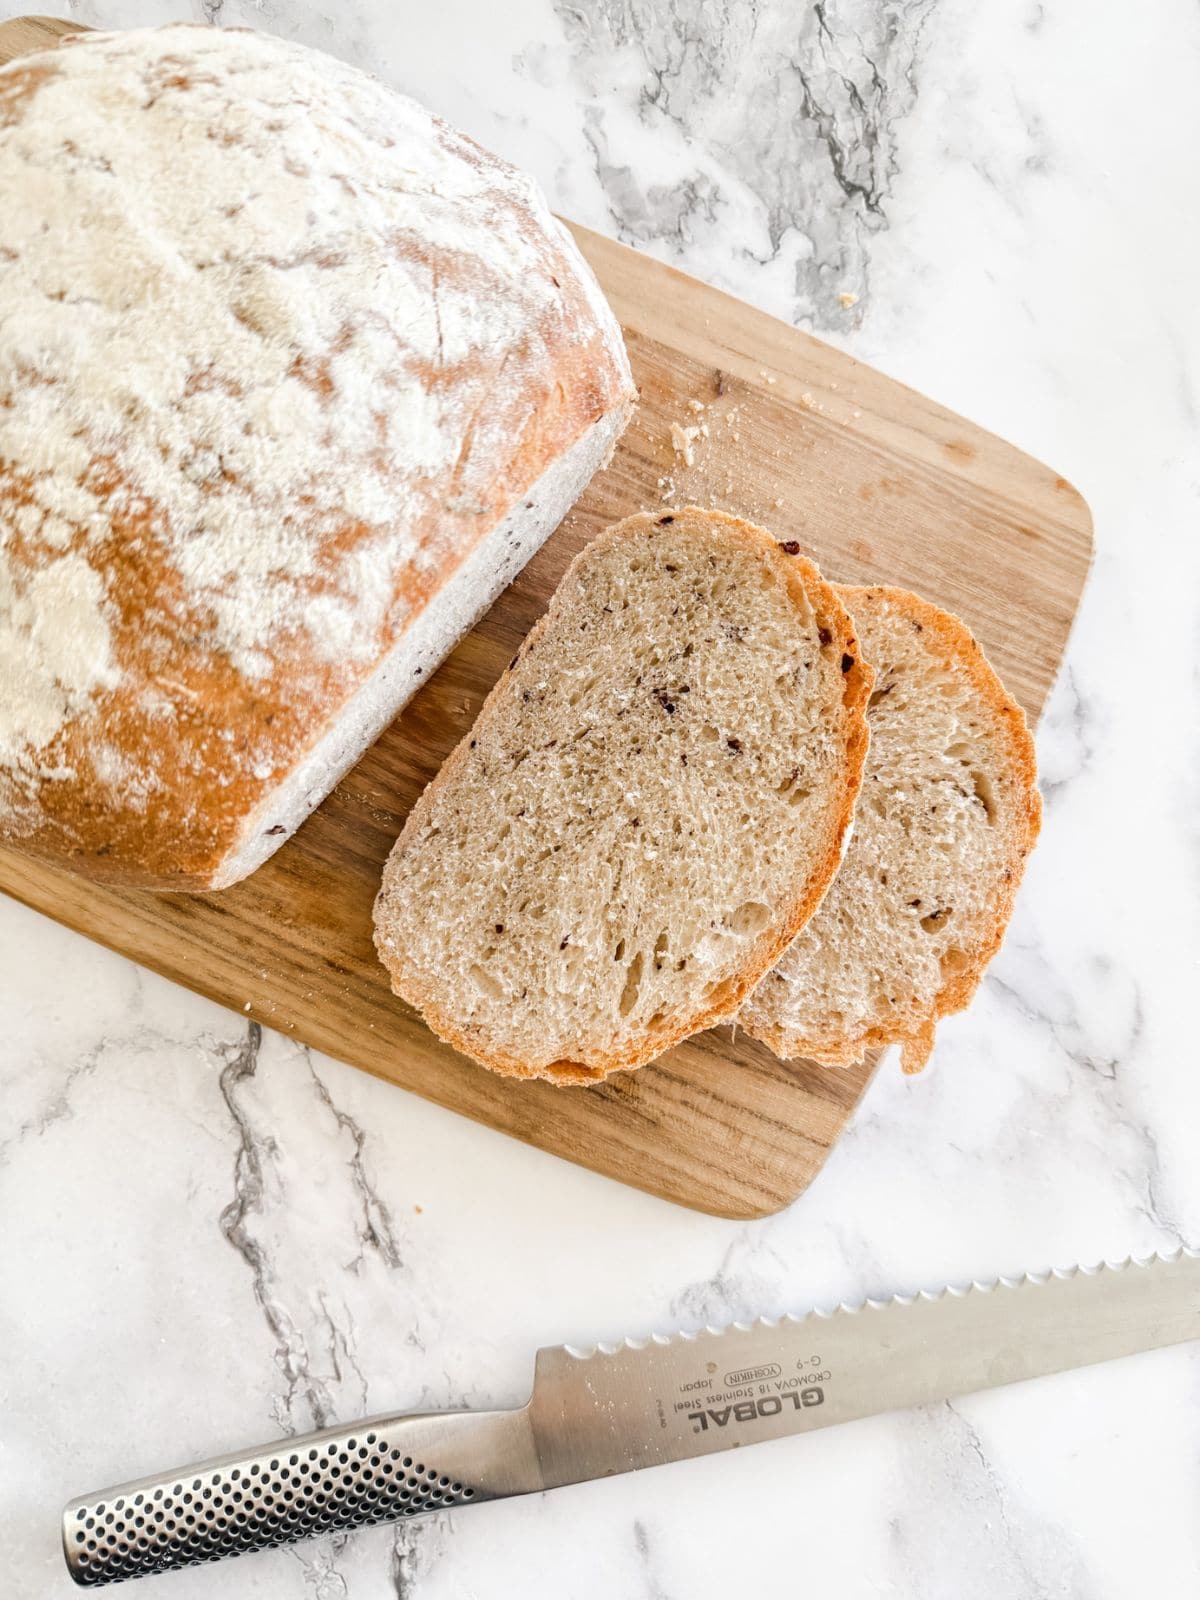
This olive bread was one of the nicest breads I have had.
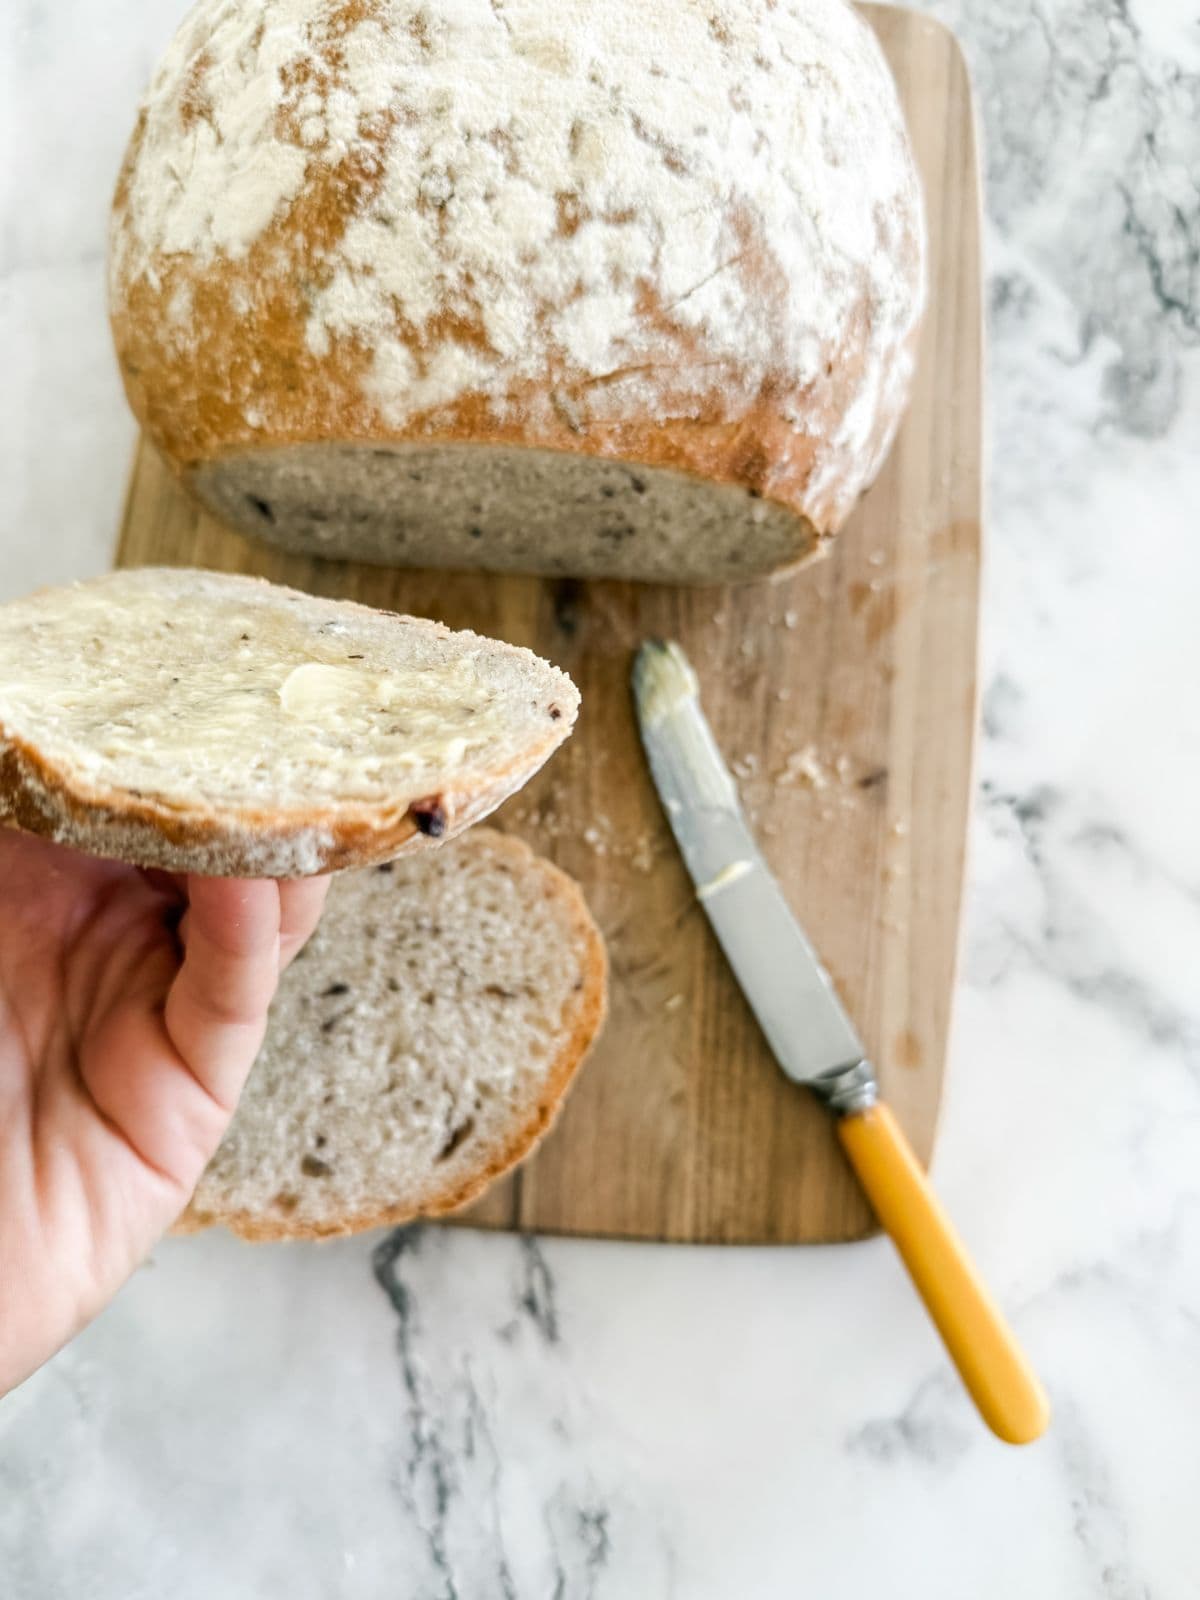
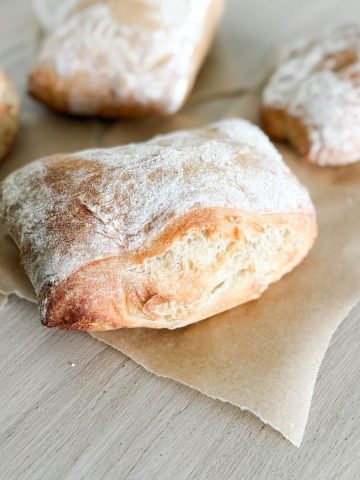
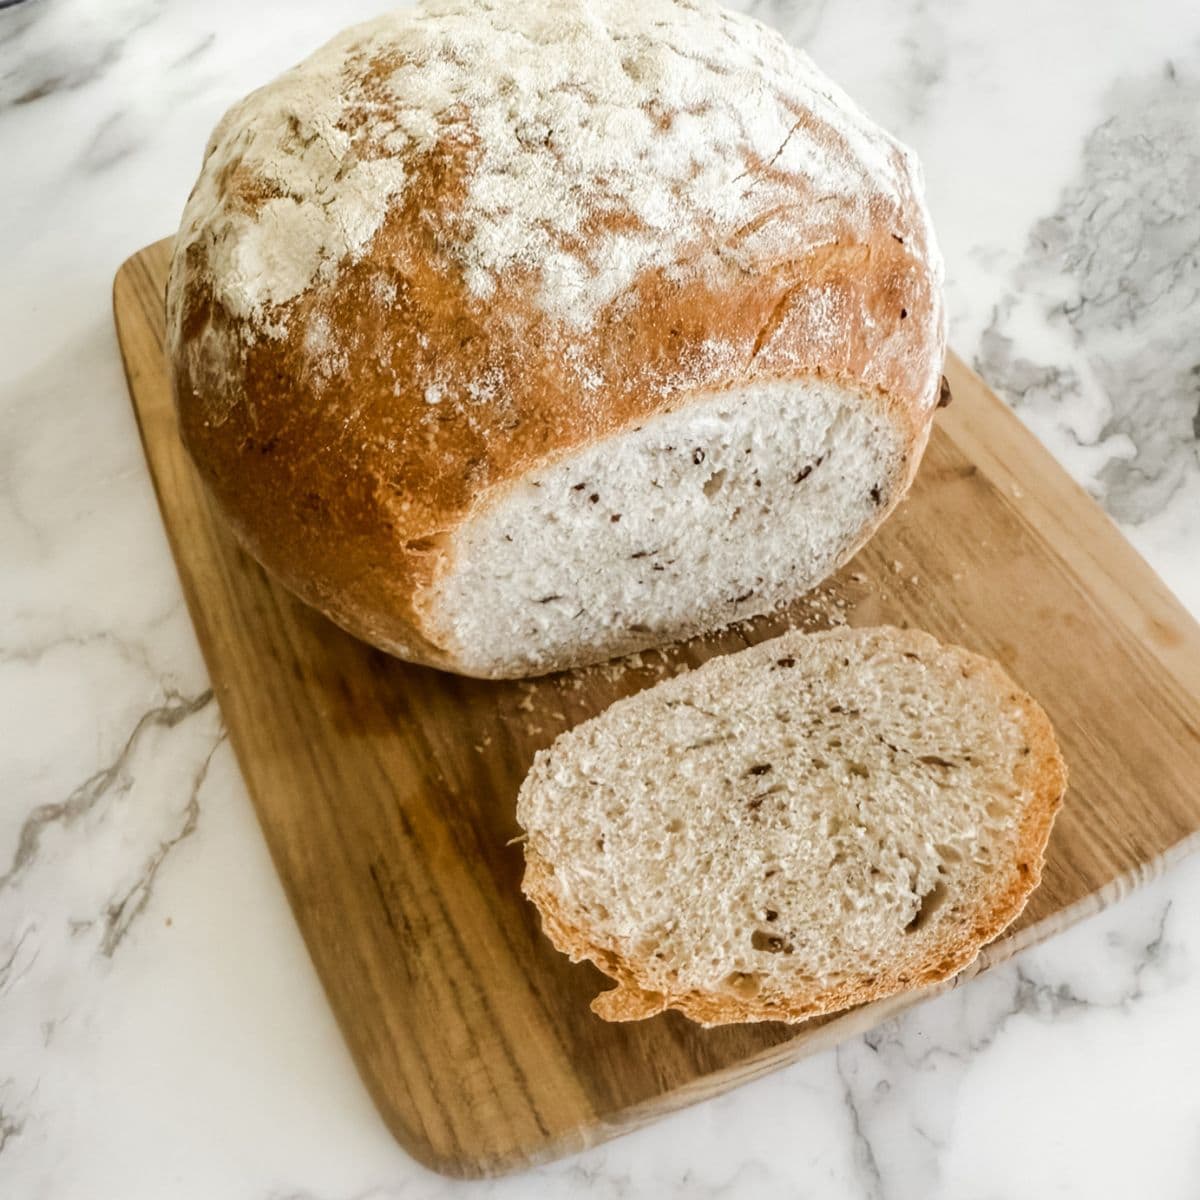
With a golden, crispy crust and soft fluffy inside, this olive bread is something you must try.
Why Make The Best Ever Olive Bread
Really you should just read the comments at the bottom of this post if you need convincing but here are a few other reasons:
It’s surprisingly easy – You don't need any fancy equipment or skills (a stand mixer does help if you have one though). This is a simple recipe anyone can master at home.
Flavour – With juicy olives and the perfect crust (not too thick but still a decent crunch) it’s the kind of bread that disappears fast - especially fresh out fo the oven slathered with butter.
Better than store-bought – Freshly baked, warm bread straight from your oven beats anything from the bakery.
Versatile & impressive – Serve it with dips, cheese boards, soups, or just warm with butter—perfect for entertaining or everyday meals. Plus you can add different flavours to change it up.
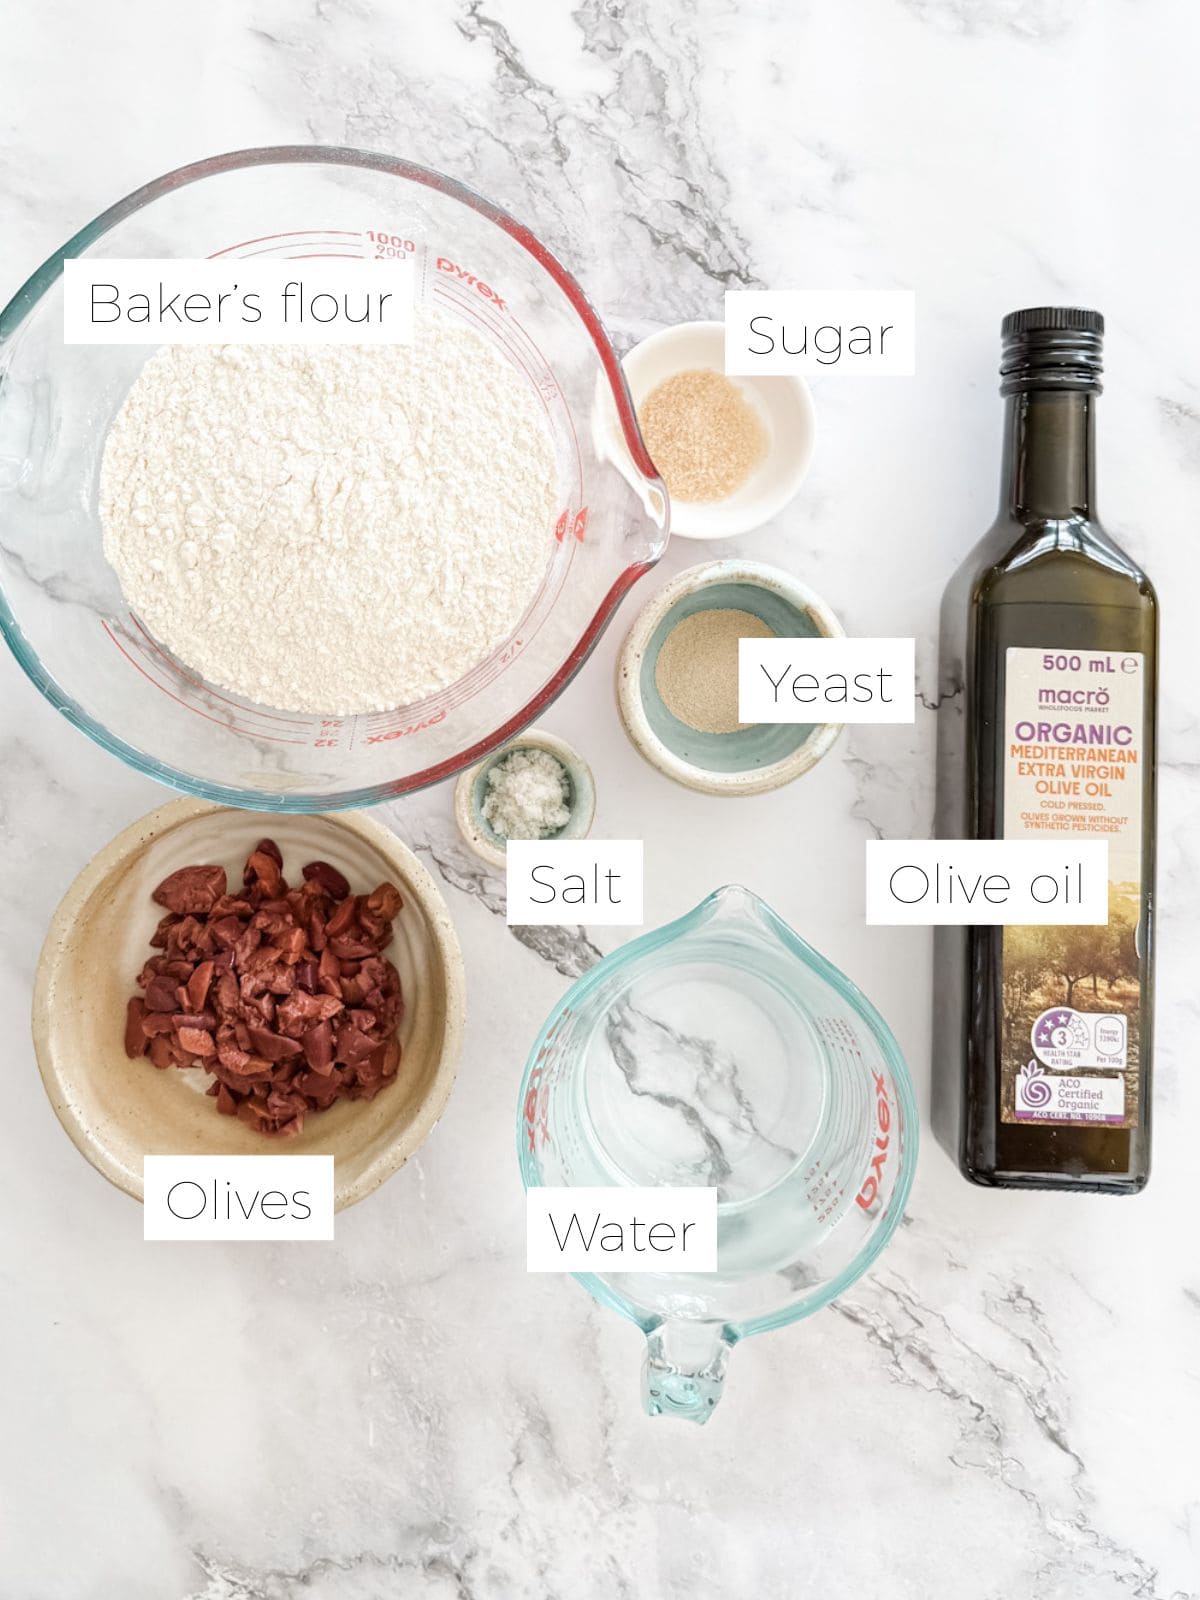
All the ingredients can be found at your local supermarket (or grocery store if you're in the Northern Hemisphere):
Baker's flour - Not regular flour.
Dried yeast - Baker's yeast.
Sugar - we use raw sugar but you can use whatever you have on hand or even honey.
Salt - a fine salt is preferable. Our choice is Celtic sea salt.
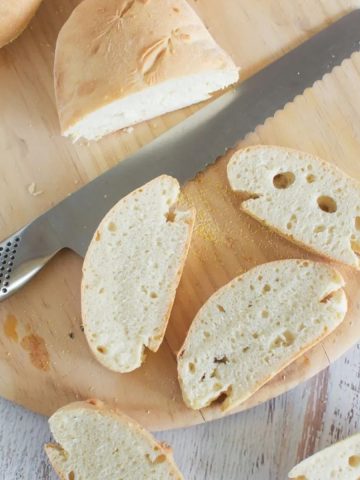
Black olives - chopped (alternatively you can use other olives)
Variations
The first time I made it, I loved it so much I had another go the next day and tried it out as a plain multigrain bread (adding seeds instead of olives).
It was just as good.
Once you master the first one you can vary the fillings and flavours to whatever your heart desires.
I think parmesan and herbs is next on the agenda or garlic and rosemary or even Slow Cooker Caramelised Onion and feta.
Add your mix ins where the recipe says to add the olives.
Out of all of the olive bread receipes I tried and tested before. This one I have found the best. It's simple and not complicated. Even my husband who is trying his hand at making bread likes this simple receipe.
Liz randall
How to make The Best Ever Olive Bread
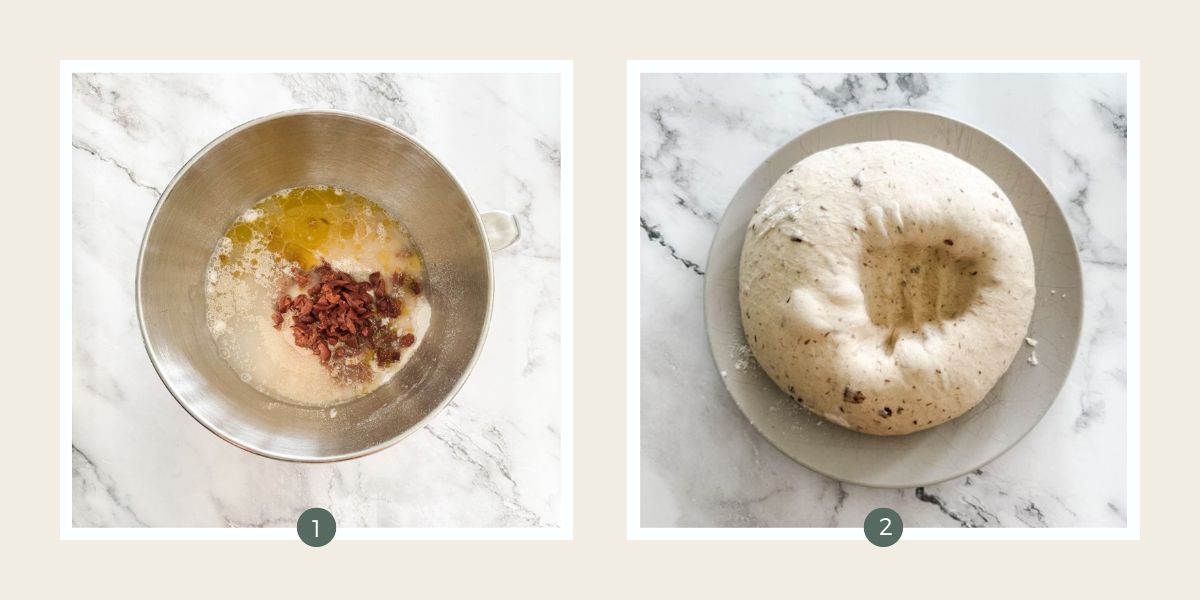
Step 1 - Place all the ingredients in a large bowl & mix together. Once combined turn onto a floured surface and knead until it is smooth and elastic.
By hand it's about 10 minutes, using a mixer and dough hook 5 or 6. Shape into a ball, cover with an upturned mixing bowl and leave to rise until doubled (about 45min).
Step 2 - Punch down the dough. Knead it again for 5 minutes then cover and rest for another 30 minutes.
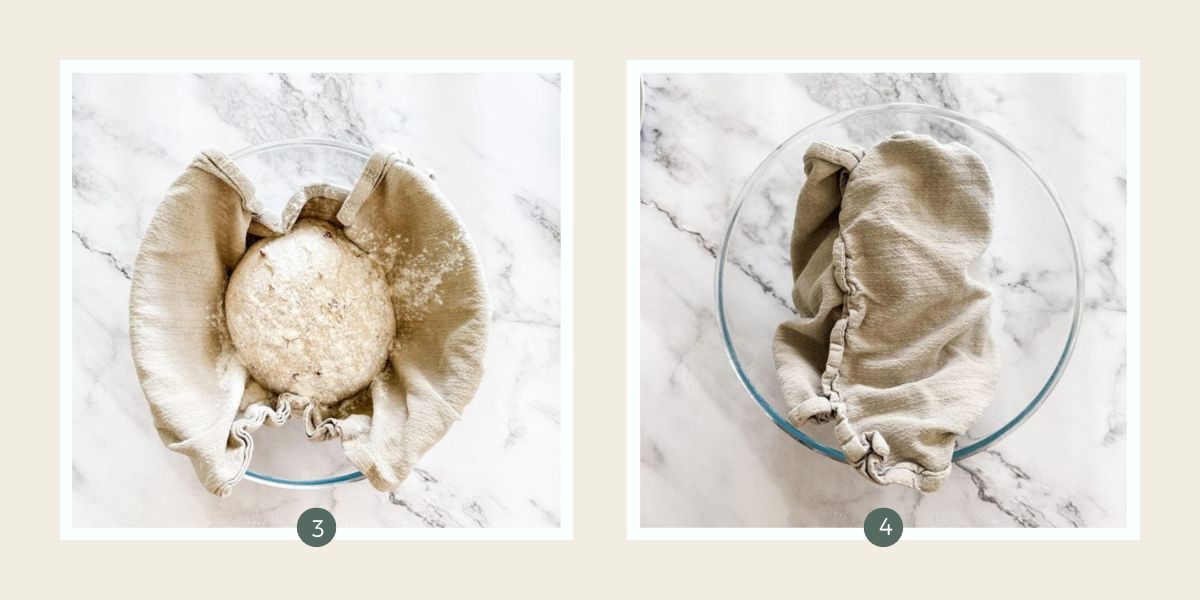
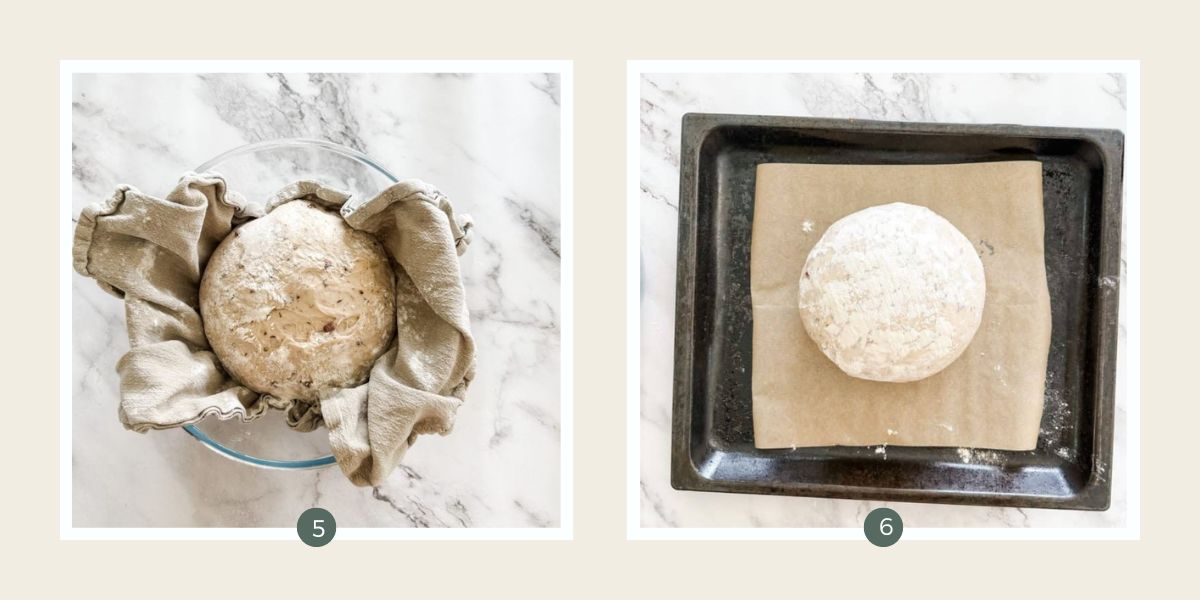
Step 3 - Line a bowl with a lint-free tea towel & dust with flour. Shape the dough into a ball and place it in the tea towel so the seam (non-smooth) side is up.
Step 4 - Fold the tea towel over the dough and leave for its final rise until it doubles in size (about 20 minutes).
Meanwhile, place a cake tin with an inch of water in the bottom of the oven and pre-heat to 210 C fan-forced (410F).
Step 5 - Here it is risen and ready to be baked.
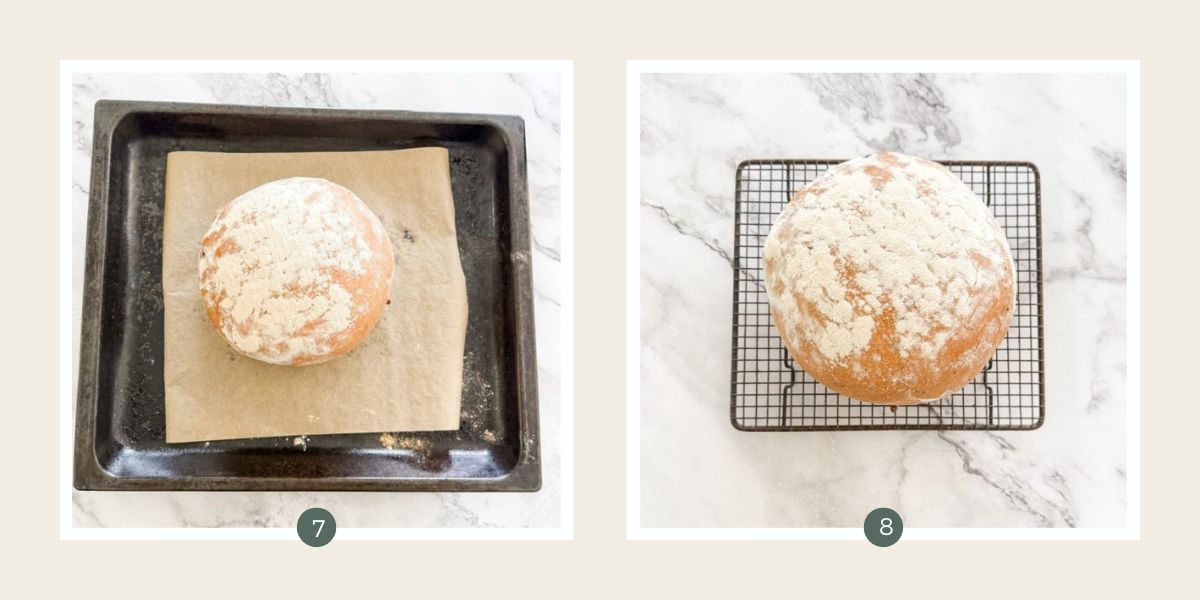
Step 6 - Gently turn the dough out onto the prepared tray so the seam is now on the bottom. Bake for 15 minutes at 210C then turn the oven down to 170C and bake for another 30 minutes.
Step 7 - Fresh out of the oven.
Step 8 - Transfer it to a wire rack & let it cool before slicing.
Recipe FAQs
How long do I knead the Best Ever Oliver Bread dough for if using a mixer?
Using a mixer makes it a lot faster. About 5 minutes should do it. My favourite tip is to knead it until when you pinch some between your thumb and forefinger, it feels like an earlobe (I know it's a weird description but it's very accurate).
Why do you put the pan of water in the oven when baking The Best Ever Olive Bread?
The water in the oven creates steam which helps the bread rise. Essentially it stops the crust from forming too quickly so the loaf has room to grow. Don't skip this step.
Would The Best Ever Olive Bread work as smaller buns?
We haven't tried it but I'm certain it would. You would shape the buns at the final stage before the tea towel step. Instead of a bowl, line a tray or plate with a floured tea towel, pop your shaped buns on top, sprinkle with a little more flour and then cover with another tea towel. Reduce the baking time to 10 minutes at 210C and 10-15 at 170C depending on size.
Pro Tip
Bread flours can vary in their consistency and 'thirstiness.' If your dough is super sticky in the first knead you might need to add more flour.
Use a couple of tablespoons of flour at a time and knead them in before adding more until it's no longer sticky.
Storage
This bread is best eaten on the day of baking.
After that, the best way to freshen it is to sprinkle with a little bit of water, wrap in aluminium foil and heat in the oven at about 100C.
The full loaf can also be frozen (wrapped in plastic wrap) then thawed and reheated the same way.
MADE THE BEST EVER OLIVE BREAD RECIPE AND LOVED IT? Please leave a ⭐️STAR rating and COMMENT below- I love connecting with you! Tag me with your creations on Instagram and find me on Pinterest.
Recipe
Olive bread
The most delicious homemade olive bread you'll ever find. Don't be put off by the prep time - it's only about 15 minutes hands-on the rest is resting time.
In a large bowl, mix together flour, yeast, sugar, salt, black olives, olive oil, and water. You can do this using a dough hook on a stand mixer.
Turn out dough onto a floured board and knead it until it is smooth and elastic.
Set it aside to rise for about 45 minutes or until it doubles in size.
Punch the risen dough down and then knead it again for 5-10 minutes or until it's smooth.
Cover it again and leave to rise for 30 minutes or until it doubles in size.
Use your hands to shape the dough into a round ball.
Line a large bowl with a lint-free tea towel and coat it generously with flour.
Turn the dough into the tea towel so it is seam-side up.
Dust the top with a bit more flour and then cover it loosely and leave it to double in size again (about 20 minutes).
While the bread is rising for the third time, put a pan of water in the bottom of the oven and preheat it to 210C(410F) fan-forced.
Line a baking tray with baking paper.
Gently tun the dough onto the baking tray seam side down.
Bake the loaf at 210C(410F) for 15 minutes then reduce heat to 170C(340F) and bake for 30 more minutes, or until it is golden.
Leave to cool on a wire rack before slicing.
Notes
Filling variations: Once you master the first one you can vary the fillings and flavours to whatever your heart desires.I think parmesan and herbs is next on the agenda or garlic and rosemary or even Slow Cooker Caramelised Onion and feta. Add your mix ins where the recipe says to add the olives.Tip: Bread flours can vary in their consistency and 'thirstiness.' If your dough is super sticky in the first knead you might need to add more flour.Use a couple of tablespoons of flour at a time and knead them in before adding more until it's no longer sticky.
Hi Lorraine. I'm not experienced with fresh yeast but apparently you need to use double the amount. Hope that works! x
Lorrainesays
Thank you sooooo much for wonderful olive bread. I have just treated myself to a kitchenaid mixer and wondered if I still had to knead the bread again if I mix for 5 mins initially?
Hi Lorraine. You're very welcome. You will need to knead it again after the first rise yes but you can put it in the mixer.
Rachelsays
Great recipe except for sugar quantity in the ingredients which is misleading in terms of tablespoons and teaspoons! I think perhaps 2 tablespoons should read teaspoons. It's definitely too sweet when you only put 1 tablespoon in. Shall I blame my eyesight or the fact I was reading off my iPhone?
Lovely texture though and will certainly make again now I've figured out the typo.
Thank you I'm glad you like it! The original recipe had it as 2tbsp but I did put in brackets that I only use 1 tsp. It must be an american recipe. I find their breads very sweet.
I hope that helps!
Claire
Debsays
This is my go-to recipe for olive bread! It always turns out perfectly and the whole family loves it. My 2 year old would eat the whole loaf on her own if we let her!
Hi, I'm excited to try this recipe but I'm just confused about the purpose of putting the pan of water in the oven ?? Are you supposed to leave it in the whole time?


Claire says
Legitimately the best bread I've ever made!
Lorraine says
Hi, if making this lovely bread with fresh yeast, how much should I use?
Claire says
Hi Lorraine. I'm not experienced with fresh yeast but apparently you need to use double the amount. Hope that works! x
Lorraine says
Thank you sooooo much for wonderful olive bread. I have just treated myself to a kitchenaid mixer and wondered if I still had to knead the bread again if I mix for 5 mins initially?
Claire says
Hi Lorraine. You're very welcome. You will need to knead it again after the first rise yes but you can put it in the mixer.
Rachel says
Great recipe except for sugar quantity in the ingredients which is misleading in terms of tablespoons and teaspoons! I think perhaps 2 tablespoons should read teaspoons. It's definitely too sweet when you only put 1 tablespoon in. Shall I blame my eyesight or the fact I was reading off my iPhone?
Lovely texture though and will certainly make again now I've figured out the typo.
Claire says
Hi Rachel,
Thank you I'm glad you like it! The original recipe had it as 2tbsp but I did put in brackets that I only use 1 tsp. It must be an american recipe. I find their breads very sweet.
I hope that helps!
Claire
Deb says
This is my go-to recipe for olive bread! It always turns out perfectly and the whole family loves it. My 2 year old would eat the whole loaf on her own if we let her!
Thanks for posting the recipe! :D
Claire says
It's a bit irresistible isn't it? You're welcome!
Faaiza says
Hi, I'm excited to try this recipe but I'm just confused about the purpose of putting the pan of water in the oven ?? Are you supposed to leave it in the whole time?
Claire says
Faaiza it's to create some steam while the bread is cooking. Yep you leave it in there and it will be absorbed. Enjoy!
Hind says
Hi and thank you for this recipe I'm going to try it. I was wondering if it would work as smaller buns instead of a big loaf? Thanks again.
Claire says
Sure would Hind. I would divide the dough after the first rise.