Beach ball piñata cake that's delicious and simple to make. Perfect for your child's birthday. It's going to be an absolute hit with the kids.

Jump to:
When I first wrote this, I was almost the mother of a two year old. Now, I'm almost the mother of a 2 year old for the third time around.
Nope doesn't seem any more true even putting it in words.
For our eldest child's 2nd Birthday, we had a ball theme.

I'm pretty sure when I sent the invitations he didn't know what a party was.
After the party, every day before nap time he asked if we were going to a party when he wakes up.
The kid loves a celebration and still does.

I didn't want his cake to be fully loaded with refined-sugar and fake colours.
Although I knew that's what he'd want and that's what kids love it was just so against everything I've been trying to teach him about food and give his little body.
I made the cake recipe up with no refined sugar.
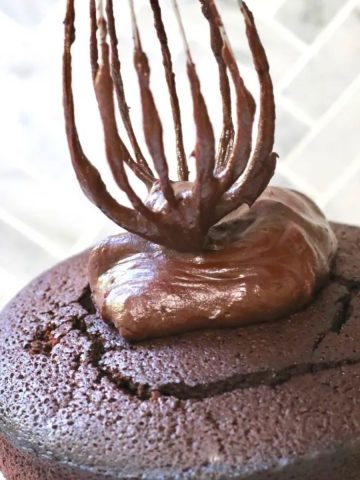
I made up a big batch of JJ's vegan and refined-sugar-free chocolate buttercream icing.
But there was not a single good-looking decoration idea I could come up with for plain chocolate icing that wasn't loaded with sugar.
So I threw my hands in the air in defeat, whipped out my gel colours and icing sugar and went to town.
I have to say, I loved it.
If you're after a traditional buttercream icing, here's how to make it.

I'd forgotten how much I miss decorating cakes.
The decoration and balls at the party were all sports themed but a basketball, soccer ball or tennis ball were just too boring to decorate - beach ball it had to be!
These days, I would use Hopper's natural food colouring (or even use some natural powdered fruits that make some pretty awesome colours).
I'm also not so concerned about sugar when it's homemade from the least-refined sugar I can find and mixed with other wholesome ingredients like organic butter.

His favourite food at the time was blueberries and has been pretty much since he could eat them so I thought he'd be excited to see them fall out when we cut the cake.
He was a little overwhelmed and some of the bigger kids were unimpressed that it was filled with fruit but all I could hear while I was trying to get a few sneaky pics was 'yes darling Claire is just cutting it, you can have some cake soon!'.
It disappeared before my eyes so I'll take that as a success.
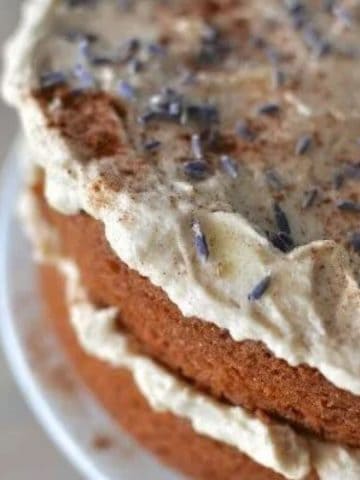
You might like to try this Tiramisu inspired birthday cake.
You can find step-by-step instructions with photos of how to construct a piñata cake on my original piñata cake post.
It looks tricky but it's actually really simple.
Enjoy!

Recipe

Beach ball piñata cake
Ingredients
Cake
- 250 g 9oz butter
- 200 g 7oz coconut sugar
- 50 g 2oz maple syrup
- 4 free-range eggs
- 3 tablespoon raw cacao
- 100 g 3.5oz wholemeal flour
- 120 g 4.3oz almond meal
Icing
- 240 g 8oz butter
- 600 g 1lb 7oz icing sugar
- 60 g 2oz milk
- Food colouring
Instructions
- Pre-heat the oven to 160C(350F) fan-forced.
- Grease a pudding dish or small, round pyrex bowl and line the bottom (prepare two if you have two the same). There's no need to line the pyrex just grease well.
- Place the butter, sugar and maple syrup in the food processor and process until smooth.
- Scrape down the sides.
- Add the eggs, one at a time and blitz until mixed in.
- Slowly add the cacao, flour and almond meal and keep blitzing.
- Scrape the sides down again and process for a few seconds to incorporate the scraped bits.
- Divide the batter in half and pour half into each pudding dish (or save the other half for later).
- Bake for 45-55 minutes or until a cake tester comes out clean.
- Leave the cake to sit in the tin/bowl for 5 minutes and then transfer to a wire rack to cool completely.
- Clean out the tin and repeat with the rest of the batter if you're only using one tin.
- Leave the cakes to cool completely.
- To make the icing, mix the butter in the bowl of an electric mixer until light.
- With the motor running, slowly add the icing sugar and milk and then increase the speed and beat until the icing is light and fluffy.
- Hollow out the middle of the cooled cakes and fill one half with your goodies. If you are using something fresh like blueberries you will need to refrigerate the cake.
- Pipe icing around the edge of the cake and place the 'lid' on top and press to secure.
- Ice the cake with a thin layer of icing and leave to set so that it is dry if you touch it very lightly.
- Divide the remaining icing into however many colours you would like and tint them with food colouring.
- Wrap the icings up in plastic wrap to form a sausage and twist and tie it off at one end and twist the other end tightly.
- Use a sharp knife or toothpick and trace lines onto the cake to mark the outlines of the colours.
- Snip the end of one of the sausages of icing and drop it into a piping bag fitted with a round tip.
- Pipe the icing in the segment you want to colour then use a palate knife or the non-serrated edge of a butter knife to smooth it out.
- Repeat with the remaining colours.
JJ - 84thand3rd says
Happy Birthday Ollie! The invite and the cake are adorable (and there's nothing wrong with eating that leftover choc buttercream with a spoon ;D heehee!)
Claire says
I may have been doing that JJ. It's also really delicious added to a smoothie!