
I have decided to retire the bread maker. It has served me well over the last few years but I've also discovered that I can make bread just as well, if not better, without it. I don't particularly like the shape of loaf it makes and my mix master can do all the kneading for me so sadly it has to go. That and I need the cupboard space. I am returning him to my sister and instead am going to focus on improving my skills.
I've had my eye on making pita bread for months now. I've always marveled at how it can have a pocket inside. When I was younger I thought they must somehow seal two slices together. How else could they make such a perfect pocket?

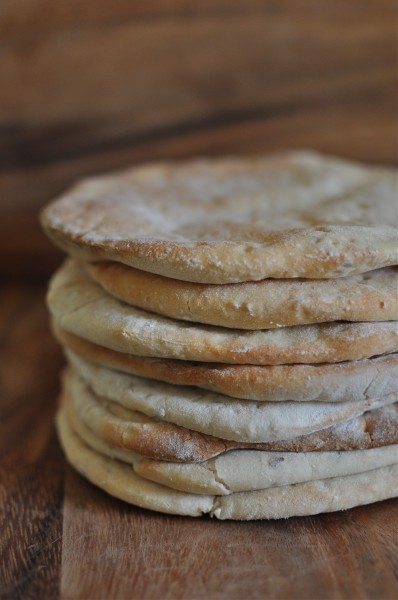
This week I got the answer when I finally make pita bread for myself. I spiced it up with some multi-grain bread mix as well as plain flour and the result was perfect. They were just as good, if not better than the store-bought version and were really simple to make. It took about 20 minutes of hands-on work for my first batch but I think with practice you could whip them up in 10 or 15 if you use the mixer to do the kneading (plus kneading, resting and baking time).
It's pretty fun to watch them puff up in the oven or maybe I'm just a strange person who finds bread puffing exciting?


To start the pita you have to prepare the yeast. Pour the water into the bowl of an electric mixer. I have found, with trial and error, that the best temperature for the yeast is between 100F and 110F. I just learned this week that it's meant to be at blood temperature (37C) so I got pretty close with my experimenting. Mix in the sugar until it has dissolved.

Sprinkle the yeast over the sugar water and stir it in then leave it for 5-10 minutes until it starts to froth.

Tip in 2 cups of the flour and use the dough hook to stir them into the liquid. Add the rest of the flour as needed until the dough is no longer sticky then knead it with the dough hook for 8 minutes or until it is nice and smooth and elastic. Mine needed the 3 ½ cups of flour.

Turn the dough out onto a lightly-floured surface and then cut it into eight equal chunks of dough. If you want them to be small, make more and if you want big pita breads, cut it into fewer chunks.

Roll each one into a ball and then roll them out with a rolling pin. Make sure that they're nice and even all over or they won't puff up nicely and give the pitas their pockets. I made mine about 1cm thick.

Lay them all out in a single layer and leave them to rest for 40 minutes or until they start to rise a little.

When they have risen, very carefully flip them over onto a lined and lightly-floured tray and bake them for 10-15 minutes at 200C. I'm not sure why you have to flip them. Next time I won't and I will report back on the results.

This was the best I could do to get a photo of them puffing up in the oven - yes I am shining a torch into the oven because my light doesn't work. One photo I took showed how hideously dirty my oven door is. I have added 'clean the oven' to my to do list. See, isn't pita puffing exciting? No? Still just me?

Here they are nice and puffed up after the oven.

It didn't say to do this in the recipe but I didn't want them to get a hard crust on the outside so I piled them all up and wrapped them in a damp tea towel to cool like I do with tortillas. It seemed to work well.

They were rather rustic looking but I loved the result. This is definitely a recipe I'll be making again. No more store-bought pita bread for us.

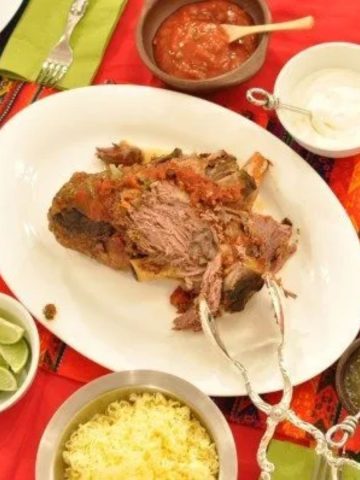
You can fill them up with whatever your heart desires or there is another option that I rather enjoyed (ps they are tomatoes from my garden!).

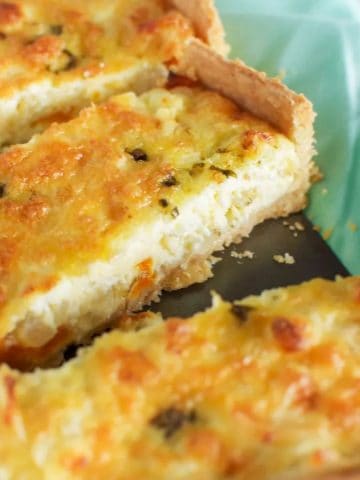
You can make them into individual pizzas. Just spread some tomato paste on top and cover them with whatever you have on hand. I used grated cheese, some feta and oregano and basil from the garden. They only need about 10 minutes at 180C fan-force or just long enough for the cheese to melt.
You can freeze the pitas in a container or freezer bag but make sure you put some paper between each one so they don't stick.
Enjoy!
So what about you? Do you have a bread maker? Does it get much use?

Recipe
Easy peasy pita bread and a very quick dinner idea
Print Pin Rate SaveIngredients
- 1 tablespoon dry yeast
- 2 teaspoon caster superfine sugar
- 1 ¼ cup warm water
- 1 ½ teaspoon salt
- 2 ½ cups plain AP flour
- 1 cup grain flour
Instructions
- Pour the warm water into the bowl of an electric mixer and dissolve the sugar inside.
- Sprinkle the yeast on top and mix it in then set it aside until it froths (5-10 minutes).
- Add 2 cups of the flour and the salt and use the dough hook to mix it all together. Add the rest of the flour as needed until the dough is no longer sticky and then knead with the dough hook for 8 minutes or until it's smooth and elastic.
- Turn it out onto a lightly-floured surface and divide the dough into 8 pieces (you can make more or fewer depending on what size you want them).
- Roll each one into a ball and then roll them out with a rolling pin until they are 1-2cm thick. Make sure they are the same thickness all over so they rise nicely.
- Leave them to rest for 40 minutes or until they just start to rise.
- Meanwhile, preheat the oven to 200C(390F) fan-forced
- Carefully flip each one onto a lined and lightly-floured baking tray.
- Bake them for 10-15 minutes or until they have puffed up and just started to turn golden at the edges.
- Pile the cooked pitas on a damp tea towel and wrap them up.
- Leave them to cool completely and then eat, store them for up to 2 days or freeze them.
- To freeze, place them in a freezer-proof container or bag with a piece of freezer go-between or baking paper between each one so they don't stick.


Erin says
Claire, the way you described how simple it is to make these seems like the perfect solution for our family. I'm giving them a shot right now. One question though ... At what point do I add the salt?
Claire says
Hi Erin. Oops! The salt goes in with the flour. Good luck!
Katherine says
These were simple, delicious and very forgiving. I'll be making my pitas this way from now on - I prefer this now to the traditional recipes. They were much quicker and more satisfying due to the simultaneous ballooning bread pockets.
My family loved them and they worked great with whole wheat flour.
Thanks!
Claire says
You're very welcome Katherine. Glad they were a success! I really should make some for my freezer!
Jess says
Claire - these look amazing. They look even better (and softer?) than storebought. I had a breadmaker and donated it to save space in my kitchen. I, too, didn't like the shape of the loaves that came out of it, and there's something really satisfying about making bread by hand. Thanks for the great recipe!
Claire says
Thanks Jess!
Yes I thought it made odd shapes cause it was a really old machine but I did some research and they all make oddly-shaped loaves. It's much more satisfying making it by hand.
Laura (Tutti Dolci) says
I love pita bread, these look perfect! I like to stuff them with hummus and veggies, or make a pizza as you suggested. I'll have to try this!
Claire says
I love them with hummus too especially homemade hummus!
The Café Sucré Farine says
Claire, these look very professional, I can't believe this is your first try. You make it sounds so easy too and what a great way to save money!
Claire says
Thanks Chris! They were really easy to make and definitely worth the effort.
celia says
Claire, we let the breadmaker go years ago - we just never used it, and I found it kept turning out identical fluffy loaves, and we were getting into crustier, dense sourdoughs. Thanks for your pita recipe! I've just bought a new pan for cooking flatbreads, and today I'm experimenting with mountain bread!
Claire says
Well Celia you probably make better loaves than some professional bakers so you're serious proof that bread-makers aren't really needed. I can't wait to see how the mountain bread turns out.
Lorraine @ Not Quite Nigella says
My friend has a breadmaker and she liked it at first but then retired it too! I think that it's very possible to make lovely bread without it :)
Claire says
They are great if you're very low on time or want to set it so it's ready when you wake up but I think making it by hand is almost as easy!
Hotly Spiced says
I'm very impressed with your home grown tomatoes! I have a friend who has a bread maker and she loved it but found it took up so much room! They had a power point installed at the bottom of their pantry, plugged the bread maker in there and that's where it lives. It never comes into the kitchen! I love your pita bread and I'm impressed with how it puffs up - very clever. How lovely to have your own, freshly baked bread xx
Claire says
That's a brilliant idea. If I had a walk-in pantry that's definitely what I'd do. Unfortunately, no room for it here :-(