
You put your right hand in,
You put your right hand out,
You put your right hand in,
And you shake it all about,
You do the hokey pokey
and you turn yourself around
That what it's all about.
Altogether not....oooooooh the Hokey Pokey. Ooooooh the Hokey Pokey. Ooooooooh the Hokey Pokey, and that's what it's all about!

There's no specific memory of performing the Hokey Pokey that comes to my mind but the 'ooooh' bit brings up and image of standing in a circle holding hands with the person next to me and then running into the middle with our hands raised and running backwards again. Oh the simple things!
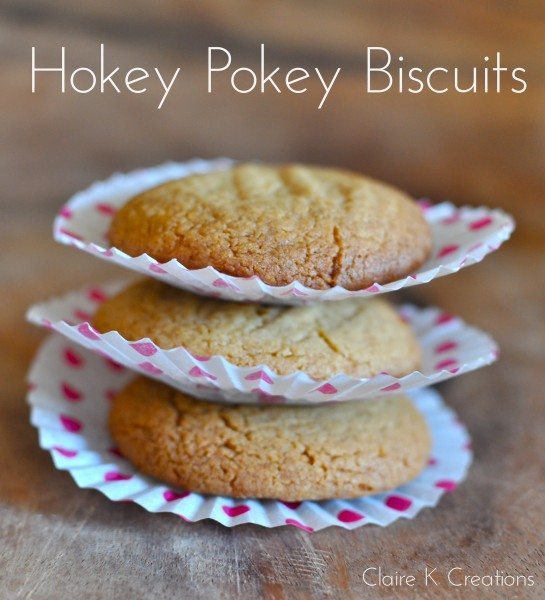
I was flicking through recipe books the other night, as I often do, and spotted Hokey Pokey biscuits. Instantly my mind started running forwards, hands raised so the next day I ran forward and baked up a batch. They remind me a little bit of gingerbread even though they don't have any spices. They're not too sweet and have a nice crunchy outer with a soft-ish center and are perfect with a cup of tea.

The recipe called for a tablespoon of milk. For some very strange reason I didn't have a drop of milk in the house so I used Greek yoghurt in its place. I'm not sure what they're meant to taste like with milk but Hokey Pokeys with yoghurt were delicious!

Unlike the song and dance, there aren't many steps involved in making Hokey Pokey biscuits. Start by putting the butter, yoghurt, sugar and golden syrup in a large saucepan.

Heat the pan over medium heat, stirring, until everything has melted and then keep heating it until it is almost boiling.
Take the pan off the heat and set it aside to cool.

Once the mixture has cooled to room temperature, sift in the flour and bicarbonate of soda. I just mixed it up in the saucepan to save on washing up. You don't have to follow my lazy lead but it does make it very simple. Mix it until it's nice and smooth with no dry bits.

At this stage the dough will look really wet and like there's no way you could roll it. It's deceiving, it actually rolls really easily. Use a level tablespoon of dough for each ball and lay them out on a lined baking tray. Leave about 3cm between each one to give them room to spread.

Use a lightly floured fork to press down the top of the biscuits and make them pretty. Bake the biscuits at 180C fan-forced for 15-20 minutes or until they start to turn golden.

Leave them on the trays for 10 minutes after you take them out of the oven.

Then transfer them to a wire rack to cool completely.

Sing and dance a round of the Hokey Pokey and then nibble on a Hokey Pokey biscuit to reward yourself for your hard work. Enjoy!

What about you? What was your favourite song and dance when you were little?

Recipe
Ingredients
- 125 g 4.4oz butter
- ½ cup caster superfine sugar
- 1 tablespoon golden syrup
- 1 tablespoon milk I used plain Greek yoghurt
- 1 ½ cups plain AP flour
- 1 teaspoon bicarbonate of soda
Instructions
- Place the butter, sugar, golden syrup and yoghurt or milk in a small saucepan.
- Heat them over medium heat, stirring, until everything is melted together. Bring it to nearly boiling, stirring constantly and then take it off the heat and set it aside.
- When the mixture reaches room temperature, sift in the flour and baking soda and stir it in.
- Pre-heat the oven to 180C (356F) fan-forced and line two baking trays with baking paper.
- Roll level tablespoons of dough into balls and lay them on the trays leaving at least 3cm between each dough ball.
- Press the top of each one down using a lightly-floured fork.
- Bake the biscuits for 15-20 minutes or until they are golden.
- Leave the baked biscuits to rest for 10 minutes on the trays before transferring to a wire rack to cool completely.


Tracey says
Hi. The recipe calls for bicarb of soda. The method calls for baking powder. I tried making these and they didn't spread flat like the picture. What did I do wrong?
Claire says
Hi Tracey. I'm so sorry there's a mistake in the recipe. It should read baking soda all the way through. Having said that it shouldn't have made a difference to how they spread. If it was quite cool in your kitchen they might have been a bit stiff going into the oven so cooked before they could melt (does that make sense?). Were they flattened before you baked them?
Sue says
My 12 yr old made these and we all enjoyed them. Thanks Claire.
Claire says
I'm glad they were enjoyed Sue. Well done to your 12yo that's very impressive!
Jen @ Savory Simple says
These sound so delicious!
Maureen @ Orgasmic Chef says
I didn't know what hokey pokey was until Lorraine told me a couple of weeks ago!
I love these biscuits!
Claire says
I only learned about it last year watching Nigella Kitchen.
Hotly Spiced says
I'm always in awe of how you're able to do everything so neatly! I love hokey pokey. I grew up on hokey pokey ice cream in NZ. I just love that caramel-type honeycomb-type flavour. What great little afternoon treats. And I think yohurt was a great substitute in a house with no milk! xx
Claire says
Aww shucks Charlie. If only you could see outside the frame of the photo!
Amy says
Oh I though these would have actual chunks of Hokey Pokey (NZism) in them! Hence my previous "i used to make it in science class" comment! Commonly referred to by you Aussies as "Honeycomb" :)
Claire says
I was wondering what was science experiment about it!
Lorraine @ Not Quite Nigella says
I've never heard of hokey pokeys before so thanks for enlightening me! They sound nice and simple (I'm a fan of non creaming recipes-less to wash up).
Claire says
I'm a fan of any recipe that reduces the washing up! I hadn't heard of them either actually. There are quite a few interestingly named recipes in this book. I'll be sharing them all of course!