
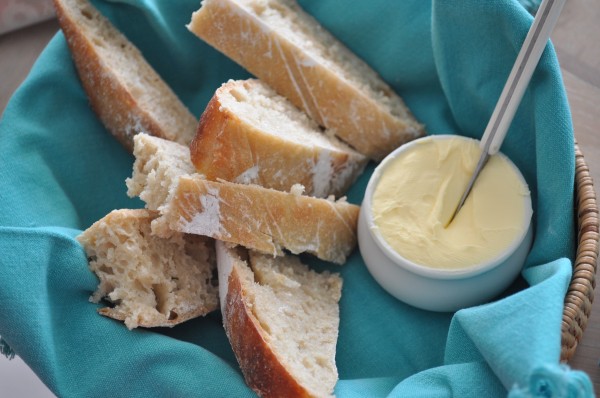
Nearly every Sunday morning I take a stroll to the Eagle Farm Markets. I buy up on the essentials and then as an extra special treat I buy a loaf of ciabatta from the Sol Bakery stall. It sounds very boring but one of my favourite lunch treats is a ciabatta filled with sharp cheddar cheese and toasted in the sandwich press. The frugal side of me hates forking out $4 for a loaf of bread but it's so good.

That was until I was sent my very first reader recipe. John contacted me a few months ago to tell me about a fabulous recipe for ciabatta that requires literally five minutes work and a little time resting. The result is a fluffy but dense loaf with a thin crust that is just delicious spread with butter and would make the perfect sandwich loaf. Thanks so much for the recipe John. If anyone else has a recipe they'd like me to try please feel free to send it through.

You only need four ingredients to make no-knead ciabatta.

This recipe is so ridiculously easy you won't believe it. Tip the flour, yeast and salt into a large bowl.

Use a spatula to fold through the water until it is all mixed in.

That's it! No more work but a minute or two to turn it out later.

Cover the bowl with aluminum foil. I'm not sure why but it's very specific that you must cover it with aluminum foil. Then it's time to go off and do whatever you like for 18 hours. Don't worry about working out the timings to have your bread ready when you want it. John did the work for us and made a little table.

When the 18 hours have passed, sprinkle the bench with a little water then cover it with plastic wrap. Dust it with corn flour so it covers the whole piece of plastic.

It's amazing how much the dough rises in 18 hours especially when all you had to do was stir it all together.

Very gently turn the dough out onto the plastic wrap. I just turned the bowl upside down and held it there until all the dough was out. You're meant to shape the loaf in the next step but I found it a little too wet to shape.

Line a baking tray with baking paper (or oil a tray) and then coat it with cornflour too. Now comes the hardest part (which isn't all that hard). Pick up the plastic wrap with the dough on it and turn it onto the tray. Sprinkle the top of the dough generously with more corn flour and then cover it up with a clean, dry tea towel and set it aside to rest for another 2 hours.
While the bread is resting, get the oven ready by half-filling a heat-proof dish with water. Put it in the bottom of the oven then pre-heat the oven to 220C fan-forced so it's ready at the same time as the bread.
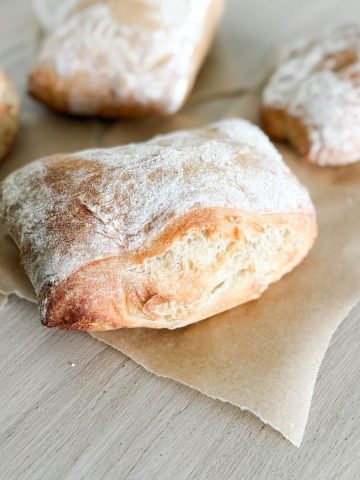
Put the tray in the oven then spritz the bread with a bit of water. Spritz it again after 5 minutes and then bake the loaf for another 20-35 minutes. It's ready when it's golden on top and sounds hollow when you give it a tap on the bottom.

Let the bread cool on a wire rack.

Slice it up when it's cool enough to handle.

I thought this bread was just perfect spread with a blob of butter. John suggested making it into garlic bread which I imagine would be amazing.
What about you? Do you have any secret food indulgences?

Recipe
Ingredients
- 3/12 cups white bakers flour
- ½ cup wheat flour
- ¼ teaspoon dry yeast
- 1 ½ teaspoon sea salt
- corn flour or polenta for dusting
Instructions
- Mix all the ingredients together (except the corn flour) in a large bowl then add 2 cups of warm water (I used water at 105F/40C).
- Use a spatula to fold all the ingredients together until everything is mixed in. It will be very wet and not really look like dough.
- Cover the bowl with aluminum foil and set it aside for 18 hours.
- Sprinkle some water on the bench top and then cover it with a piece of plastic wrap.
- Dust the plastic wrap generously with corn flour and then very very carefully pour the dough from the bowl onto the corn flour then gently shape it into a loaf. You need to be extra gentle so it maintains its aeration.
- Line a baking tray with baking paper and then sprinkle it with more corn flour. Very carefully turn the dough from the plastic wrap to the tray and re-shape it if you need to. Generously sprinkle the top with more corn flour and cover the bread with a dry tea towel then set it aside for another 2 hours.
- Half-fill an oven-proof bowl with water and place it in the bottom of the oven then pre-heat it to 220C(428F) fan-forced so that it reaches that temperature at the same time as the bread reaches the 2 hours.
- Put the dough in the oven and spritz it with a few squirts of water. I just used my fingers to fling water on it. Repeat the water spraying after 5 minutes.
- Bake the loaf for 30-45 minutes or until it sounds hollow when it's tapped on the bottom.
- Transfer the bread to a wire rack to cool.
Notes
| For a loaf tomorrow |
Start time today |
Mix onto tray, next day |
Start bake |
Cooling on rack |
| Lunchtime |
3.00pm |
9.00am |
11.00am |
12.00pm |
| Dinner time |
8.00pm |
2.00pm |
4.00pm |
5.00pm |
| Mid morning |
12.00pm |
6.00am |
8.00am |
9.00am |

Cathlyn says
Can you leave the dough for more than 18hrs?
Claire says
You could but my only concern that it would collapse back in on itself and loose all the fluffiness.
Deb says
I've made this recipe a couple of times, it's good. What's not good is the picture you show using liquid measures for your flour. Dry ingredients are meant to be leveled after being spooned in to a dry measuring cup. You can not do that with a liquid measure, you would have to tap or do other things to a liquid measure in order to measure your dry ingredient which will compact the flour and give inaccurate measurements and through off your baking.....as it should be precise to always get the same result or to get an adequate result to begin with.
Claire says
Thanks very much for your feedback Deb. I'm not a very precise baker so try to make sure recipes work without absolutely perfect measurements. Makes it easier for everyone that way but otherwise I find weight the ingredients the best way to go.
Nic@diningwithastud says
How easy! And it looks so professional - totally fab Claire :)
Claire says
Thanks Nic!
Daisy@Nevertoosweet says
WOW i never thought making bread could be that easy! No kneading what so EVER YAY! But wow it does take a long time hehe for the 18 hours where should you could the dough? In the fridge, on the bench top or just anywhere? :D
Thanks for sharing this recipe! Can't wait to try it :D
Claire says
Neither did I! You just leave the dough in a bowl covered with foil on the kitchen bench.
Enjoy!
Daisy@Nevertoosweet says
Too EASY! Thanks again for the great recipe :)
Claire says
No problem Daisy!
The Café Sucré Farine says
Hello sweet Claire! Welcome home, what a great little bread maker you are now along with all your other talents! Hope you had a wonderful trip. I wish we could sit down together and chat and gobble up this wonderful looking bread and you could tell me about all your adventurers!
Claire says
Hi Chris. That would be fantastic!
ELIZABETH BRADSHAW says
Can't wait to try it. Great table too!
Claire says
Thanks Elizabeth!
Celia says
Looks beautiful, Claire! I love ciabattas - I make them in sourdough and yeasted, and usually add remilled semolina flour to give them an extra Italian feel. It's amazing how easy they are - as John says, they need very little hands-on time.
Is this the same as the no-knead recipe from Mark Bittman that can also be baked in a pot?
Claire says
I'll have to find out for you Celia. Or maybe I'll give it a go in a pot. I'm going to experiment a little with the flour next time too.
Lorraine @ Not Quite Nigella says
How fantastic! And it is done so quickly yet looks perfect! :D Thank for sharing Claire and John!
Claire says
So quick and easy!