
A wonderful winter dessert recipe I just discovered is Nigella's apple pandowdy (adapted from her recipe for pear pandowdy).
Whenever I make a Nigella recipe (in this case it was fajitas which I'll share soon) I like to follow it with a Nigella dessert.
I just happened to buy a giant box of apples for $3 a few days before so some sort of apple dessert was in order.
It was also my first time making pastry from scratch.
For some reason I've always been afraid to try but it turns out it's actually very easy and well worth the tiny bit of effort involved.
This dessert can be made in advance and even frozen and then popped in the oven when you're ready for it.

Start by peeling and chopping up the apples into small chunks.

Place the apples, sugar, cinnamon and butter in a saucepan and heat.
When I was looking at the recipe to type this up I saw it says to melt the butter first. I didn't but maybe Nigella has a reason and melting the butter first adds another level of deliciousness.

Cook the apples, stirring occasionally until they start to soften and caramelise.

When the apples are ready, tip them into a dish that can go in the oven.
This dish was a little large but it was the only suitable thing I had. You could probably cook it in a cake tin if you needed to.

I don't know why I was so scared of something that only has 5 ingredients.

Place the flour and salt in the electric mixer with the paddle beater attached then add the cold butter squares and vegetable shortening and start to mix very slowly.
When the fat has been cut into the flour, slowly add the milk with the motor running.

Keep adding the milk until the dough comes away from the sides as in the photo.

Form the dough into a ball using your hands then place it on a floured surface.
Roll it out until it is big enough to cover the apples with a little extra around the sides. It is quite a thick pastry.

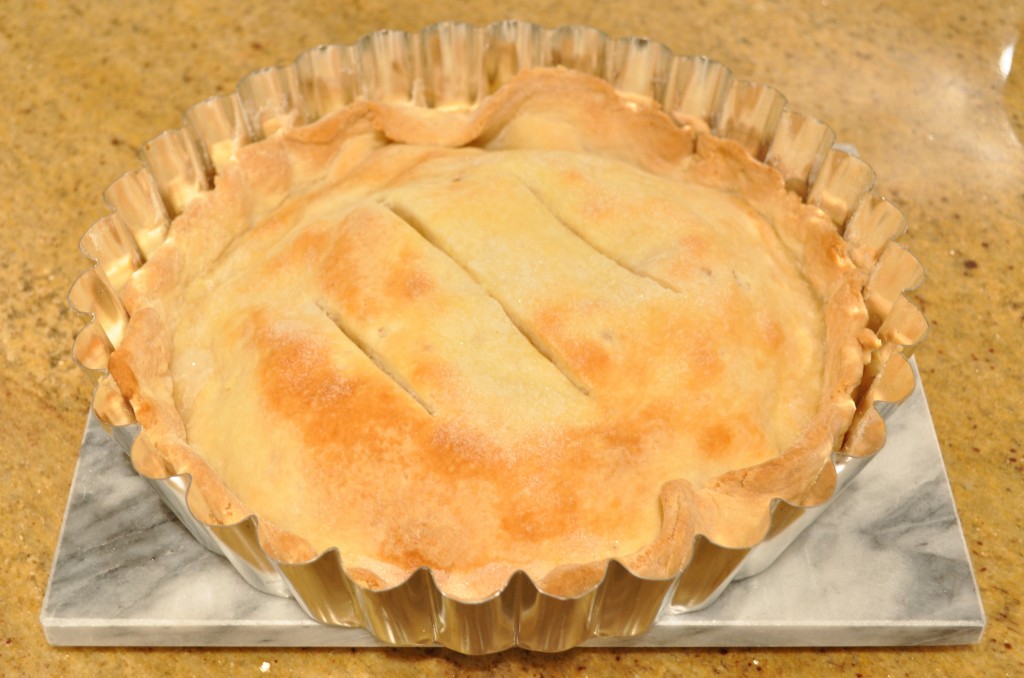
Place the dough over the apples and tuck it in at the sides then give it three big slashes across the top and sprinkle it with a little caster sugar.
Bake the pie at 200C fan-forced for about 25 minutes or until the pastry is golden.
It will take a little longer if you kept it in the fridge for any amount of time.
Serve the apple pandowdy fresh from the oven with cream or ice-cream. Enjoy!

Recipe
Ingredients
Pie Filling:
- 5 apples peeled, cored and cut into chunks
- 50 g 2oz butter
- 50 g 2oz caster (superfine) sugar plus a little extra for sprinkling
- finely grated zest of one lemon
- I added a sprinkle of cinnamon
For the pastry
- 225 g 8oz plain (AP) flour, plus extra for dusting
- a pinch of salt
- 75 g 2.5oz of very cold butter, cut into 1cm cubes
- 35 g 2.5 tablespoon cold vegetable shortening
- 125 ml ½c cold full-fat milk (I only had low-fat milk but it worked perfectly)
Instructions
- I don't have a skillet that can go in the oven so I prepared the apples in a saucepan and then made the pandowdy in a tin.
- Melt the butter in a saucepan then add the apples, sugar, lemon zest and cinnamon and cook over low heat until the apple begins to caramelise. When this happens, remove the apples from the heat.
- To make the pastry, pour the flour and salt into the bowl of an electric mixer. Attach the paddle then add the very cold butter and using a teaspoon drop in little blobs of the cold shortening and mix it on the slow setting to cut the fat into the flour. This can be done by hand if you don't have an electric mixer.
- Keep the motor running slowly and add the milk a little at a time until the dough comes away from the sides of the bowl.
- Tip the dough out onto a floured surface and form it into a bowl with your hands.
- Pre-heat the oven to 200C(392F) fan-forced.
- Place the fruit into the tin you are using.
- Roll out the dough until it is roughly the size of the tin. It's quite a thick dough.
- Place the dough over the tin and tuck in the edges. Nigella says that it's meant to look rather 'ramshackled' so don't worry if it looks messy.
- Make 3 slashes across the top of the pastry and sprinkle it with a little bit of caster sugar.
- Bake the pandowdy for about 25 minutes or until the pastry turns golden.
- I served it with ice cream.
- You can prepare the pandowdy ahead of time but make sure the apples have cooled before covering them with the pastry.


celia says
Claire, this looks lovely! I've only made apple pandowdy once before, but it's the perfect dish for this freezing cold weather we're having at the moment in Sydney! Thanks!
Kathleen says
This looks delish! I've never made a pandowdy before. Sure looks yummy!
Lorraine @ Not Quite Nigella says
This is a really new one for me. I've never heard of a pandowdy before. I feel like I've been missing out! :D
Claire says
Oh you are! It's a very simple version of an apple pie really. Plus, because there's no crust on the bottom it's much healthier (right?).