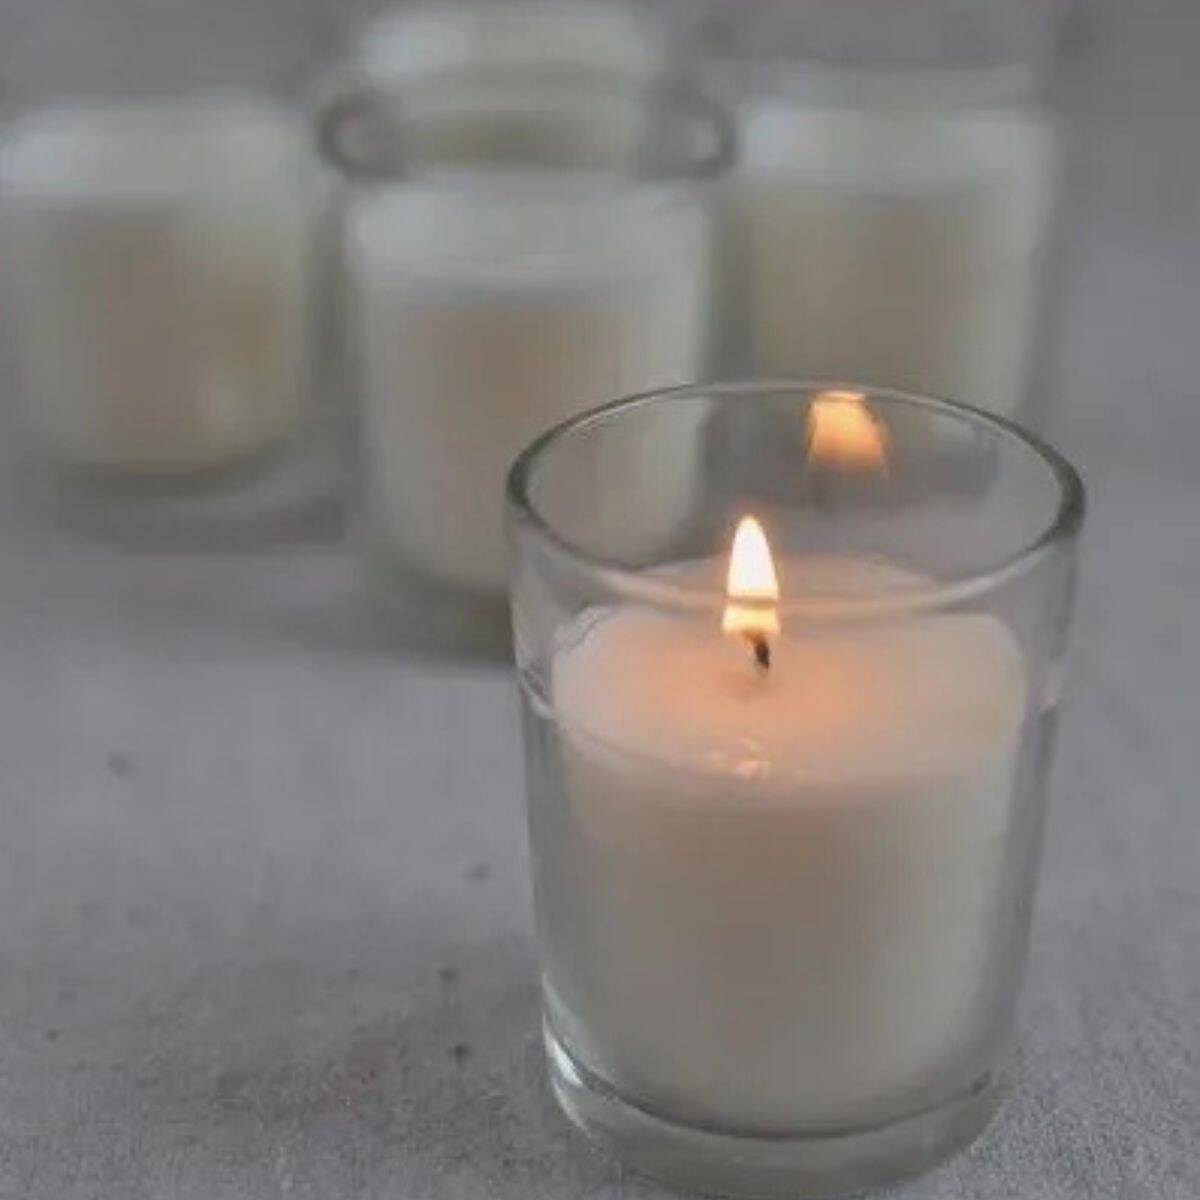
How to make scented soy candles quickly & easily. A how-to guide to DIY candle making using pure essential oils.
For my Birthday one year, strange one that I am, I asked for some wax and candle wicks to make my own candles.
I was very excited to receive them but actually forgot about it until a while later.
Spurred on by the excitement of finding a use for my jar collection, one rainy Saturday afternoon I did a bit of Googling of homemade soy candles then got straight to making my own soy candles.
It was pretty straightforward to make soy wax candles at home - melt, pour, leave to set, but what I didn't realise was that soy wax is a lot easier to work with than paraffin wax, which I'd asked for.
It made nice homemade candles but soy wax makes them a much prettier white colour so that was what I tried next.
Disclaimer: When I originally wrote this post I didn't know about the potentially harmful health effects of artificial fragrances and fragrance oils (which you will see in some of the original images).
These days, when I make a scented candle I use pure essential oils.
Why you'll love these
There are lots of reasons to make your own candles but my top ones are:
- Choose your fragrance - make your scent exactly as you like it.
- Choose your size - Make your candles whichever size you like in whichever candle containers you like - a good use for the recycled glass jar collection.
- Save $$ - It's less expensive than buying fancy candles.
- Saves waste - You can reuse your favourite candle container.
- Can control the strength - so if you like a much stronger scent you can make it.
What you need
WAX
Obviously, one of the essential ingredients of candle making is candle wax.
Make sure you get pure soy wax flakes and try to get non-GMO if possible.
There are lots of places to buy them online just do a Google or check out my resources below (contains affiliate links).
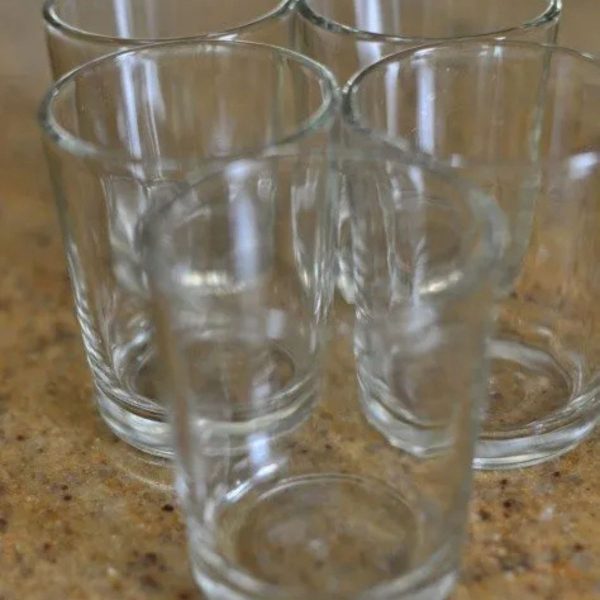
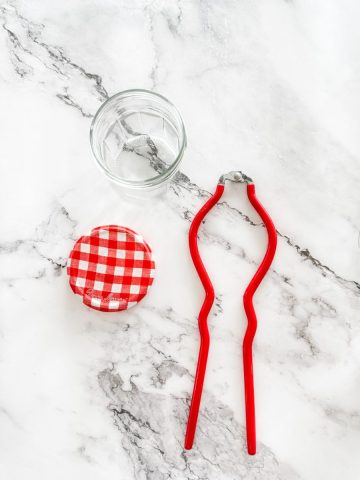
CANDLE CONTAINERS
You will need something to make your candles in.
Glass jars, ceramics and even shells make beautiful homemade candles - just make sure that your item is heat-proof up to high temperatures.
Generally if something is oven-safe then you're ok.
You can also re-use old candle jars.
How to clean old candle containers
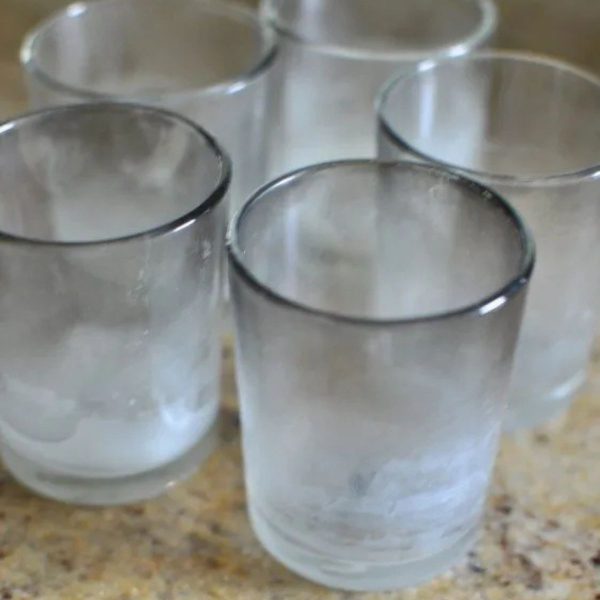
Step 1 - Prepare
Get out all your old candle containers and boil the kettle.
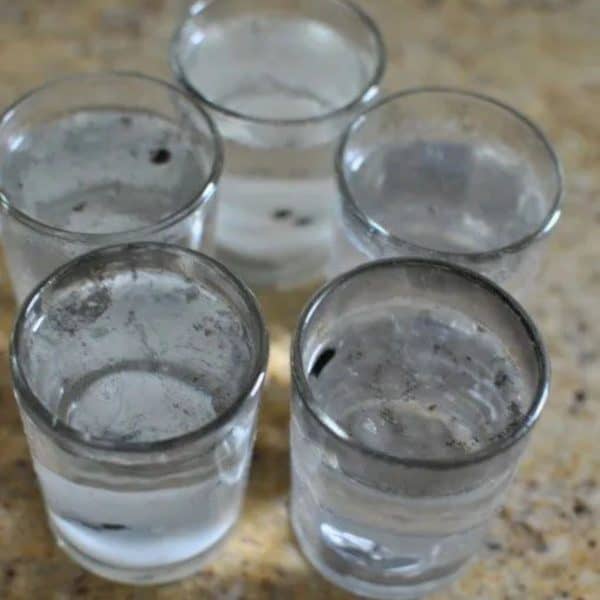
Step 2 - Fill
Pour the freshly boiled water as close to the top as possible and leave to cool.
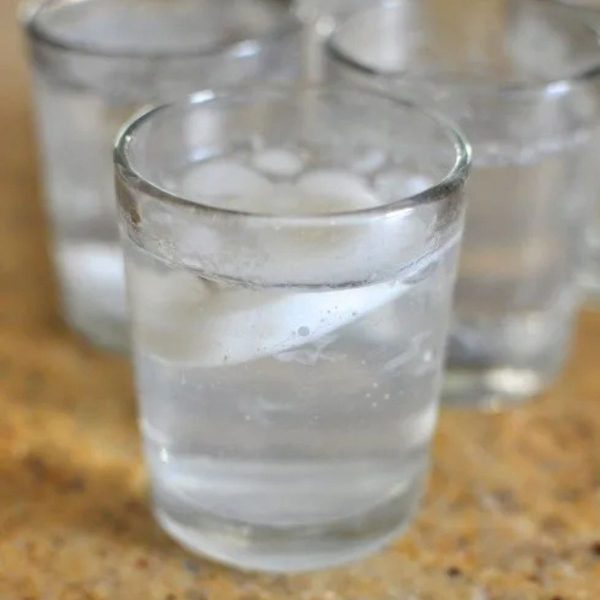
Step 3 - Remove wax
Once the water cools, the old wax will solidify at the top. Lift it out.
If there's any stuck to the bottom give it a little nudge with a fork & it will lift right out.
Step 4 - Clean
Once the wax is all removed (repeat step 2 if not), give them a little wash with dishwashing liquid & warm water to remove any black marks then dry.
WICKS
You can use cotton or wooden wicks. I've worked with both. It depends on the look you are trying to achieve. For first time candle makers, I would recommend using cotton wicks.
ESSENTIAL OILS
Make sure you're using pure essential oils. Using artificial fragrance will give you a nice dose of some potentially nasty side-effects that are best avoided.
GLUE OR TAPE
This is to hold the wick to the bottom of the container. You can also get a special wick sticker or use glue dots but I don't think they're necessary for first timers.
SCISSORS
Scissors are to trim wicks. If you're going to make a lot of candles, get some wick trimmers.
HEAT-PROOF CONTAINER
This is for melting the wax in. You can use a pot or I prefer to use a pyrex, microwavable jug and do it in the microwave.
Another great idea is using a milk frother jug with a handle. They're great cause they have a pouring spout.
STIRRER
I used a popsicle stick so I wouldn't have to worry about cleaning it after.
MEASURING CUP
This is to measure how many cups of soy wax flakes.
WORKSPACE COVER
It's best to cover your work surface to make clean up a little easier. A big sheet of paper works perfectly.
How to
Now come the technical parts of how to make soy candles.
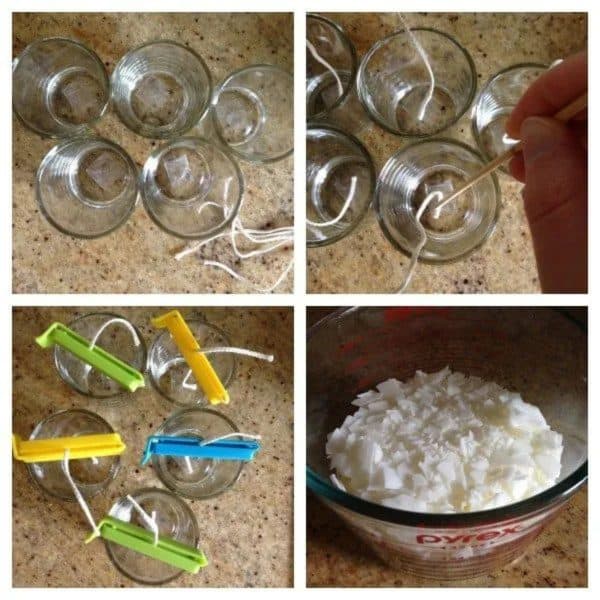
Step 1 - Add wicks
Measure out the height just by holding it next to your container then add a few centimeters on the bottom and top.
To attach the wicks at the bottom I was very professional.
I used sticky tape. Just fold it around itself to make it double sided then secure it to the bottom of the jar.
Use a skewer to press the wicks down and stick it to the bottom.
You can get fancy little things to hold it there but sticky tape works so I'm not wasting money on something else.
A word of warning though - don't try using a hot glue gun.
The glue will melt when you add the hot wax and the wick will float up from the bottom (yes I'm telling you this from experience).
Once it's attached to the bottom you will need something to hold with wick taut and centered.
You can wrap it around a skewer.
My bag clips were the perfect size to fit over the jars so I used them.
Alternatively, if you can get your hands on wood wicks they come with a little weighted stand that will hold the wick in place.t
Step 2
Step 2 text
Step 3
Step 3 text
Step 4
Step 4 text
Step one - the wicks
First up you have to add the wicks. Measure out the height just by holding it next to your container then add a few centimeters on the bottom and top.
To attach the wicks at the bottom I was very professional.
I used sticky tape. Just fold it around itself to make it double sided then secure it to the bottom of the jar.
Use a skewer to press the wicks down and stick it to the bottom.
You can get fancy little things to hold it there but sticky tape works so I'm not wasting money on something else.
A word of warning though - don't try using a hot glue gun.
The glue will melt when you add the hot wax and the wick will float up from the bottom (yes I'm telling you this from experience).
Once it's attached to the bottom you will need something to hold with wick taut and centered.
You can wrap it around a skewer.
My bag clips were the perfect size to fit over the jars so I used them.
Alternatively, if you can get your hands on wood wicks they come with a little weighted stand that will hold the wick in place.

Step two - the wax
For the wax, you'll need to work out the capacity of your jars then use double the amount of flakes.
For example, if you jars hold 1 cup of liquid then you will need to measure out 2 cups of wax flakes.
Pour them into a heat-proof jug and then microwave for 1 minute. Take them out, give them a stir and microwave again for 1 minute and stir.
I used a paddle pop stick for the stirring.
If they're not melted then continue the microwave-stir 20 seconds a time until all the flakes have melted. Make sure you use an oven glove to take the jug out because it gets mighty hot - safety first!
If you don't want to use a microwave or don't have one, then a double boiler is the next easiest way to do it.
Put your heatproof bowl or jug into a large pot and pour enough water in the pot so you have a few inches of water come up the sides.
Heat until it starts to bubble then leave at a simmer until the wax melts.
I've also discovered using a coffee pot with a handle.
I have one dedicated to candle making so I just leave leftover wax in it.
It also means you can pour wax more easily.

Step three - scent the candles
How to choose your essential oils for homemade candles
There's a lot that goes into choosing your scent for making your own candles so we put together a separate quick tutorial. Learn how to choose scent for homemade candles here.
I also recommend using ceramic or glass container for mixing the oils as plastic can absorb the scent.
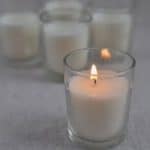
Once you've stirred in your fragrance, pour the wax into your containers (almost to the top of the container) then leave them to set for at least 12 hours.

You will notice that some of mine have little cracks. That is because I wanted them to set quickly so I could write this post.
I popped them in the fridge when they were nowhere near set so I'm guessing the bits around the outside set first then the inside sank a little as it set.
The moral of the story - be patient.

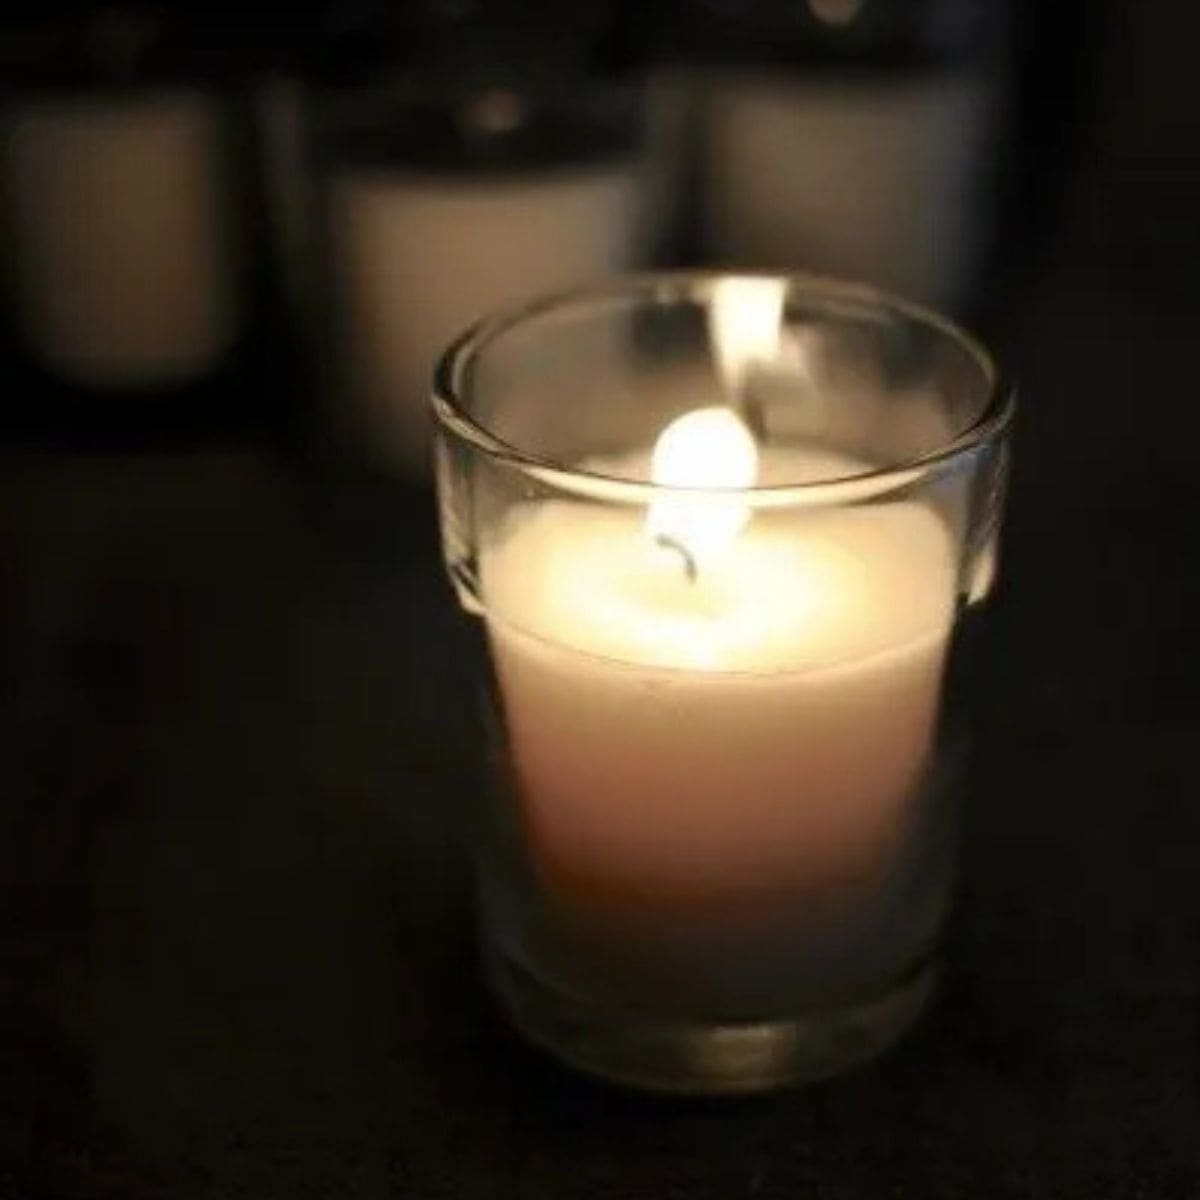
Then it's time to marvel at your perfect little creation. I was marvelling even more after an afternoon of shopping.
I saw a candle nearly exactly the same as this for $19 in one store and in others, bigger versions were selling for more than $50. I'm thinking maybe I should go into business.
How to make scented soy candles - video

They make a lovely gift especially considering you can tailor the container and 'flavour' to suit the person you're giving them to.
Happy candle making!
What about you? What would you make a candle in and what's your favourite candle scent?

How to make scented soy candles
Equipment
- Sticky tape
- Skewers
Materials
- Glass jars or old candles in jars
- Boiling water
- Candle wicks
- Soy wax flakes
- Essential oils
Instructions
- If you are using old candles, pour the boiling water into the old containers and leave to cool.
- Remove the wax floating on the top.
- Use dishwashing liquid and hot water to clean up any excess wax or soot.
- Dry the glass containers.
- Cut small pieces of sticky tape and fold to make double-sided tape then place in the middle of the bottom of each jar.
- Cut the wicks so that about 4cm comes out the top of the jar.
- Use a skewer to press them into the sticky tape so they stick to the bottom.
- Place a skewer over the top and wrap the wick to hold it up in the middle.
- Measure out the soy wax flakes (you will need double the amount - eg if your candle is 1 cup capacity, you will need 2 cups of soy wax flakes).
- Place the flakes in a heat-proof jug and microwave for 1 minutes.
- Remove and stir then microwave for 1 minute again then stir.
- If there are still solid flakes, microwave for 20 seconds at a time until dissolved.
- Add the fragrance oil, stir and then pour the wax into the jars.
- Make sure the the wicks are in the centre then leave the wax to set for 12 hours.
- Trim the wicks to 1 inch.
Notes
Be sure to follow me on my social media, so you never miss a post!
Facebook | Pinterest | instagram
Be sure to follow me on Instagram and tag @clairekcreations so I can see all the wonderful Claire K Creations recipes and creations YOU make!
I created a fun little group on facebook and I’d love for you to join in! It’s a place where you can share YOUR favorite recipes, tips, tricks and tools for making life simpler, more natural and more connected and see what’s new around here (so that you never miss a new recipe, tip or trick)!
If you’d like to check it out, you can request to join HERE.
[mv_create key="736" layout="grid" title="What you need to make candles at home" type="list"][mv_create key="720" layout="circles" thumbnail="https://www.clairekcreations.com/wp-content/uploads/2019/10/claire-k.jpg" title="About Claire Cameron" type="list"]
[mv_create key="792" layout="grid" title="DIY Ideas" type="list"]


Heather says
Hi Claire, Love your tutorial and made my first candles last night and now my daughter and I are hooked. /they turned out great and are so easy, we couldn't believe it.
I was wondering if you could tell me where you bought your wick trimmer and a price please? I live in regional Qld so most stuff I have to order online but I can't seem to find anyone in Aust that sells them. All the ones I have found say they can't be used on unburnt wicks. Any help would be great.
Thank you
Claire says
Hi Heather. I'm so glad you both enjoy it! I'm sorry but all I can remember is that I bought it at a little gift shop when I was with my mum but I have no idea where it was. I found one on Aussie candle supplies for you though so hope that helps! http://www.aussiecandlesupplies.com.au/wick-trimmer-p-1652.html
Angela says
I've read your candle making as I've just started myself. But we are told to use two different waxes one for jars, candles and one for the moulds?
I want to try and find some fragrances to buy?
Claire says
Hi Angela. I just use the one type of wax. If you follow the link in the post you can see where I bought my fragrances. I thought they were very good to buy from.
Violet says
Hi Claire, I've just read your post about making soy candles and thought it was great. Like everyone else I love candles too and have made a few in the past and there's been a lot of trial and error along the way! After a couple of hand surgeries and 3/4 years of not making candles, now that I've read your article it's made me want to give it another go.
Apart from the wonderful finished results, I find it so therapeutic especially if using relaxing or invigorating oils, mmmmmmm...............
Whenever I made candles I always made sure that whatever container I was using was warm, not hot, just 'aired' if you like. So that the wax isn't being poured into a cold container, this helps to prevent cracking, shrinking away from the sides and from getting the 'bloom' which sometimes forms on the top of the candle. If all else fails, once the wax is fully set, then a second-pour usually sorts out any slight imperfections. Using wax left over from the batch you made, re-melt and very gently pour a small layer on top of the candle to fill in any cracks or cover any 'bloom.' Ensuring that the wax is melted to the correct temperature of course so that it adheres to the already set wax. Temperature is very important, correct melt temp and pour temp.
And being soy wax everything you use, utensils, pans, jugs, jars, votives, etc., etc., everything is completely washable, as are any spillages. Hot, soapy water and it's all washed away, wonderful. Much better than paraffin wax or bees wax, although bees wax makes such nice candles too. I like the sheets which are so easy to roll.
I think your idea of using sticky tape to fix the wick to the bottom of the container is brilliant Claire. I used wick sustainers, but they won't be necessary using your method - great tip! Now I need to find some natural candle fragrance oils here in the UK as I'd been using pure essential oils in the past. I don't like the artificial fragrances :-( It's autumn here, so what better time than now to start making candles and have them burning throughout the house to make the place cheery!!
Thank you for the inspiration.
Claire says
Hi Violet. Thanks so much for the temp tips! Very handy to know. Yes that's great that you can wash it all up. I had a nightmare time when I used paraffin wax. I hope you find the fragrances. Thanks for such a great comment.
Alison says
Hi there - well I have just poured my first candle - if it works (and why shouldn't it lol) then I am on my way. I love and burn candles all the time. I use the melts which a friend makes and my family buy me the candles from Dusk - they are so expensive. So wish me luck :-)
Claire says
Good luck Alison! I'm sure they will be perfect.
Madeleine says
Hi Claire,
Thanks so much for sharing this candle making post, I have made some Coconut & Lime candles and it was so easy!
Claire says
You're welcome Madeleine! That sounds like a lovely combo.
Kedyma says
Congrats on your beautiful job! I love candles and I´m trying to make my own soy candles, but I have to say that here in Brazil finding the right support to make them is quite difficult. We are not used to make them and the supplies we have here are not good enough. In my opinion for example the most difficult part is how to choose the wick. :D
Claire says
That would be hard Kedyma. I hope you can find the right supplies!
Wendy C says
I just made some beautiful soy candles myself. I did struggle with getting the wick to stay on the bottom though, the sticky tape didn't really work for me. Any other suggestions? To remove wax from the old glass containers I just placed them in the freezer. The wax shrinks and just pops out then I washed them as normal. Can't wait to burn my first candle. I think my favourite so far is vanilla & cinnamon but also made Asian Pear & Lily and I couldn't resist trying the Monkey Fart, which despite its name smells nice as an oil. Thanks for all the tips and hints. Wendy
Claire says
Wendy I did have that problem with a few. Superglue works well but don't use a hot glue gun like I did. The glue melted when I put the wax in!
Violet says
Hi Wendy, You could try blu-tack (the white version!), I've found this works extremely well and is really easy to remove afterwards if you're re-using the container.
Hope that helps. V
Claire says
Great tip thanks Violet!
hermiliesmith says
Nice post and the information in the blog is really useful and I will definitely look toward the experiment of soy wax candles.
Suzanne says
Wow, I didn't know you could make your own scented candles right at home :-) I found some candle making stuff here on Amazon and I was wondering if this is good enough and not too expensive? Thanks for your tutorial :-)
Claire says
You sure can Suzanne! Maybe hunt around for the stuff that's inexpensive for your first go then when you're a pro buy the more expensive stuff?
Hannah says
Hi Claire,
Thank you for your post. I can't believe how simple it is to do! I am definitely going to give it a go.. was wondering with the wick - i've had a look on the website you mentioned.. Did you get a spool of wick and what thickness did you get? http://www.naturalcandlesupply.com.au/Candle-Making/Candle-Wicks/HTP-Wicks/?cid=512
Thanks !
Hannah
Claire says
Hi Hannah. From memory mine came with just a big piece of wick and it was about 2cm thick. Hope that helps!
Diane C. says
I really enjoyed reading about your candle making foray followed by the comments section. I live in Arizona and found the following site has an extensive "how to" section that you might find useful. It covers questions regarding different types of waxes/soy, dyes, scents, containers, other basic supplies and safety precautions. I can't wait to get started.
lonestarcandlesupply.com/
(877) 956-3192
Find High Quality Candle Supplies.
Claire says
Thanks Dianne. I'll have a look. I definitely need some more tips!
joan adams says
i love making candles great to make but when i make the glass jars
when they set i get white marks on the glass jars so do you know what i doing wrong i tried
every thing cant make it out why
than you Joan
Claire says
Hi Joan. I'm very sorry but I don't know what could be the cause of that!
Suzanne Hernan says
Hi there Claire i have just made my first batch of soy candles. I used pommegrante and sage scent. A couple of questions. What does C- Soy flakes mean and do you melt the crayon and how many do you use per pour.? My house smells fantastic ..i cant wait to see how they have turned out in the morning. I added a product called container maker....it came with my kit. Do you use this? You add it in with the fragrance and stir it around before you pour. Many thanks Suzanne
Claire says
Hi Suzanne. Ooh that sounds delish! I haven't heard of that product sorry. With the amount, it depends on what sizw candle you're making. The wax should include instructions for that. With the one I used, you needed 2 cups wax for one cup.
Sue says
Hi Claire, Love your candles!
I am a candle-making newbie and have been getting condensation on the inside of my glass containers when using either soy or paraffin wax. I have tried warming the containers before I fill them but nothing seems to make any difference. Can you tell me what I am doing wrong please? Many thanks.
Claire says
Hi Sue. I'm sorry I'm not too sure about that one. The only thing I can think of is maybe the temp of your kitchen? I would say if it's too cold that might cause condensation?
Tania says
Hi Claire, I too have just started making soy candles and loving it. I cant help but wonder if there are any type of glass jars, cups, jugs etc that wouldn't be safe to burn a candle in. Is there a rule you follow? Thanks
Claire says
Hi Tania. Hmm I'm not sure. I would say that any glass jar is fine. Ceramics it probably depends on the type. If it's oven-safe I'd say then it's fine.