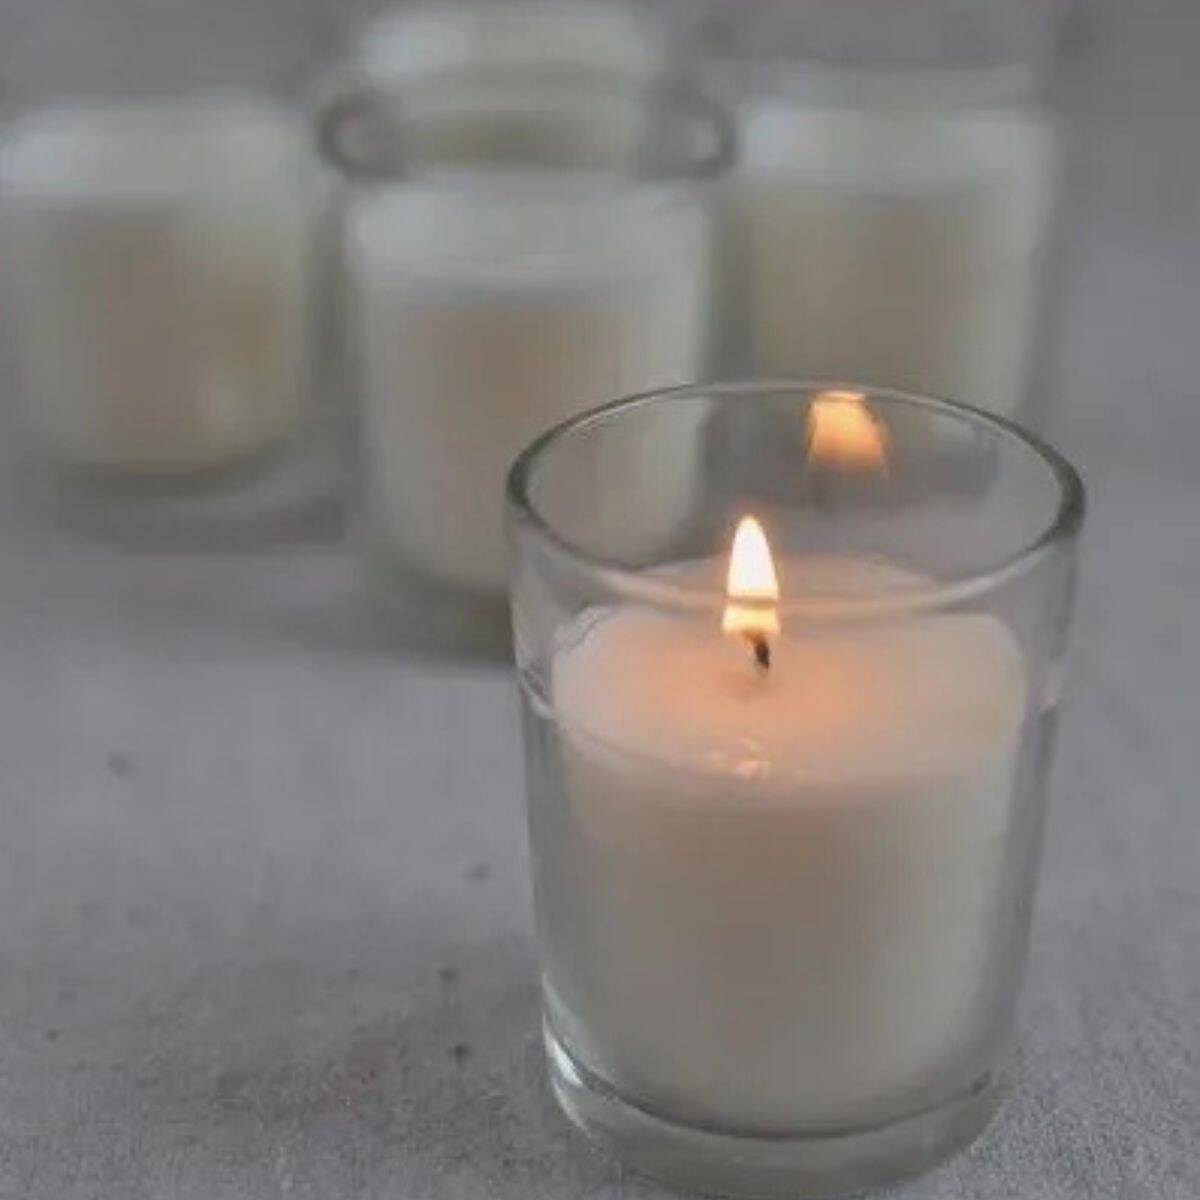
How to make scented soy candles quickly & easily. A how-to guide to DIY candle making using pure essential oils.
For my Birthday one year, strange one that I am, I asked for some wax and candle wicks to make my own candles.
I was very excited to receive them but actually forgot about it until a while later.
Spurred on by the excitement of finding a use for my jar collection, one rainy Saturday afternoon I did a bit of Googling of homemade soy candles then got straight to making my own soy candles.
It was pretty straightforward to make soy wax candles at home - melt, pour, leave to set, but what I didn't realise was that soy wax is a lot easier to work with than paraffin wax, which I'd asked for.
It made nice homemade candles but soy wax makes them a much prettier white colour so that was what I tried next.
Disclaimer: When I originally wrote this post I didn't know about the potentially harmful health effects of artificial fragrances and fragrance oils (which you will see in some of the original images).
These days, when I make a scented candle I use pure essential oils.
Why you'll love these
There are lots of reasons to make your own candles but my top ones are:
- Choose your fragrance - make your scent exactly as you like it.
- Choose your size - Make your candles whichever size you like in whichever candle containers you like - a good use for the recycled glass jar collection.
- Save $$ - It's less expensive than buying fancy candles.
- Saves waste - You can reuse your favourite candle container.
- Can control the strength - so if you like a much stronger scent you can make it.
What you need
WAX
Obviously, one of the essential ingredients of candle making is candle wax.
Make sure you get pure soy wax flakes and try to get non-GMO if possible.
There are lots of places to buy them online just do a Google or check out my resources below (contains affiliate links).
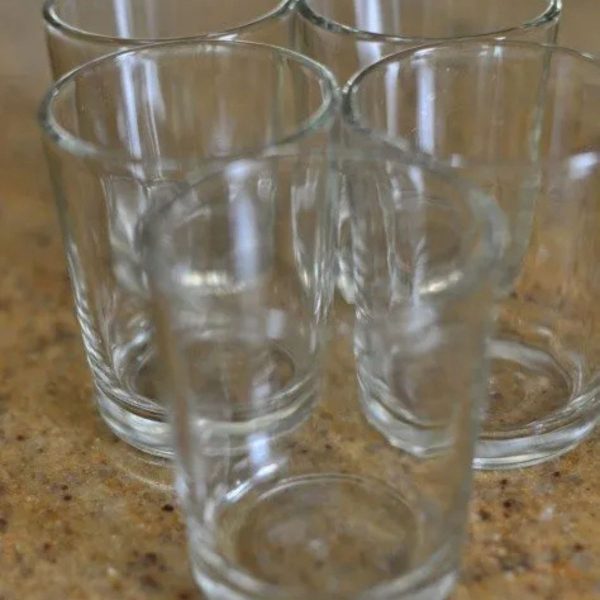
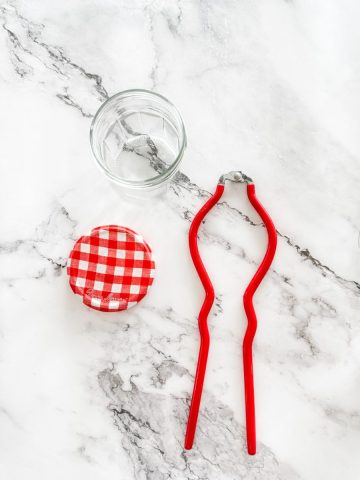
CANDLE CONTAINERS
You will need something to make your candles in.
Glass jars, ceramics and even shells make beautiful homemade candles - just make sure that your item is heat-proof up to high temperatures.
Generally if something is oven-safe then you're ok.
You can also re-use old candle jars.
How to clean old candle containers
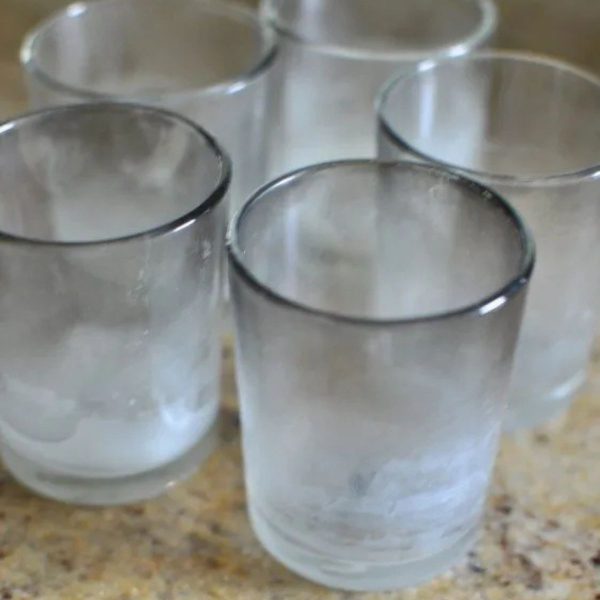
Step 1 - Prepare
Get out all your old candle containers and boil the kettle.
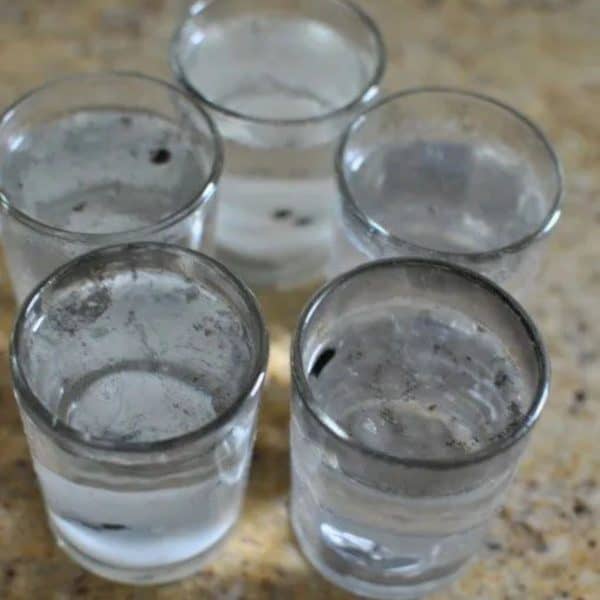
Step 2 - Fill
Pour the freshly boiled water as close to the top as possible and leave to cool.
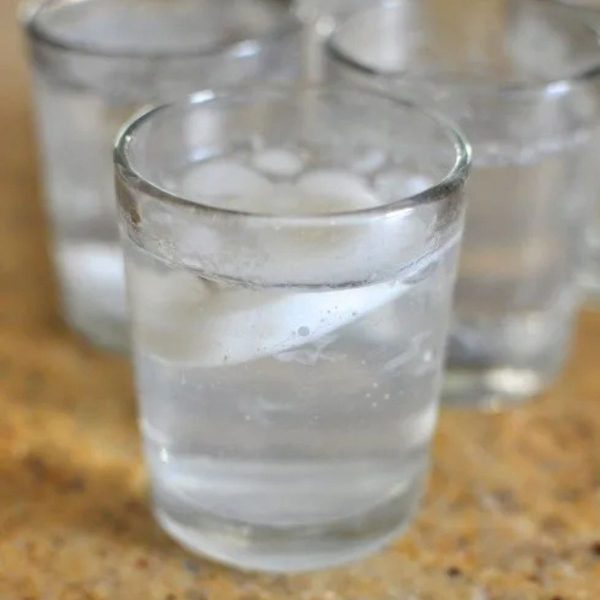
Step 3 - Remove wax
Once the water cools, the old wax will solidify at the top. Lift it out.
If there's any stuck to the bottom give it a little nudge with a fork & it will lift right out.
Step 4 - Clean
Once the wax is all removed (repeat step 2 if not), give them a little wash with dishwashing liquid & warm water to remove any black marks then dry.
WICKS
You can use cotton or wooden wicks. I've worked with both. It depends on the look you are trying to achieve. For first time candle makers, I would recommend using cotton wicks.
ESSENTIAL OILS
Make sure you're using pure essential oils. Using artificial fragrance will give you a nice dose of some potentially nasty side-effects that are best avoided.
GLUE OR TAPE
This is to hold the wick to the bottom of the container. You can also get a special wick sticker or use glue dots but I don't think they're necessary for first timers.
SCISSORS
Scissors are to trim wicks. If you're going to make a lot of candles, get some wick trimmers.
HEAT-PROOF CONTAINER
This is for melting the wax in. You can use a pot or I prefer to use a pyrex, microwavable jug and do it in the microwave.
Another great idea is using a milk frother jug with a handle. They're great cause they have a pouring spout.
STIRRER
I used a popsicle stick so I wouldn't have to worry about cleaning it after.
MEASURING CUP
This is to measure how many cups of soy wax flakes.
WORKSPACE COVER
It's best to cover your work surface to make clean up a little easier. A big sheet of paper works perfectly.
How to
Now come the technical parts of how to make soy candles.
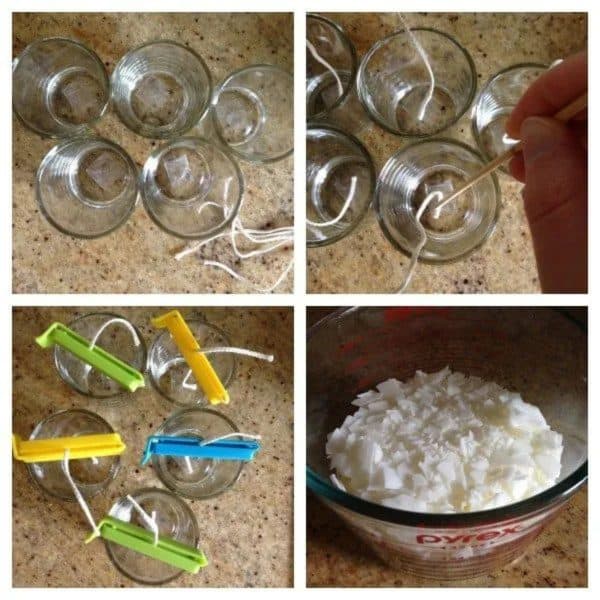
Step 1 - Add wicks
Measure out the height just by holding it next to your container then add a few centimeters on the bottom and top.
To attach the wicks at the bottom I was very professional.
I used sticky tape. Just fold it around itself to make it double sided then secure it to the bottom of the jar.
Use a skewer to press the wicks down and stick it to the bottom.
You can get fancy little things to hold it there but sticky tape works so I'm not wasting money on something else.
A word of warning though - don't try using a hot glue gun.
The glue will melt when you add the hot wax and the wick will float up from the bottom (yes I'm telling you this from experience).
Once it's attached to the bottom you will need something to hold with wick taut and centered.
You can wrap it around a skewer.
My bag clips were the perfect size to fit over the jars so I used them.
Alternatively, if you can get your hands on wood wicks they come with a little weighted stand that will hold the wick in place.t
Step 2
Step 2 text
Step 3
Step 3 text
Step 4
Step 4 text
Step one - the wicks
First up you have to add the wicks. Measure out the height just by holding it next to your container then add a few centimeters on the bottom and top.
To attach the wicks at the bottom I was very professional.
I used sticky tape. Just fold it around itself to make it double sided then secure it to the bottom of the jar.
Use a skewer to press the wicks down and stick it to the bottom.
You can get fancy little things to hold it there but sticky tape works so I'm not wasting money on something else.
A word of warning though - don't try using a hot glue gun.
The glue will melt when you add the hot wax and the wick will float up from the bottom (yes I'm telling you this from experience).
Once it's attached to the bottom you will need something to hold with wick taut and centered.
You can wrap it around a skewer.
My bag clips were the perfect size to fit over the jars so I used them.
Alternatively, if you can get your hands on wood wicks they come with a little weighted stand that will hold the wick in place.

Step two - the wax
For the wax, you'll need to work out the capacity of your jars then use double the amount of flakes.
For example, if you jars hold 1 cup of liquid then you will need to measure out 2 cups of wax flakes.
Pour them into a heat-proof jug and then microwave for 1 minute. Take them out, give them a stir and microwave again for 1 minute and stir.
I used a paddle pop stick for the stirring.
If they're not melted then continue the microwave-stir 20 seconds a time until all the flakes have melted. Make sure you use an oven glove to take the jug out because it gets mighty hot - safety first!
If you don't want to use a microwave or don't have one, then a double boiler is the next easiest way to do it.
Put your heatproof bowl or jug into a large pot and pour enough water in the pot so you have a few inches of water come up the sides.
Heat until it starts to bubble then leave at a simmer until the wax melts.
I've also discovered using a coffee pot with a handle.
I have one dedicated to candle making so I just leave leftover wax in it.
It also means you can pour wax more easily.

Step three - scent the candles
How to choose your essential oils for homemade candles
There's a lot that goes into choosing your scent for making your own candles so we put together a separate quick tutorial. Learn how to choose scent for homemade candles here.
I also recommend using ceramic or glass container for mixing the oils as plastic can absorb the scent.
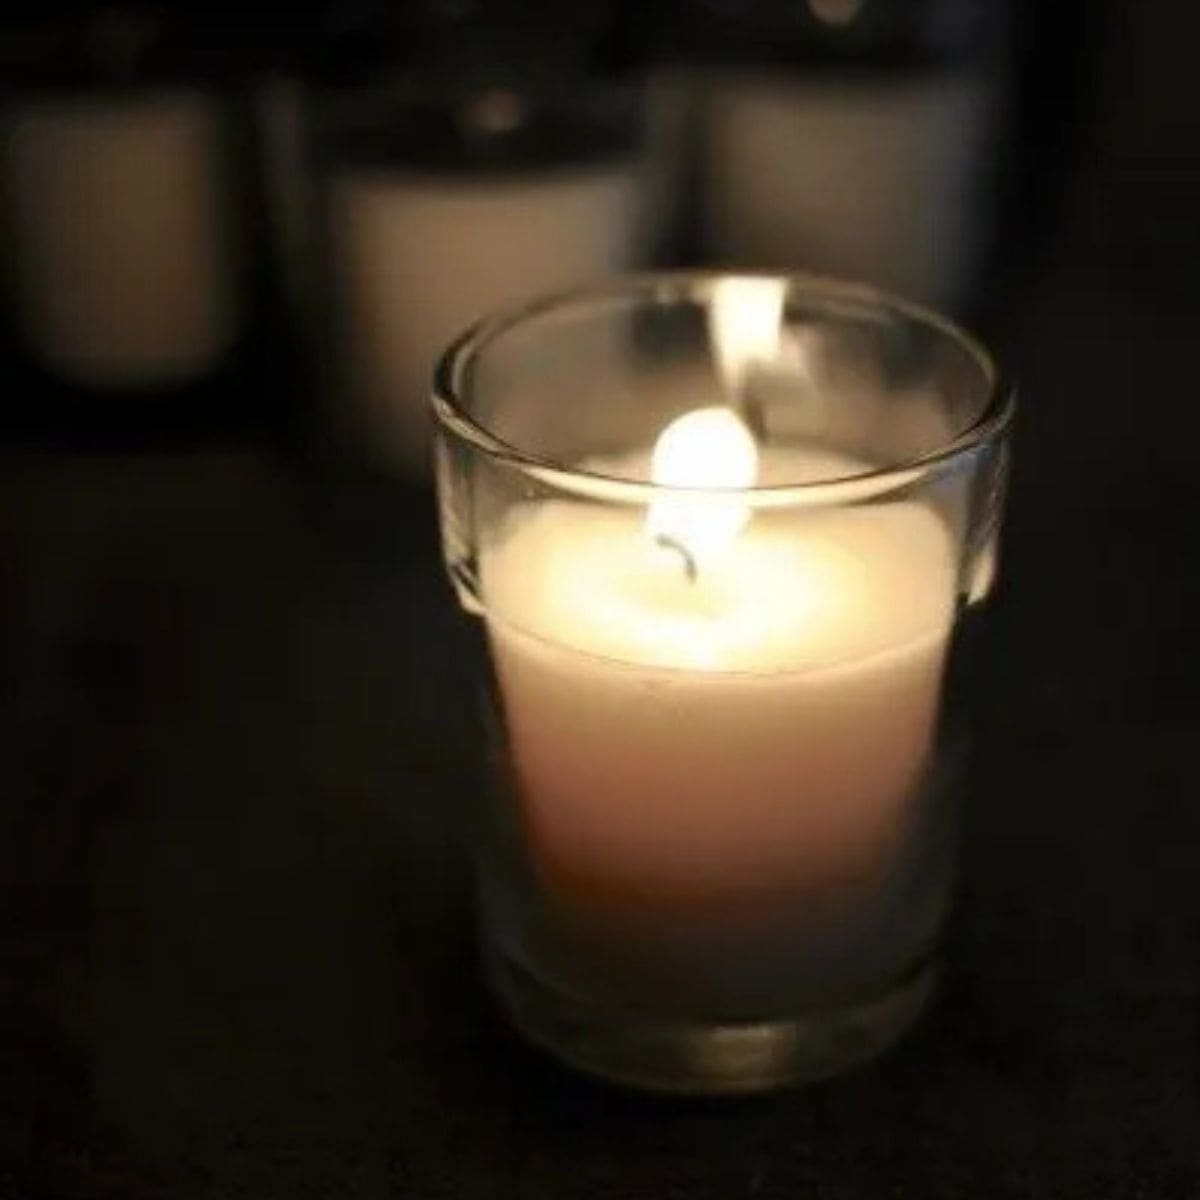
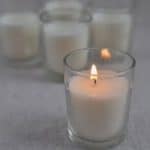
Once you've stirred in your fragrance, pour the wax into your containers (almost to the top of the container) then leave them to set for at least 12 hours.

You will notice that some of mine have little cracks. That is because I wanted them to set quickly so I could write this post.
I popped them in the fridge when they were nowhere near set so I'm guessing the bits around the outside set first then the inside sank a little as it set.
The moral of the story - be patient.

Then it's time to marvel at your perfect little creation. I was marvelling even more after an afternoon of shopping.
I saw a candle nearly exactly the same as this for $19 in one store and in others, bigger versions were selling for more than $50. I'm thinking maybe I should go into business.
How to make scented soy candles - video

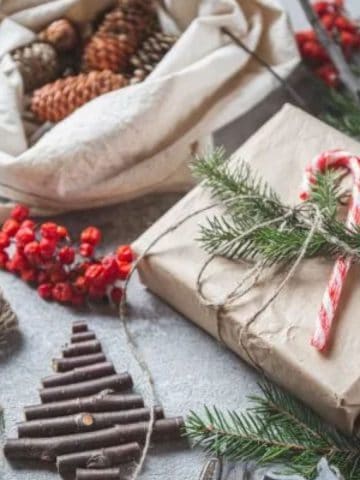
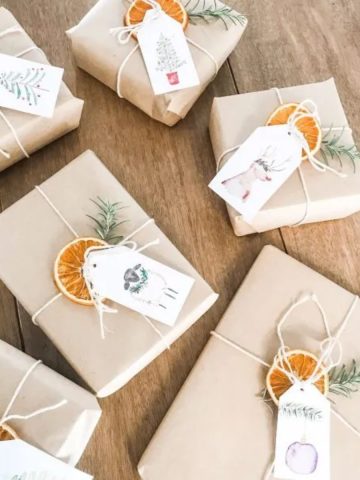
They make a lovely gift especially considering you can tailor the container and 'flavour' to suit the person you're giving them to.
Happy candle making!
What about you? What would you make a candle in and what's your favourite candle scent?

How to make scented soy candles
Equipment
- Sticky tape
- Skewers
Materials
- Glass jars or old candles in jars
- Boiling water
- Candle wicks
- Soy wax flakes
- Essential oils
Instructions
- If you are using old candles, pour the boiling water into the old containers and leave to cool.
- Remove the wax floating on the top.
- Use dishwashing liquid and hot water to clean up any excess wax or soot.
- Dry the glass containers.
- Cut small pieces of sticky tape and fold to make double-sided tape then place in the middle of the bottom of each jar.
- Cut the wicks so that about 4cm comes out the top of the jar.
- Use a skewer to press them into the sticky tape so they stick to the bottom.
- Place a skewer over the top and wrap the wick to hold it up in the middle.
- Measure out the soy wax flakes (you will need double the amount - eg if your candle is 1 cup capacity, you will need 2 cups of soy wax flakes).
- Place the flakes in a heat-proof jug and microwave for 1 minutes.
- Remove and stir then microwave for 1 minute again then stir.
- If there are still solid flakes, microwave for 20 seconds at a time until dissolved.
- Add the fragrance oil, stir and then pour the wax into the jars.
- Make sure the the wicks are in the centre then leave the wax to set for 12 hours.
- Trim the wicks to 1 inch.
Notes
Be sure to follow me on my social media, so you never miss a post!
Facebook | Pinterest | instagram
Be sure to follow me on Instagram and tag @clairekcreations so I can see all the wonderful Claire K Creations recipes and creations YOU make!
I created a fun little group on facebook and I’d love for you to join in! It’s a place where you can share YOUR favorite recipes, tips, tricks and tools for making life simpler, more natural and more connected and see what’s new around here (so that you never miss a new recipe, tip or trick)!
If you’d like to check it out, you can request to join HERE.
[mv_create key="736" layout="grid" title="What you need to make candles at home" type="list"][mv_create key="720" layout="circles" thumbnail="https://www.clairekcreations.com/wp-content/uploads/2019/10/claire-k.jpg" title="About Claire Cameron" type="list"]
[mv_create key="792" layout="grid" title="DIY Ideas" type="list"]

Joanne says
Hi we have made some in tea cups but the wax has slightly come away from the sides of the cups. Any ideas what we did wrong.
Claire says
Hi Joanne. Sometimes as it sets it shrinks a little and you can have to top it up a little. I think it happens if it cools to quickly.
Andrea Louise Walsh says
How much of the fragrance oil did you use ??
Claire says
Hi Andrea. It really depends how strong a scent you want and what fragrance you are adding. I just used a couple of drops for mine.
Kayla says
Thanks so much for posting this, it's so simple to follow! Quick question - do you know a cheap place to buy the wicks and wax flakes from? I just want a small/cheap amount to start with to make sure I can actually do it haha!
Claire says
You're welcome Kayla. This is where I got mine http://www.naturalcandlesupply.com.au/#Candle-Making
Christine says
I just bought a small bag of soy wax, wicks, and scent at Hobby Lobby. I paid $12.00 for all (I used my phone coupon).
Claire says
I'll have to look there next time Christine. Thanks for the tip.
Jo Oliver says
Wonderful easy explanation, i think Im going to give it a go .
Thank you heaps
Jo
Claire says
You're welcome Jo!
Hodge Podge says
Great tip for cleaning the glass votives, thank you!
I really could not believe how easy it is to make candles at home. I made scented candles in teacups (here: http://hodgepodgecraft.com/2013/07/how-to-make-scented-candles-in-a-teacup-a-step-by-step-tutorial/) and have included a tip at the end about how you can get a smooth finish on the top, even if your candle sets with cracks initially...
Claire says
Ooh lovely thanks Hodge Podge!
Stacey jones says
Hi I have just had a little lesson with a friend on making soy candles and she went to a class. They told her to add 10percent qty of fragrance per candle. So 400gm candle add 40ml. My house smells fab and the oil came from a candle supply place. French pear, oh it's smells amazing and for the few dollars of cost for the fragrance it's well worth it. The 400gm candle retails for $30.00 Aussie and cost less than $5.00 I am very happy.
Claire says
Thanks for the tip Stacey. Isn't it crazy how inexpensively you can make them compared to the price in the shops?!
Jackie says
Hi Claire!
How much oil do u use per candle?
Thanks so much! : )
Claire says
Hi Jackie. That's a good question.. I just used a few drops in the jug which had 2 cups of melted wax.
Clarice says
I just made two candles in containers that had candles before. It only took me about 20 minutes using the microwave. I used newspaper to lay my tools on, so there was no surface cleanup. I wiped out my Pyrex cup and the metal spoon I used with paper towels, and stuck them in the dishwasher. This is incredibly easy. A question: I used about a tablespoon of candle scent in my candles, about 8 oz each, and they don't seem to be that scented. Do these candles really smell when they burn or is it barely noticeable? I want it to be able to tell when they burn.
Claire says
I think it depends on the type of scent. The one I used was pretty strong and I could smell it well. Are you using special candle scent?
Koreena says
i add about 8 drops :)
Claire says
Thanks Koreena!
Ciara says
This is great, thanks for the instructions! I just spent a small fortune on candle making stuff!
Just wondering if I wanted to add colour would I add it when I add the scent?
Thanks :)
Claire says
You're welcome!
sarah says
Have u tried to add colour? How did it turn out?
Claire says
Hi Sarah. I haven't yet. That will have to be my next challenge.
Jen says
Can't wait to try making soy candles! Suggestions about types of oils to use and types to avoid and why or why not? And, how much oil do you add? Thank you!
Claire says
Hi Jen. I'm not 100% sure. I usually just add a couple of drops. I bought my oils from here http://www.naturalcandlesupply.com.au/#Candle-Making. It's best to buy the ones that are made for candles. As far as what to avoid etc... depends what you're after. I was making one for a pregnant friend so did some googling to find out which oils weren't good for the bub. Lavender is safe!
Stephanie @ henry happened says
I'm so excited to try this! I had no idea it was so easy - these look beautiful and I bet they smell amazing.
Claire says
Look forward to seeing yours Stephanie!
Jennifer @ Mother Thyme says
This is great, Claire! I have always wanted to try making my own candles. You have inspired me to give it a try. :)
Claire says
Yay Jen! They're really easy to make, you'll love it!
Hotly Spiced says
I spend a fortune on candles and I'm always resentful every time I do because I know they must be cheap to make. What lovely candles and they turned out so well. I'm going to have to try this xx
Claire says
Yes you will Charlie!
Lorraine @ Not Quite Nigella says
I'm candle crazy! My favourite is by Tuberose Rouge by Diptyque! You did a great job-what is your favourite scent Claire?
Claire says
That sounds rather fancy Lorraine! I'm not sure which is my favourite yet but I do love classic vanilla.
Jess says
YAY! Welcome to the soy candle-making bandwagon. You will now be addicted forever - I speak from experience. Isn't it shocking how much those things cost when they're so easy to make!? I'm so glad you shared this, because I didn't know the tip about how to clean old jars - I'll give this a try next time.
Claire says
Yep you can recycle all the ones you finish with! So crazy and I can't stop they're just so much fun to make! I love that they don't really look homemade either.
Nabil says
Thanx Claire for the tip
Can you check this site ribbonwick.com
and tell me what do u think about refilling these beauties ?
Happy 2015
N
Claire says
Hi Nabil,
You're very welcome. I'm not 100% sure on these. You would need to find the special wick but I couldn't find anything from a quick Google. They look amazing though!
Sorry I can't be more help.
Claire
Ken says
Hi, I'm new to the homemade scented candle business and I have a budding question, please pardon me if this question has been asked and answered before. Can someone please tell me which is better for scented candles Tin or Glass Jars??? does any affect the way the fragrance is released or the intensity of the fragrance??? I look forward to your responses.
Cheers
Ken
Claire says
Hi Ken. I would be more inclined to use glass.
Brenda says
Hi! I recently found a brand new 4 pound box of soy flakes at a local goodwill store for $1.99. I never made candles before but couldn't pass up a bargain!! I used this site for instructions & bought several really cool small distressed tin containers from Michael's, on sale of course!! The candles are beautiful & the little tins worked out perfectly for candles, no leaks or any problems at all. I'm inclined to take a risk, if I think something I like might work. Hope this helps with your question about tin containers.
Happy candle making!! And thanks Claire for sharing your recipe...
Brenda
Claire says
What a bargain Brenda! That's awesome and you're very welcome.